In this article we are going to explore the process of getting a domain to route web traffic to another domain using AWS tools, such as S3, CloudFront and Route 53. In the past week, I personally went through the painful process of migrating this very website from shared hosting to Lightsail in AWS. I also have other domains such as theinterface.uk and theinterface.me which I wanted to seamlessly route to theinterface.uk. This was a task which took a lot of time for me to work out, with some help from the lovely people at AWS support.
To save other people time and to give me something to come back to in the future when I inevitably need to do this again – this guide is the place to come to if you need to redirect a domain to another domain.
Register domain in Route 53 (optional, but recommend)
First thing to do is register or transfer for your domain to Route 53. This process is optional, but it does make this whole process a lot easier. For the purposes of this guide, we will proceed with domain registration within Route 53.
Create a bucket within S3
First thing to do is log into Amazon S3 and create a new bucket, you can do this by clicking the orange ‘Create bucket’ button.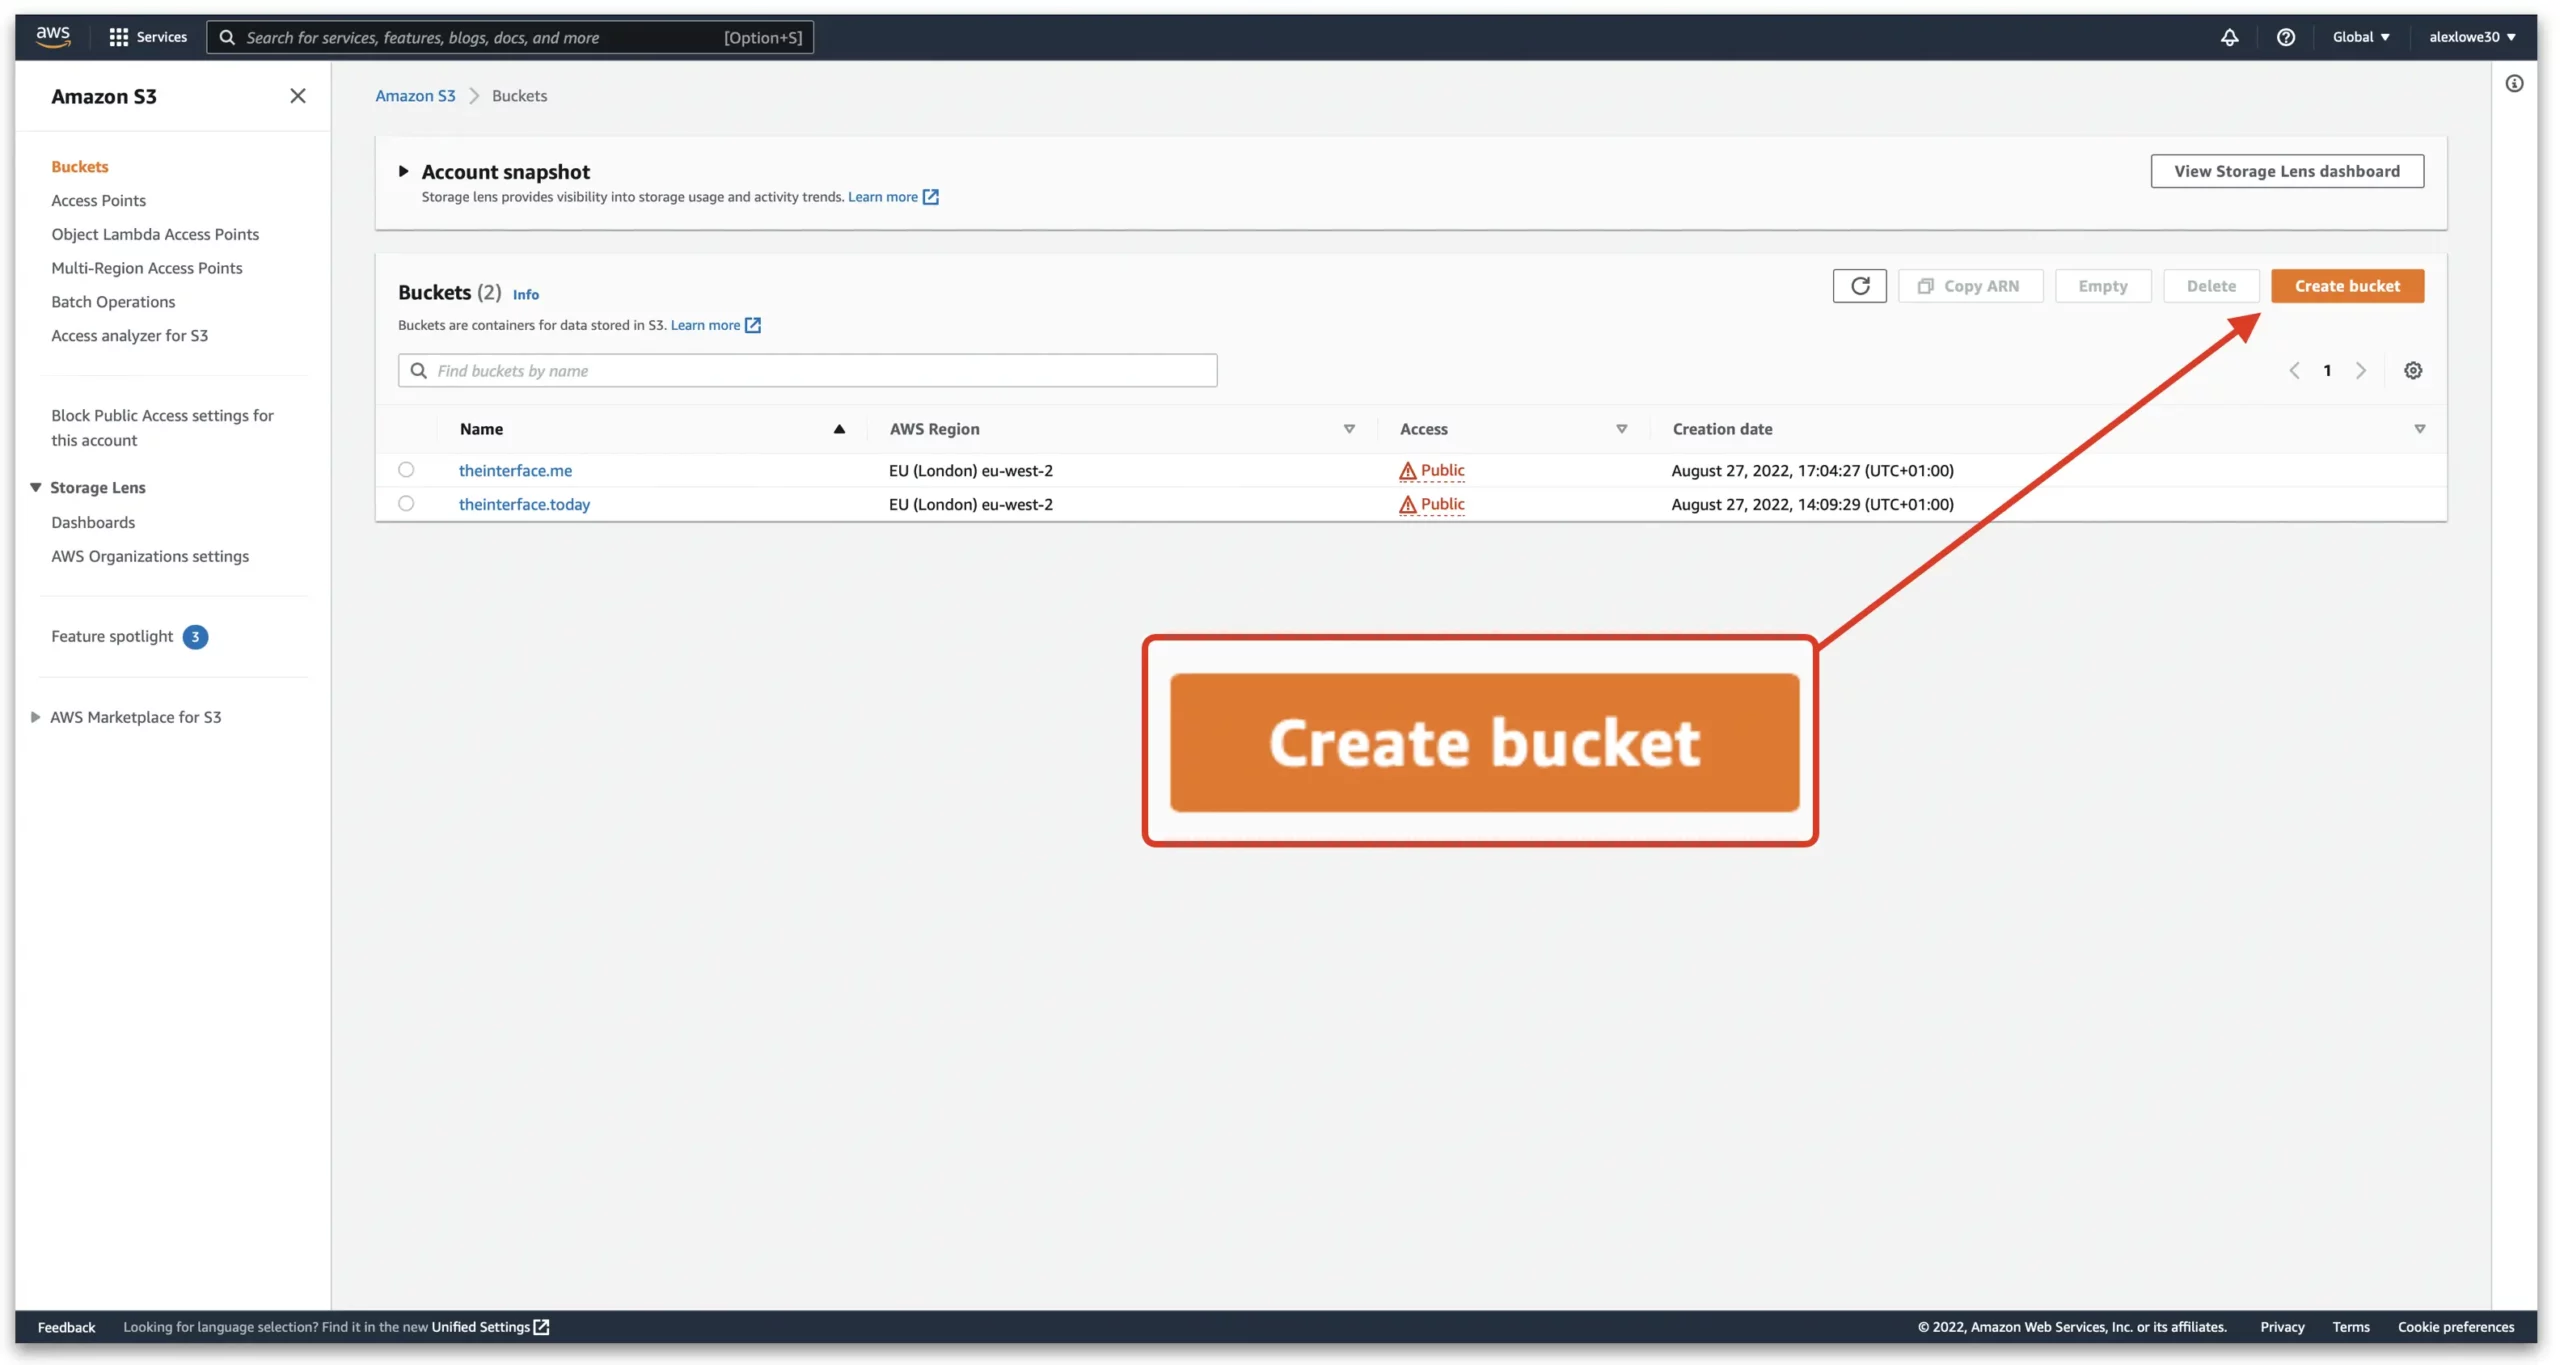
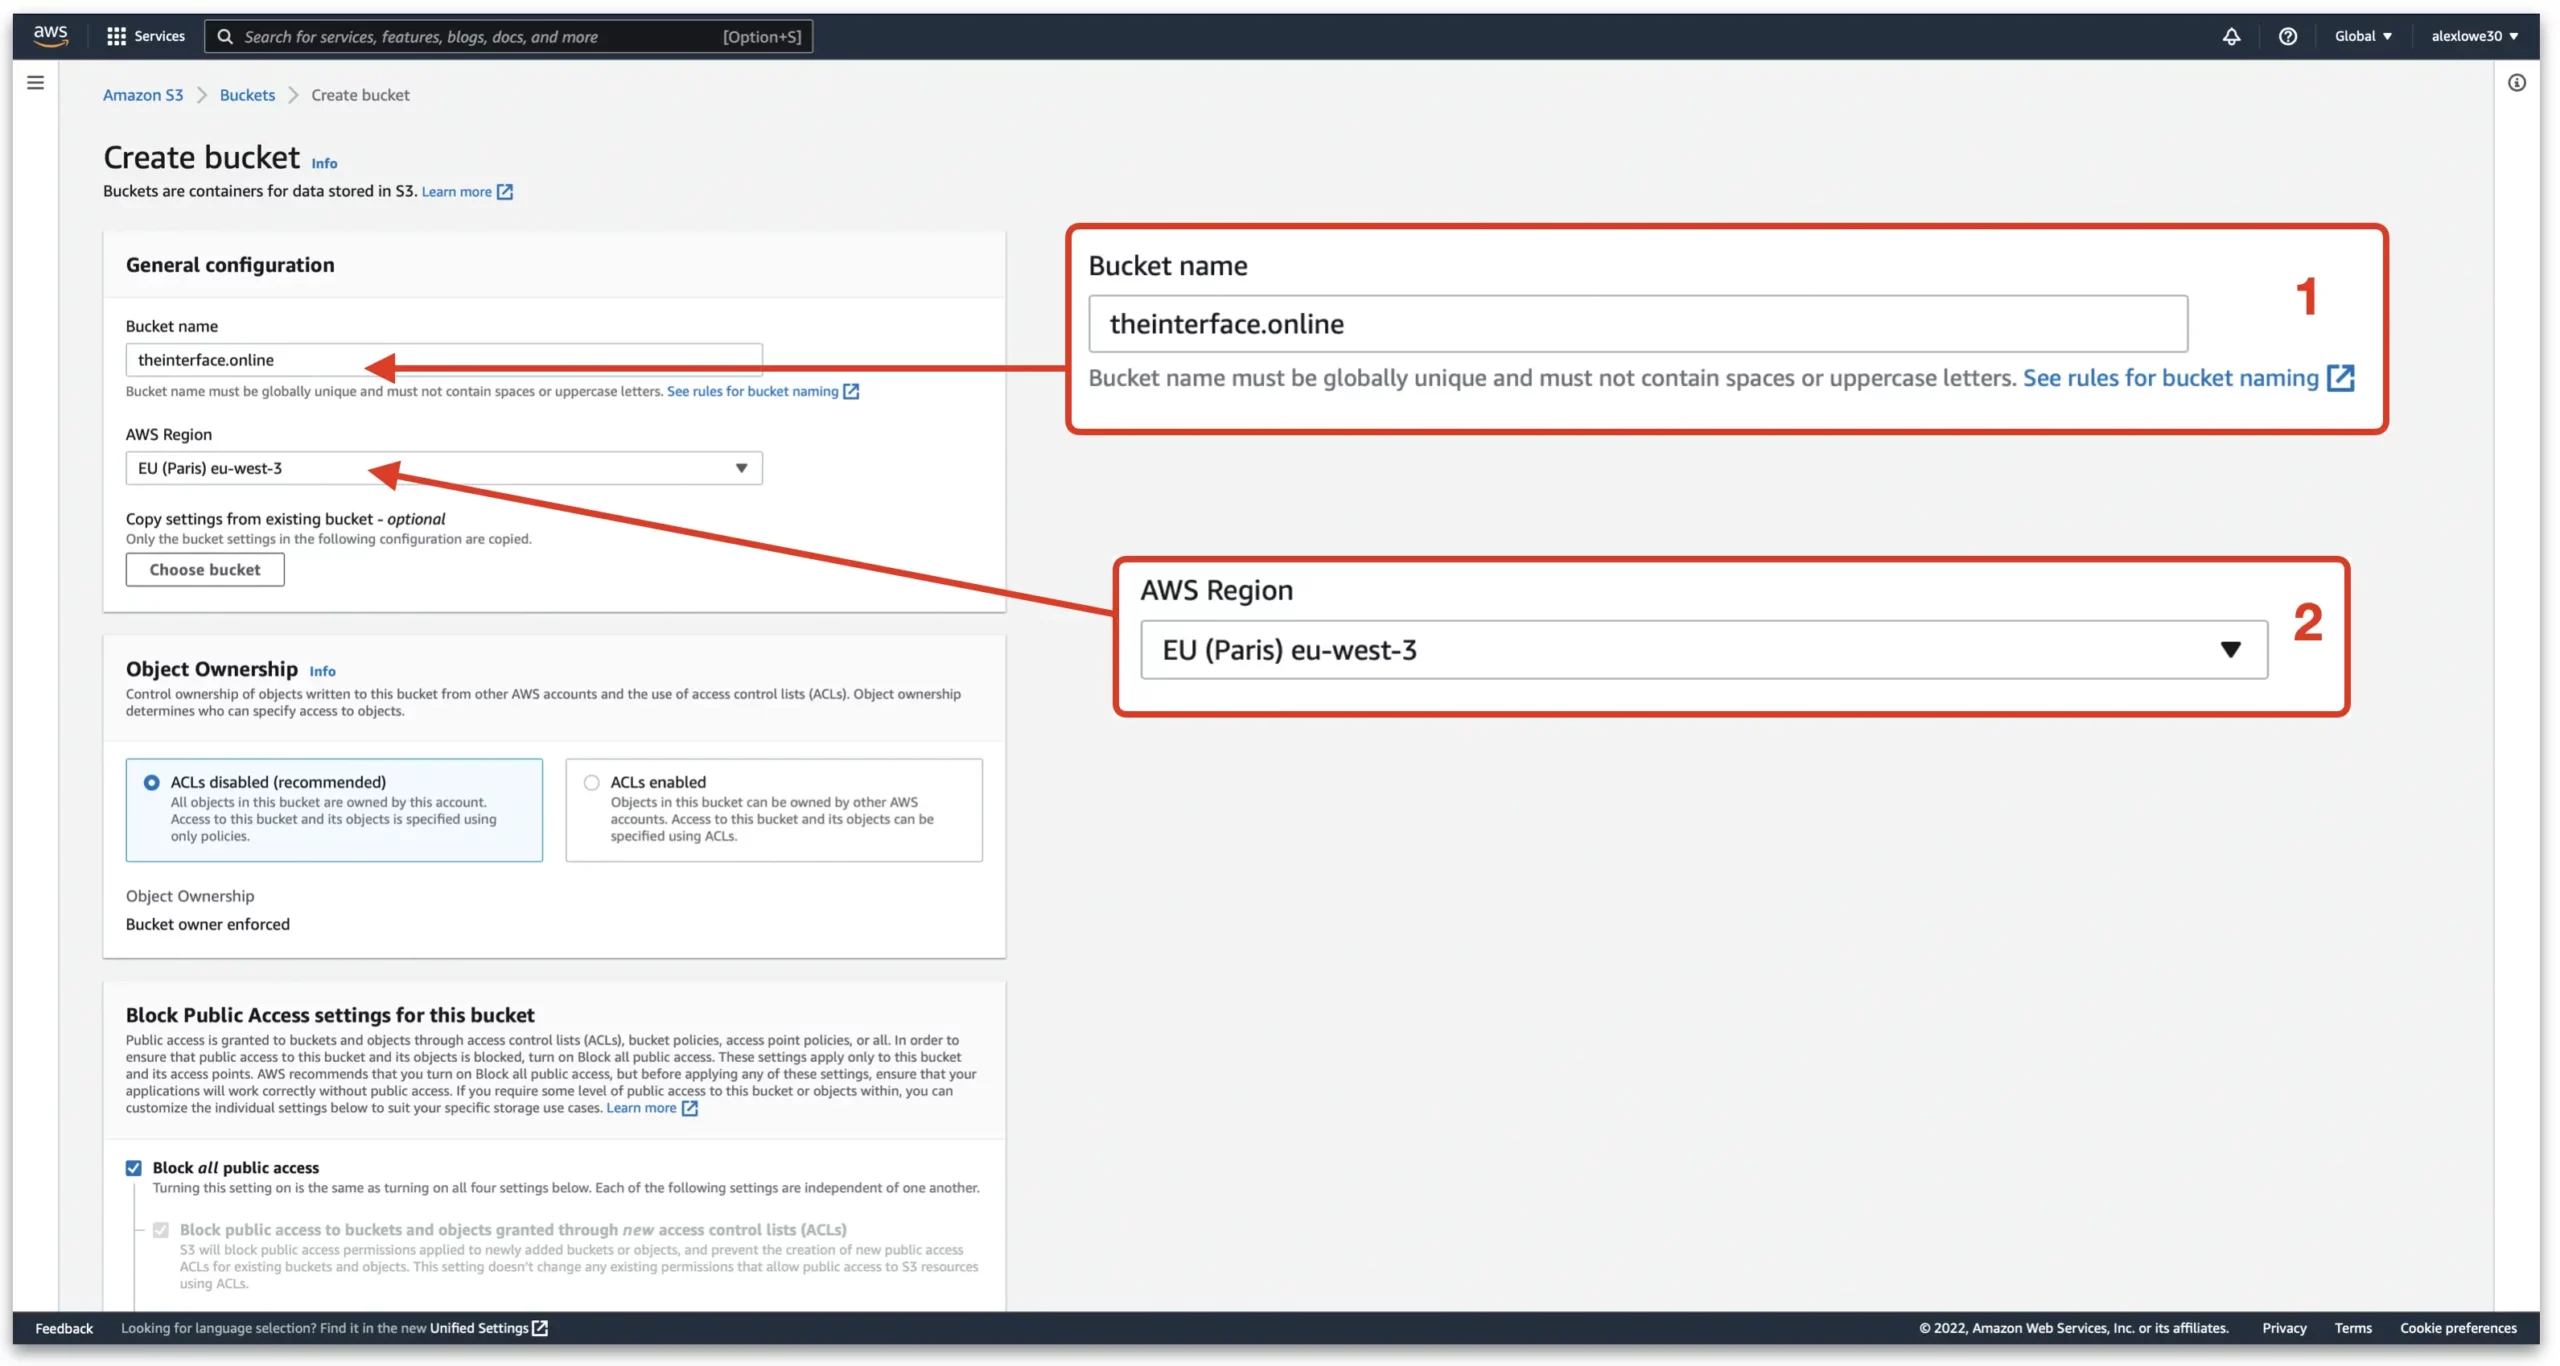
Next, under the bucket configuration page choose a new name for the bucket. This needs to be the same as the root domain we are directing from. For example, if I would like to redirect theinterface.online to theinterface.uk, then I would name the bucket theinterface.online.
- Enter is the bucket name here
- Choose the AWS region. This doesn’t really matter that much, easiest to pick the one closest to you. Once this is paired with CloudFront, it is added to the AWS global CDN anyway.
Next, scroll down to the “Block Public Access settings for this bucket” and uncheck the “Block all public access” setting. We need this to be public to everyone so can get redirected to our main domain name.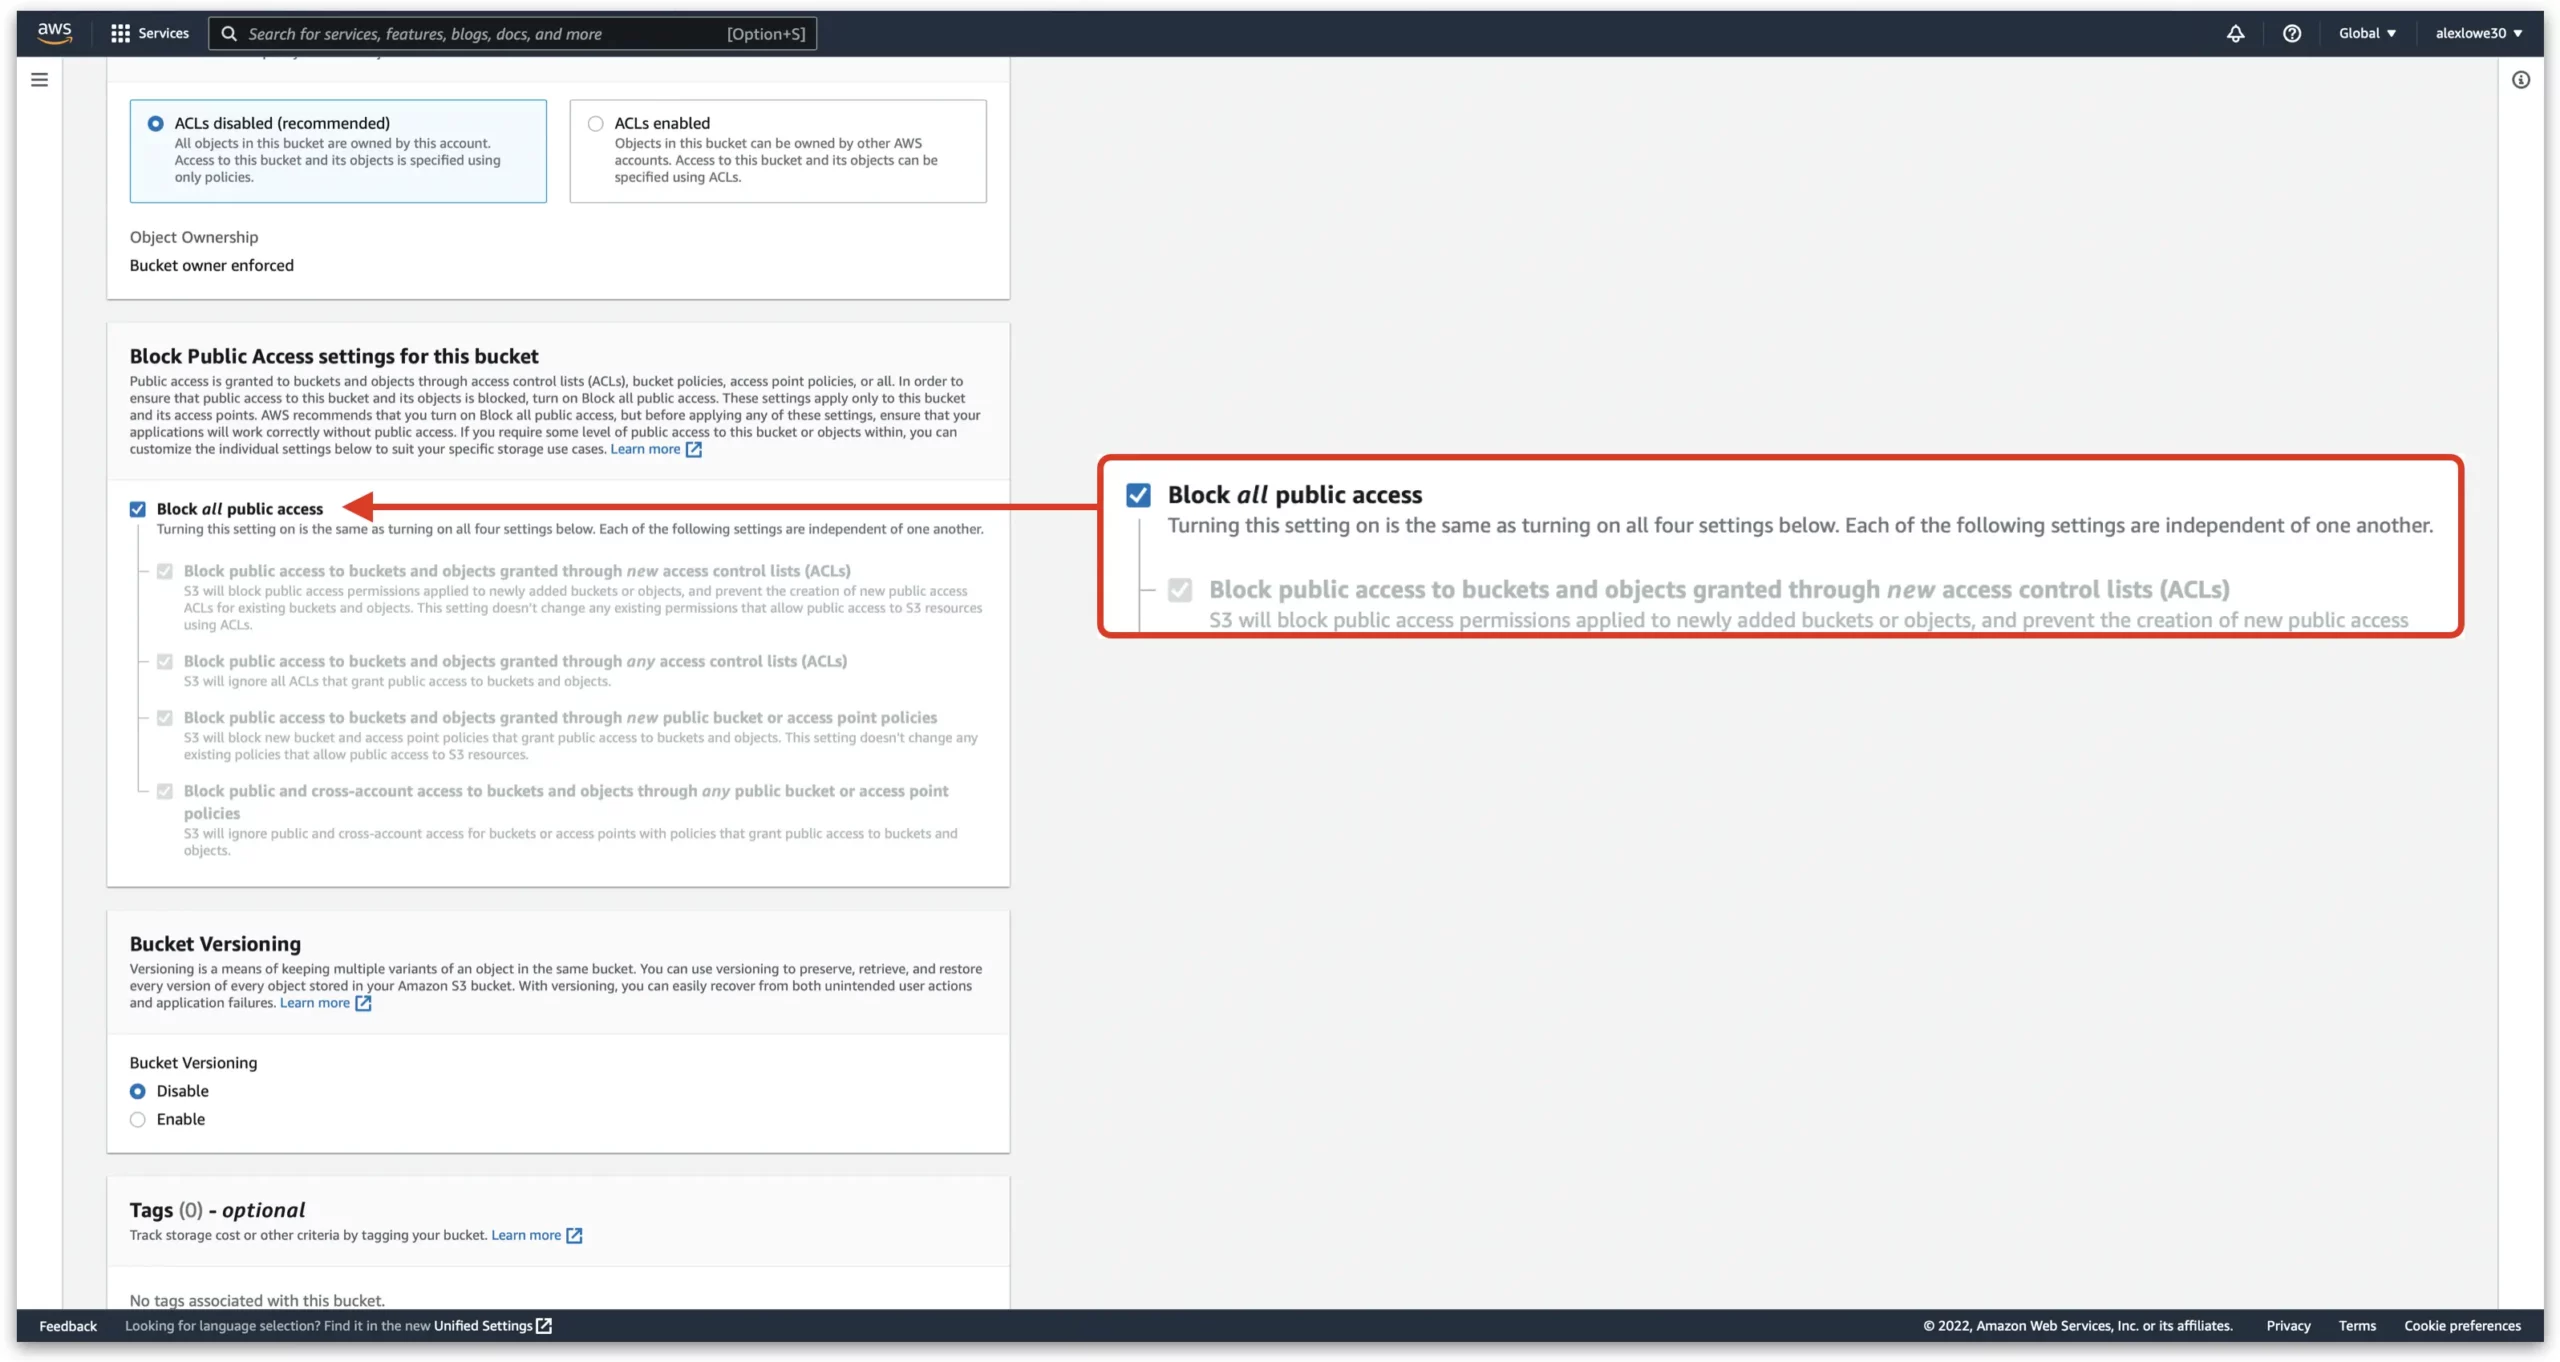
Next, scroll down to the bottom of the page and click “Create bucket”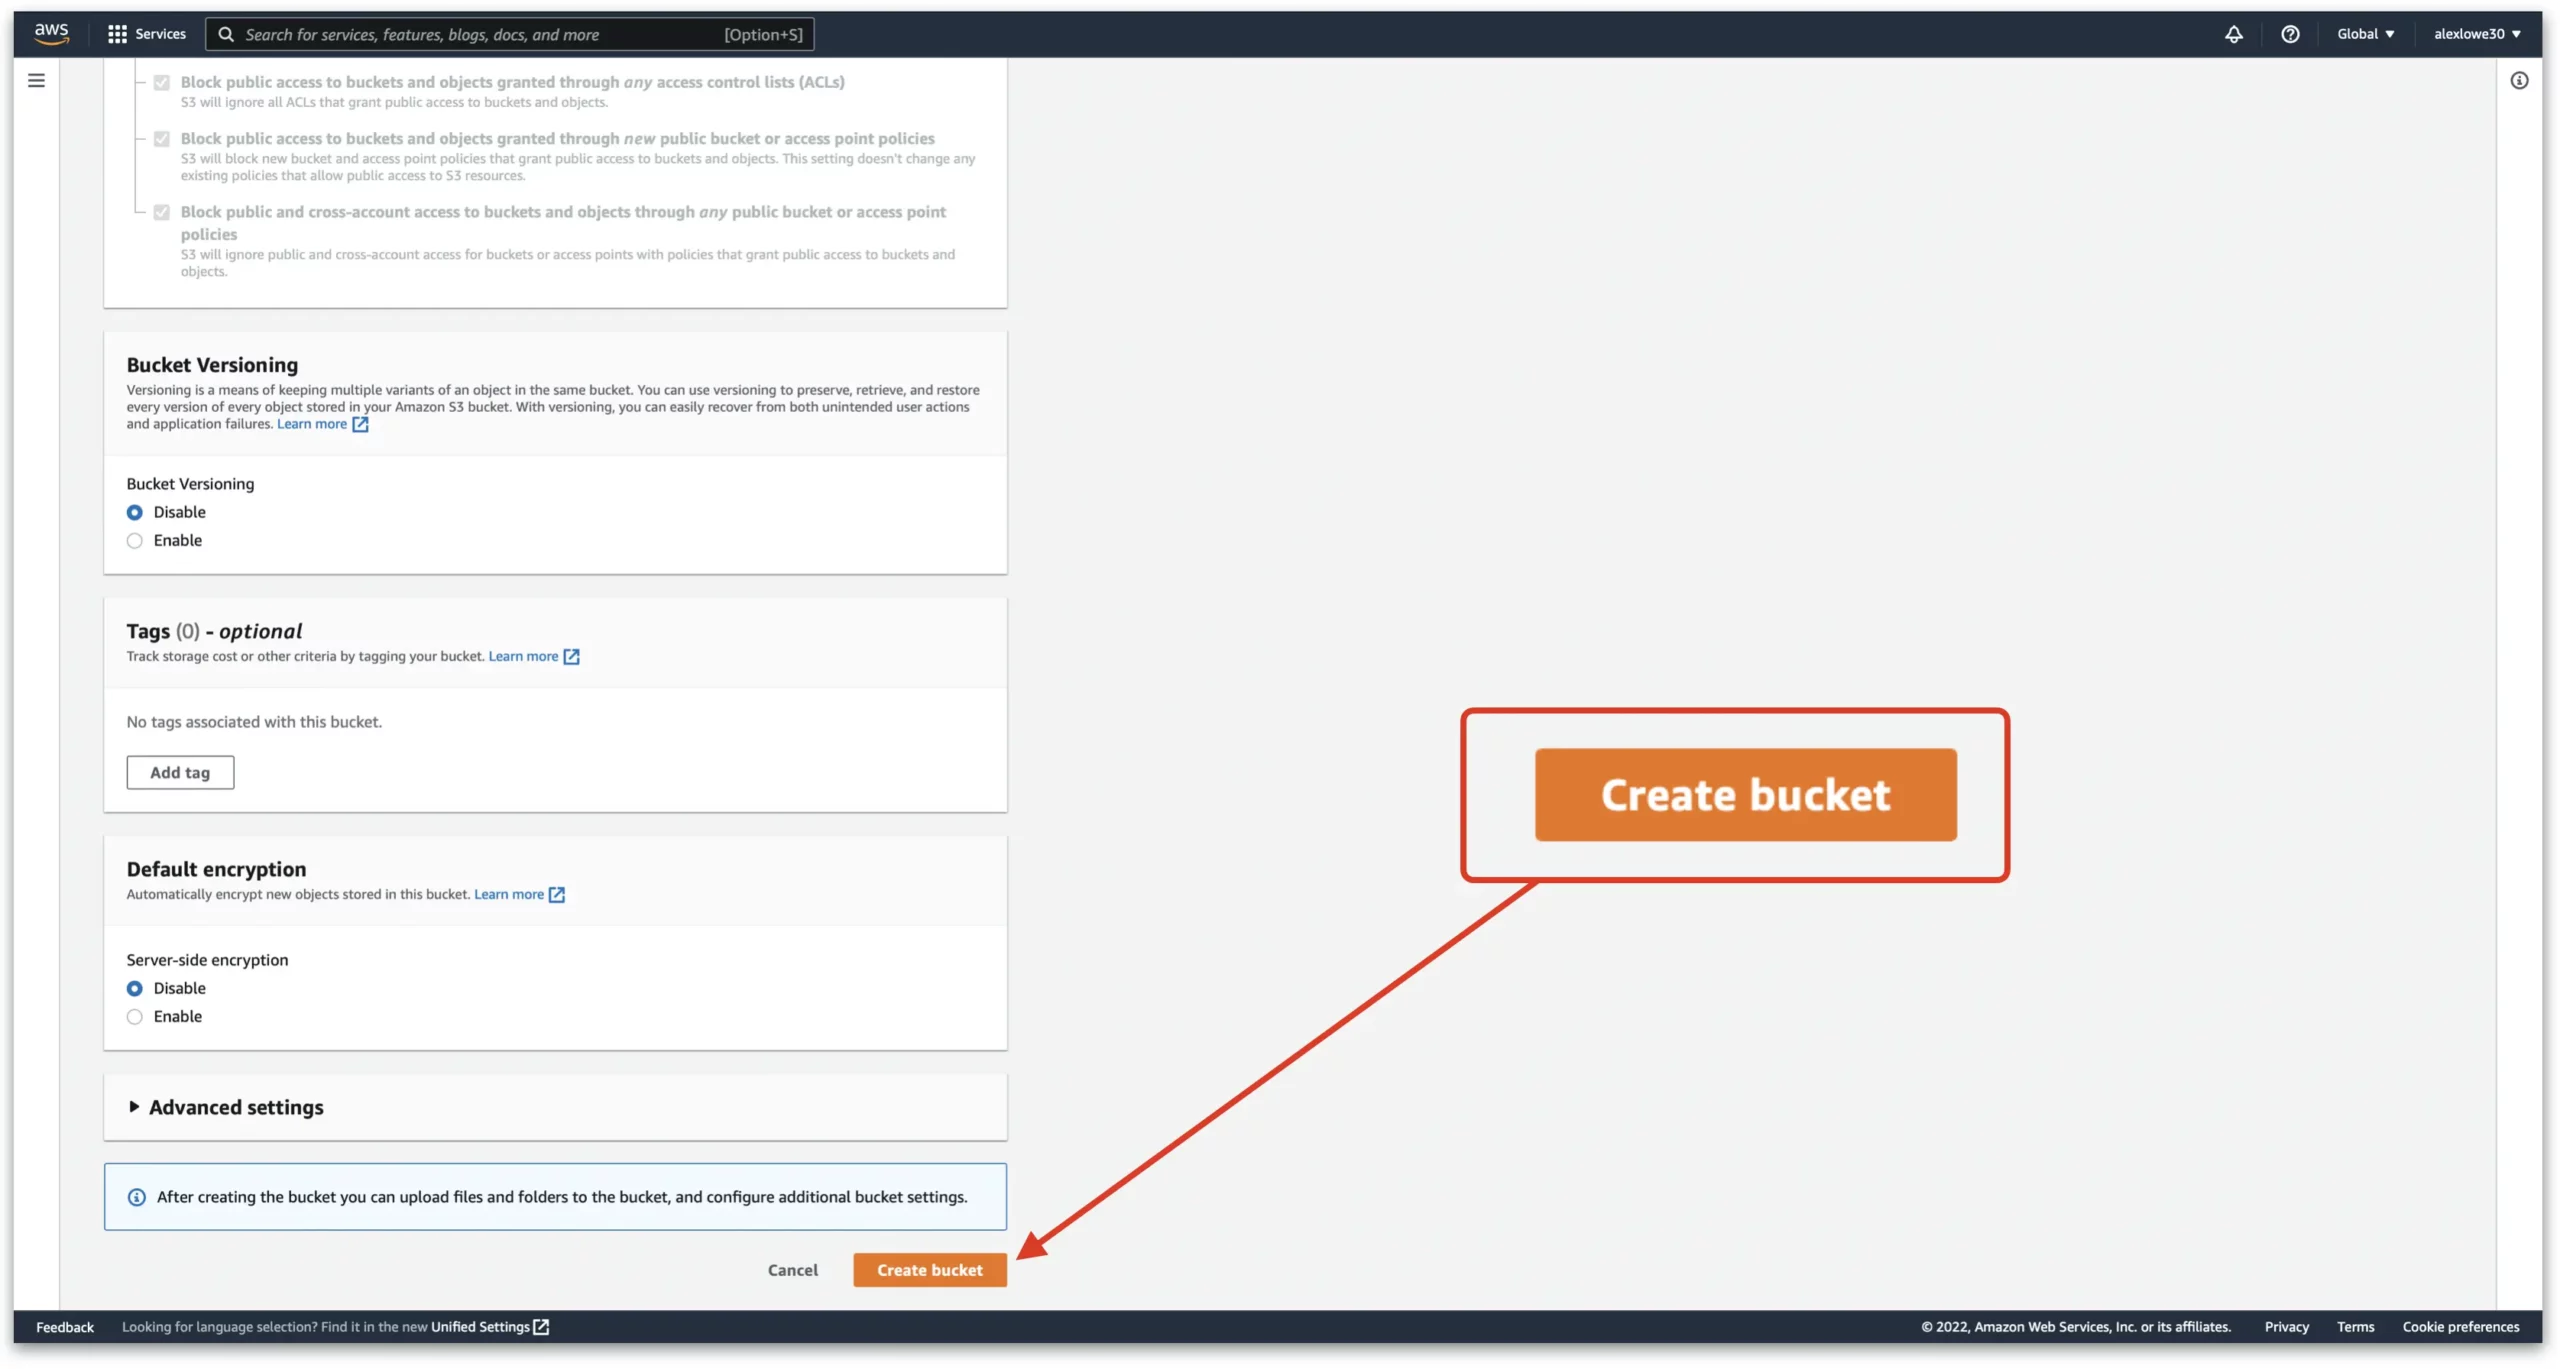
Set the bucket to public
First, we have our first problem I personally came across. In the below screenshot, we can see I have the “theinterface.online” domain and even though we set it to public in the previous steps, it is saying it is set to “Objects can be public.” What we are looking for is the red status shown on the other two domains saying “Public”. To achieve this, we need to complete one more step in the permissions section.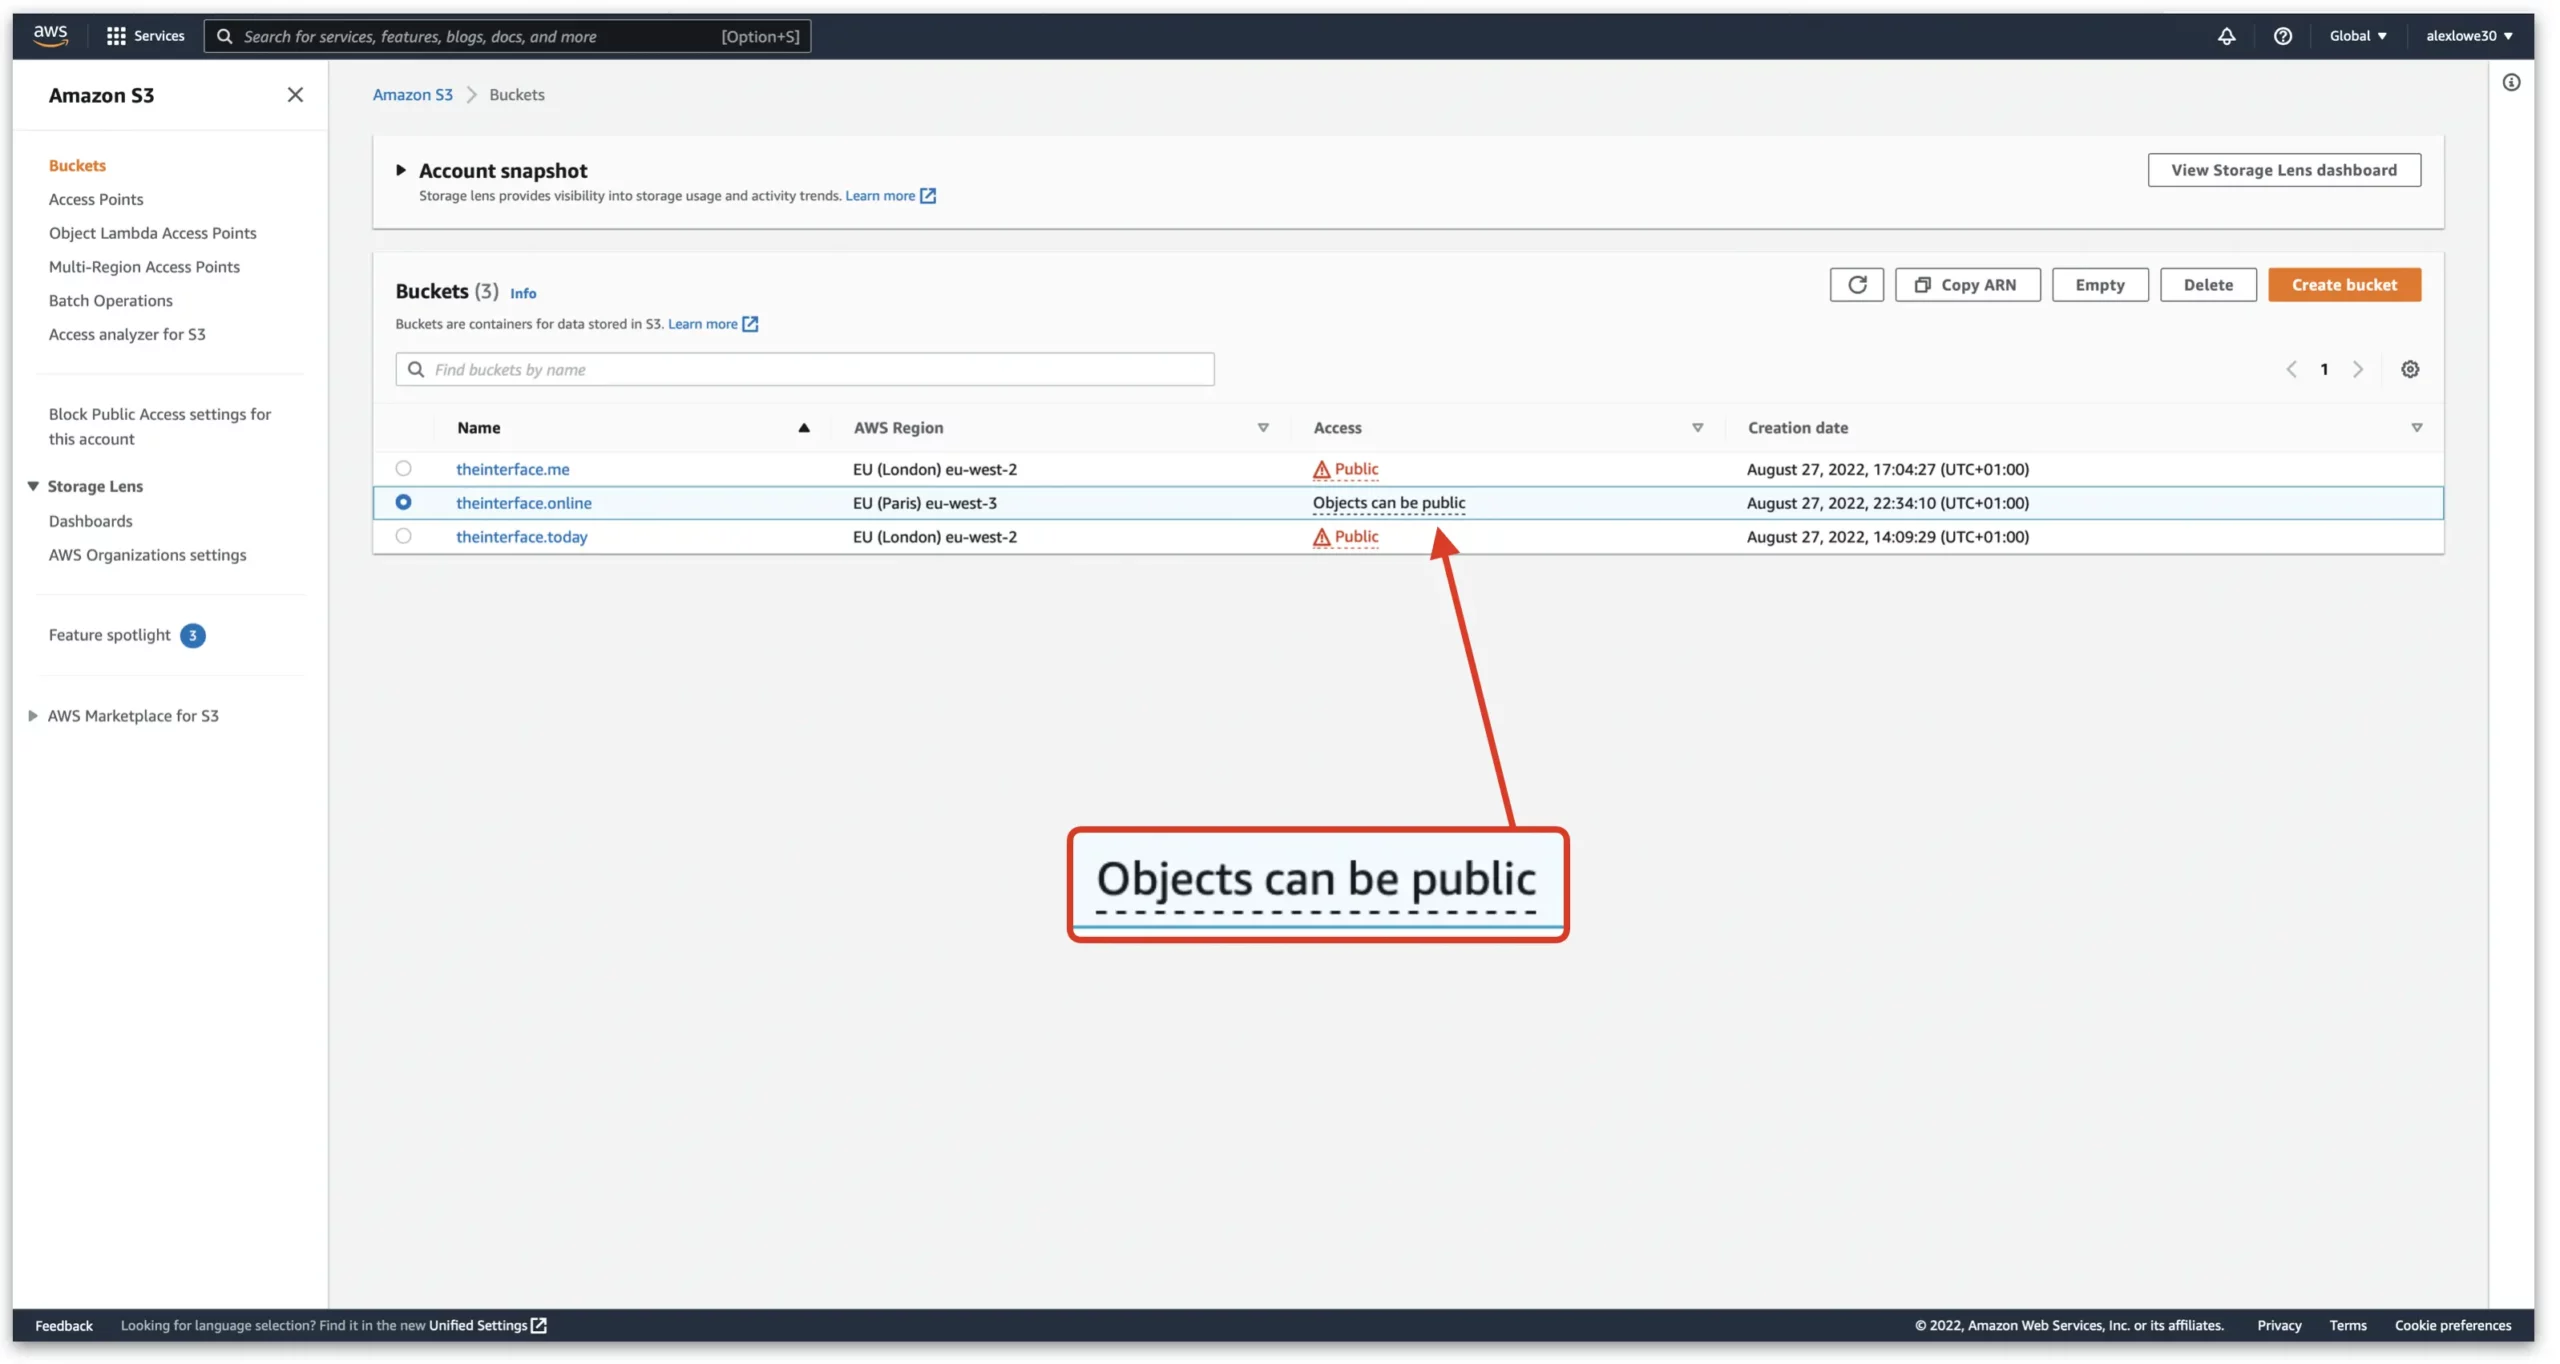
First, click on the bucket we want to edit.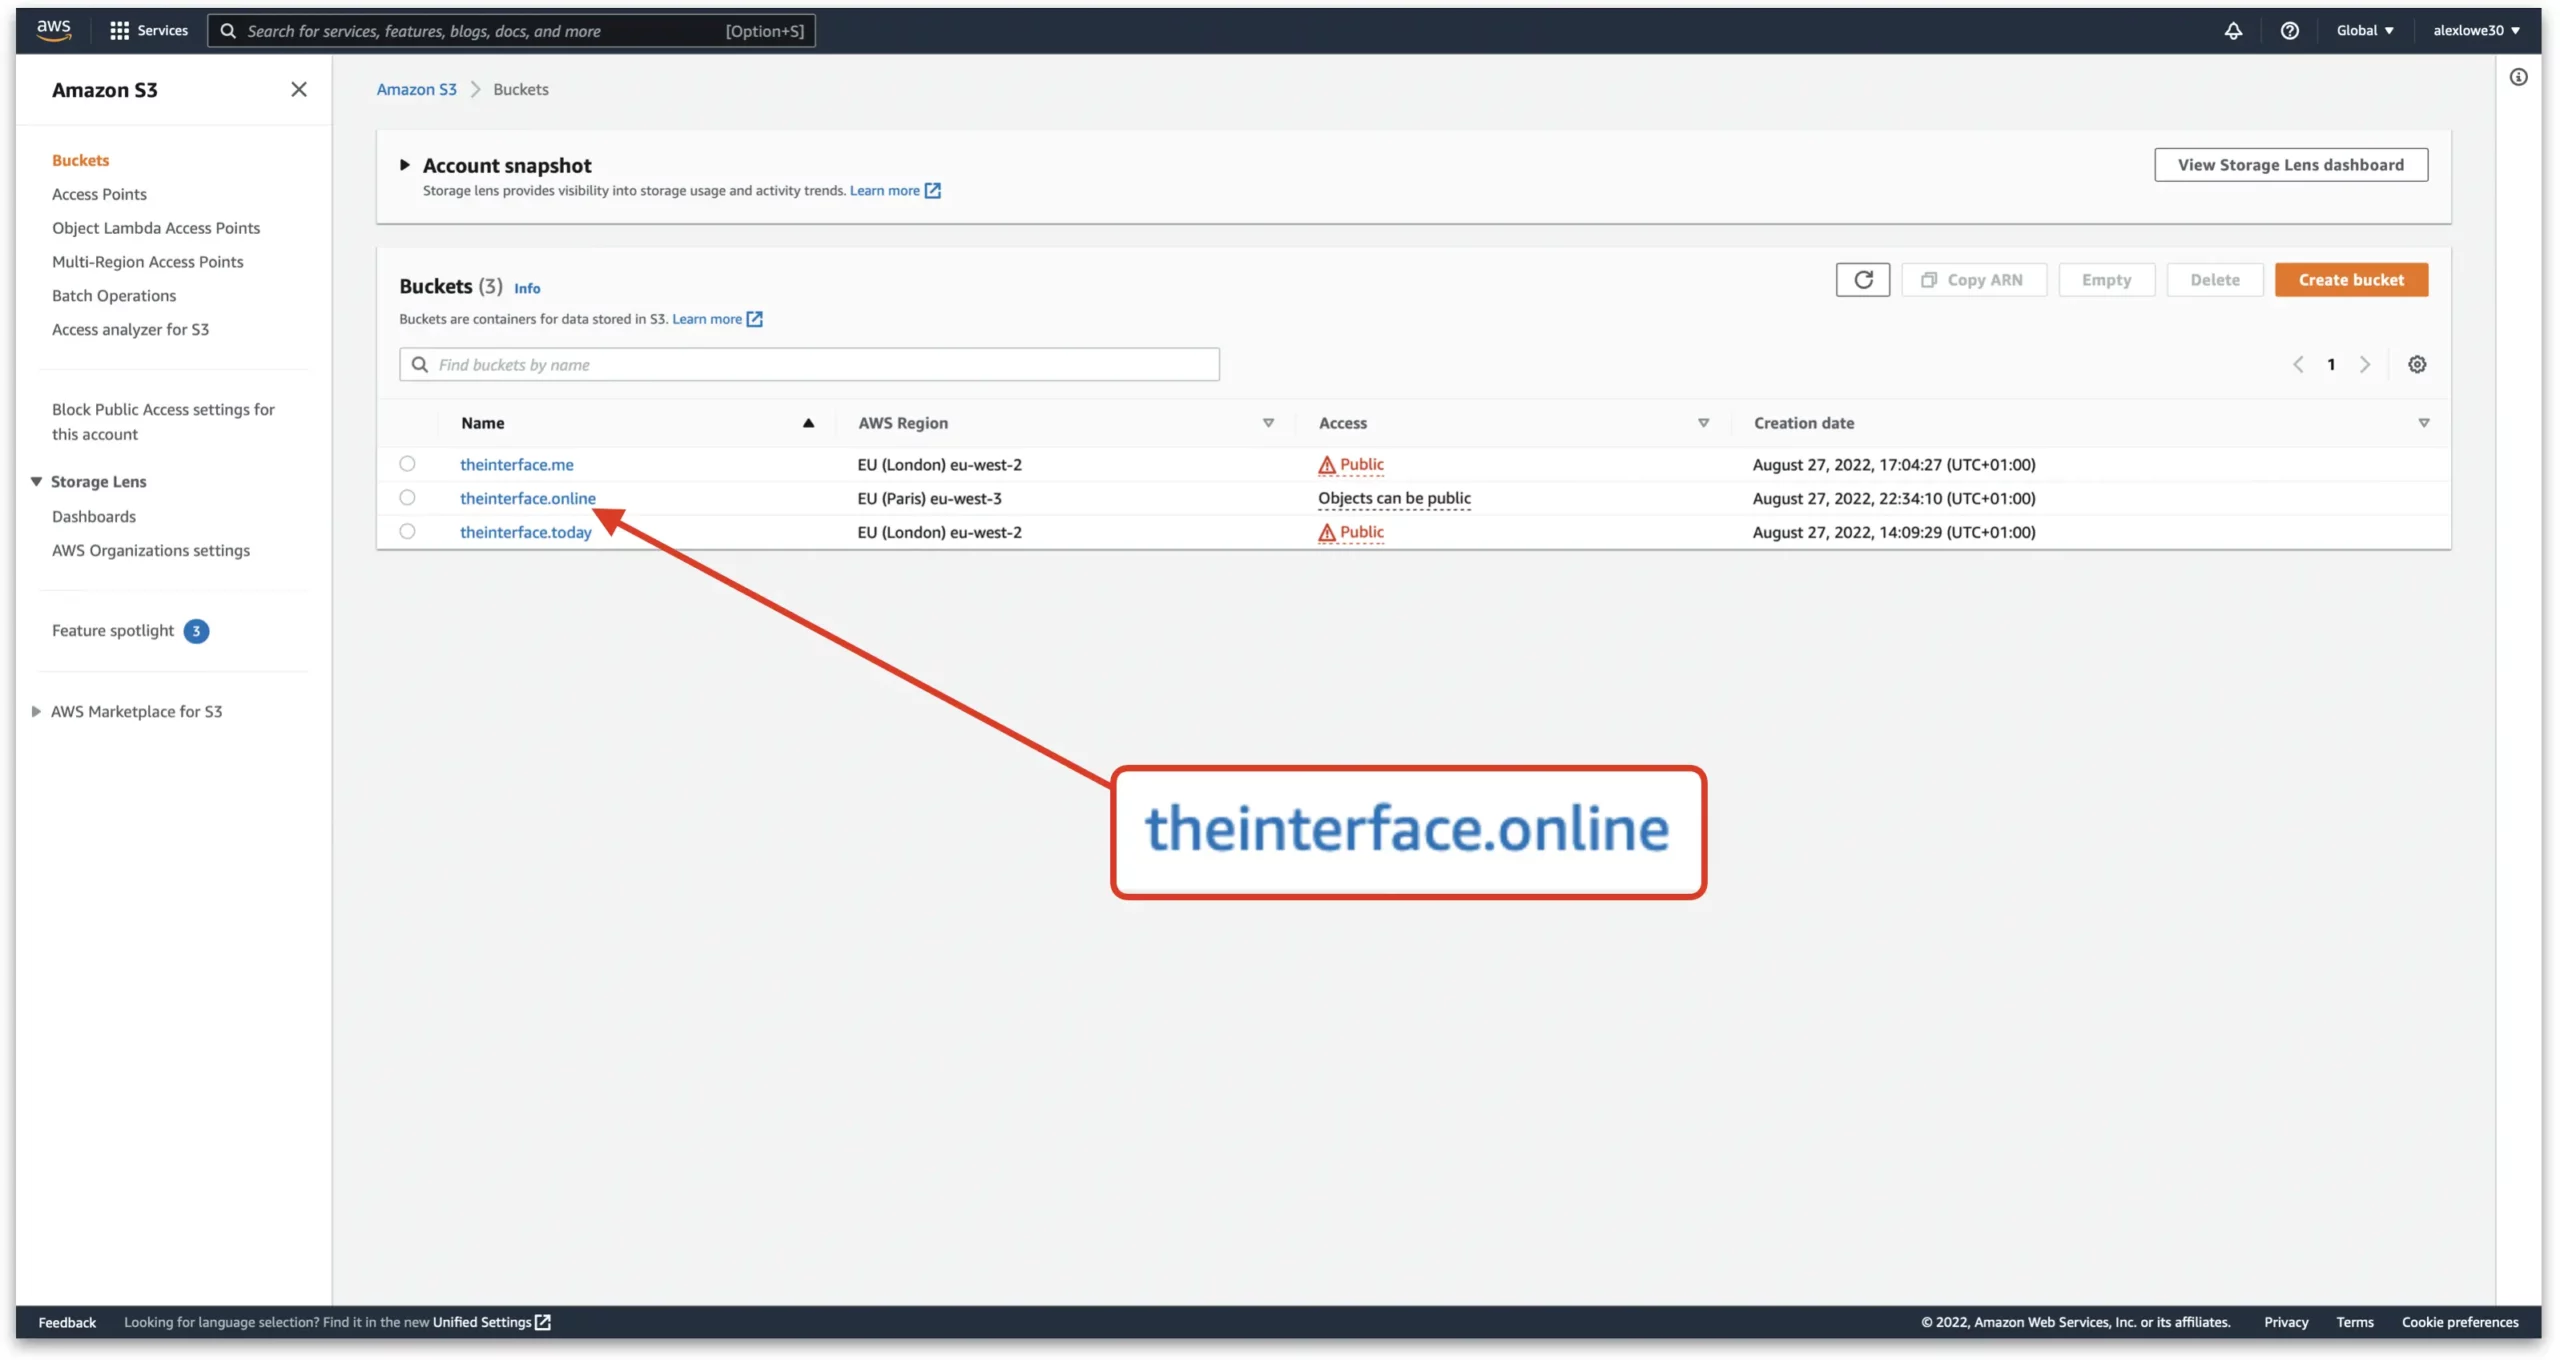
Next, click on “Permissions”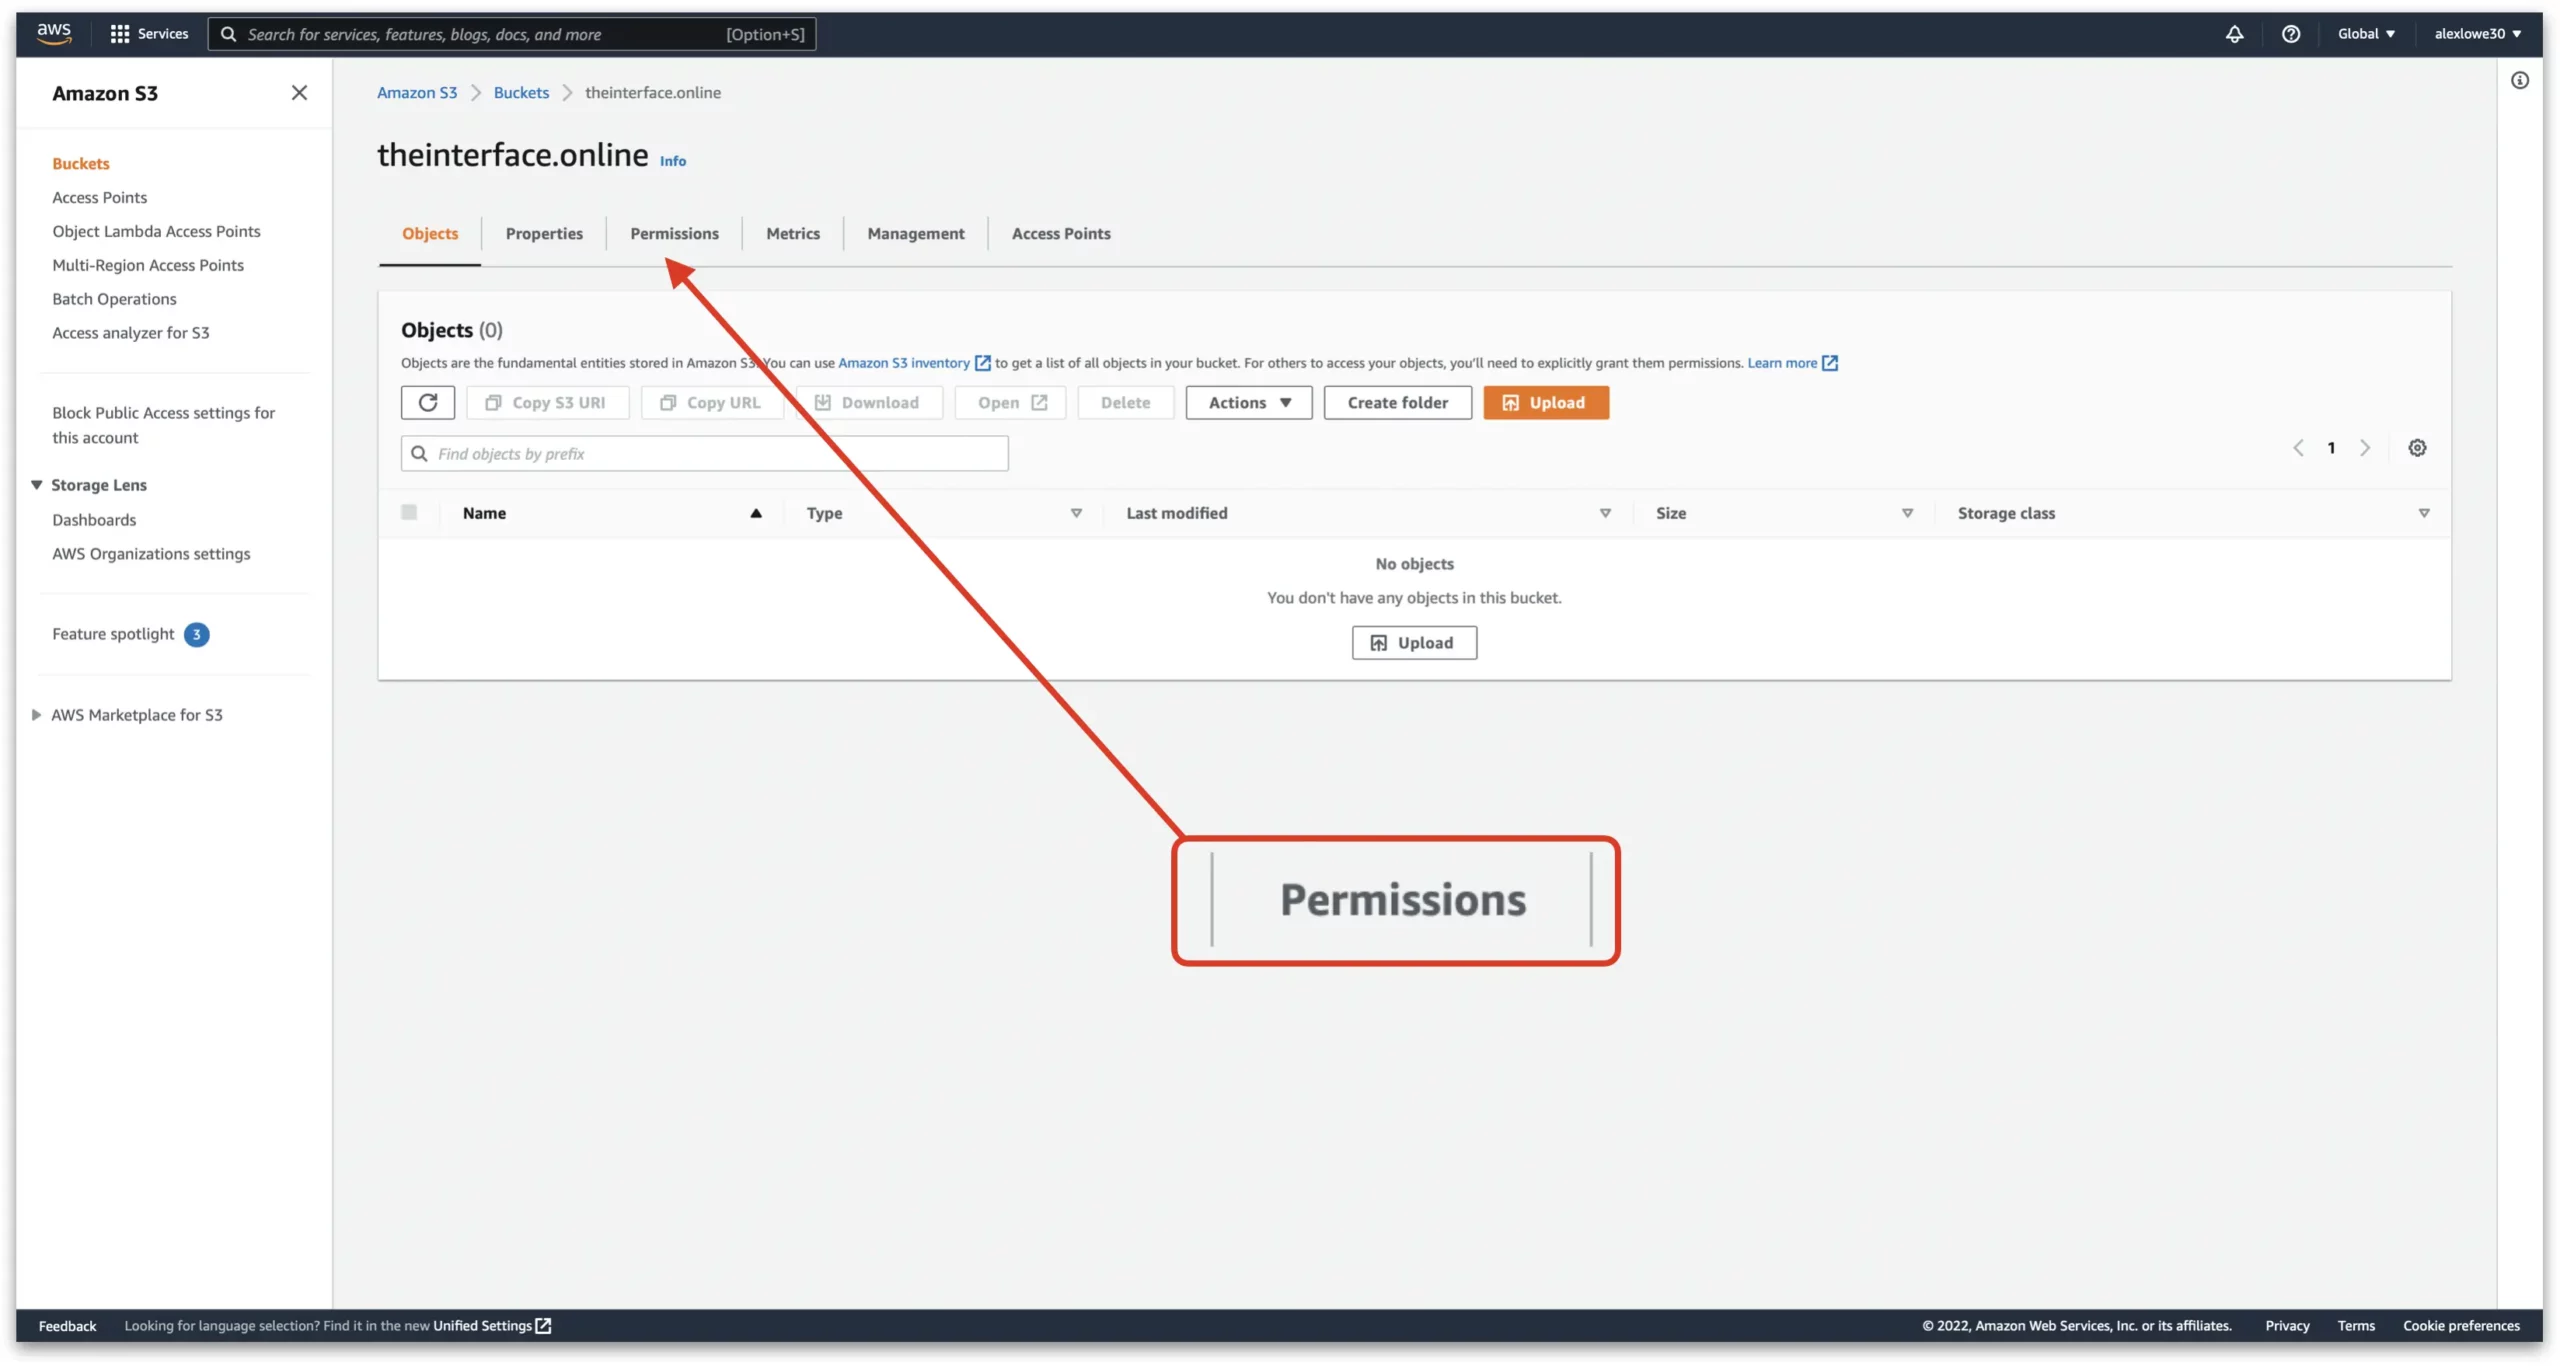
Scroll down to the “Bucket Policy” section and then click on “Edit”
In the next page, we have an area where we can a snippet of code. The required code can be found below.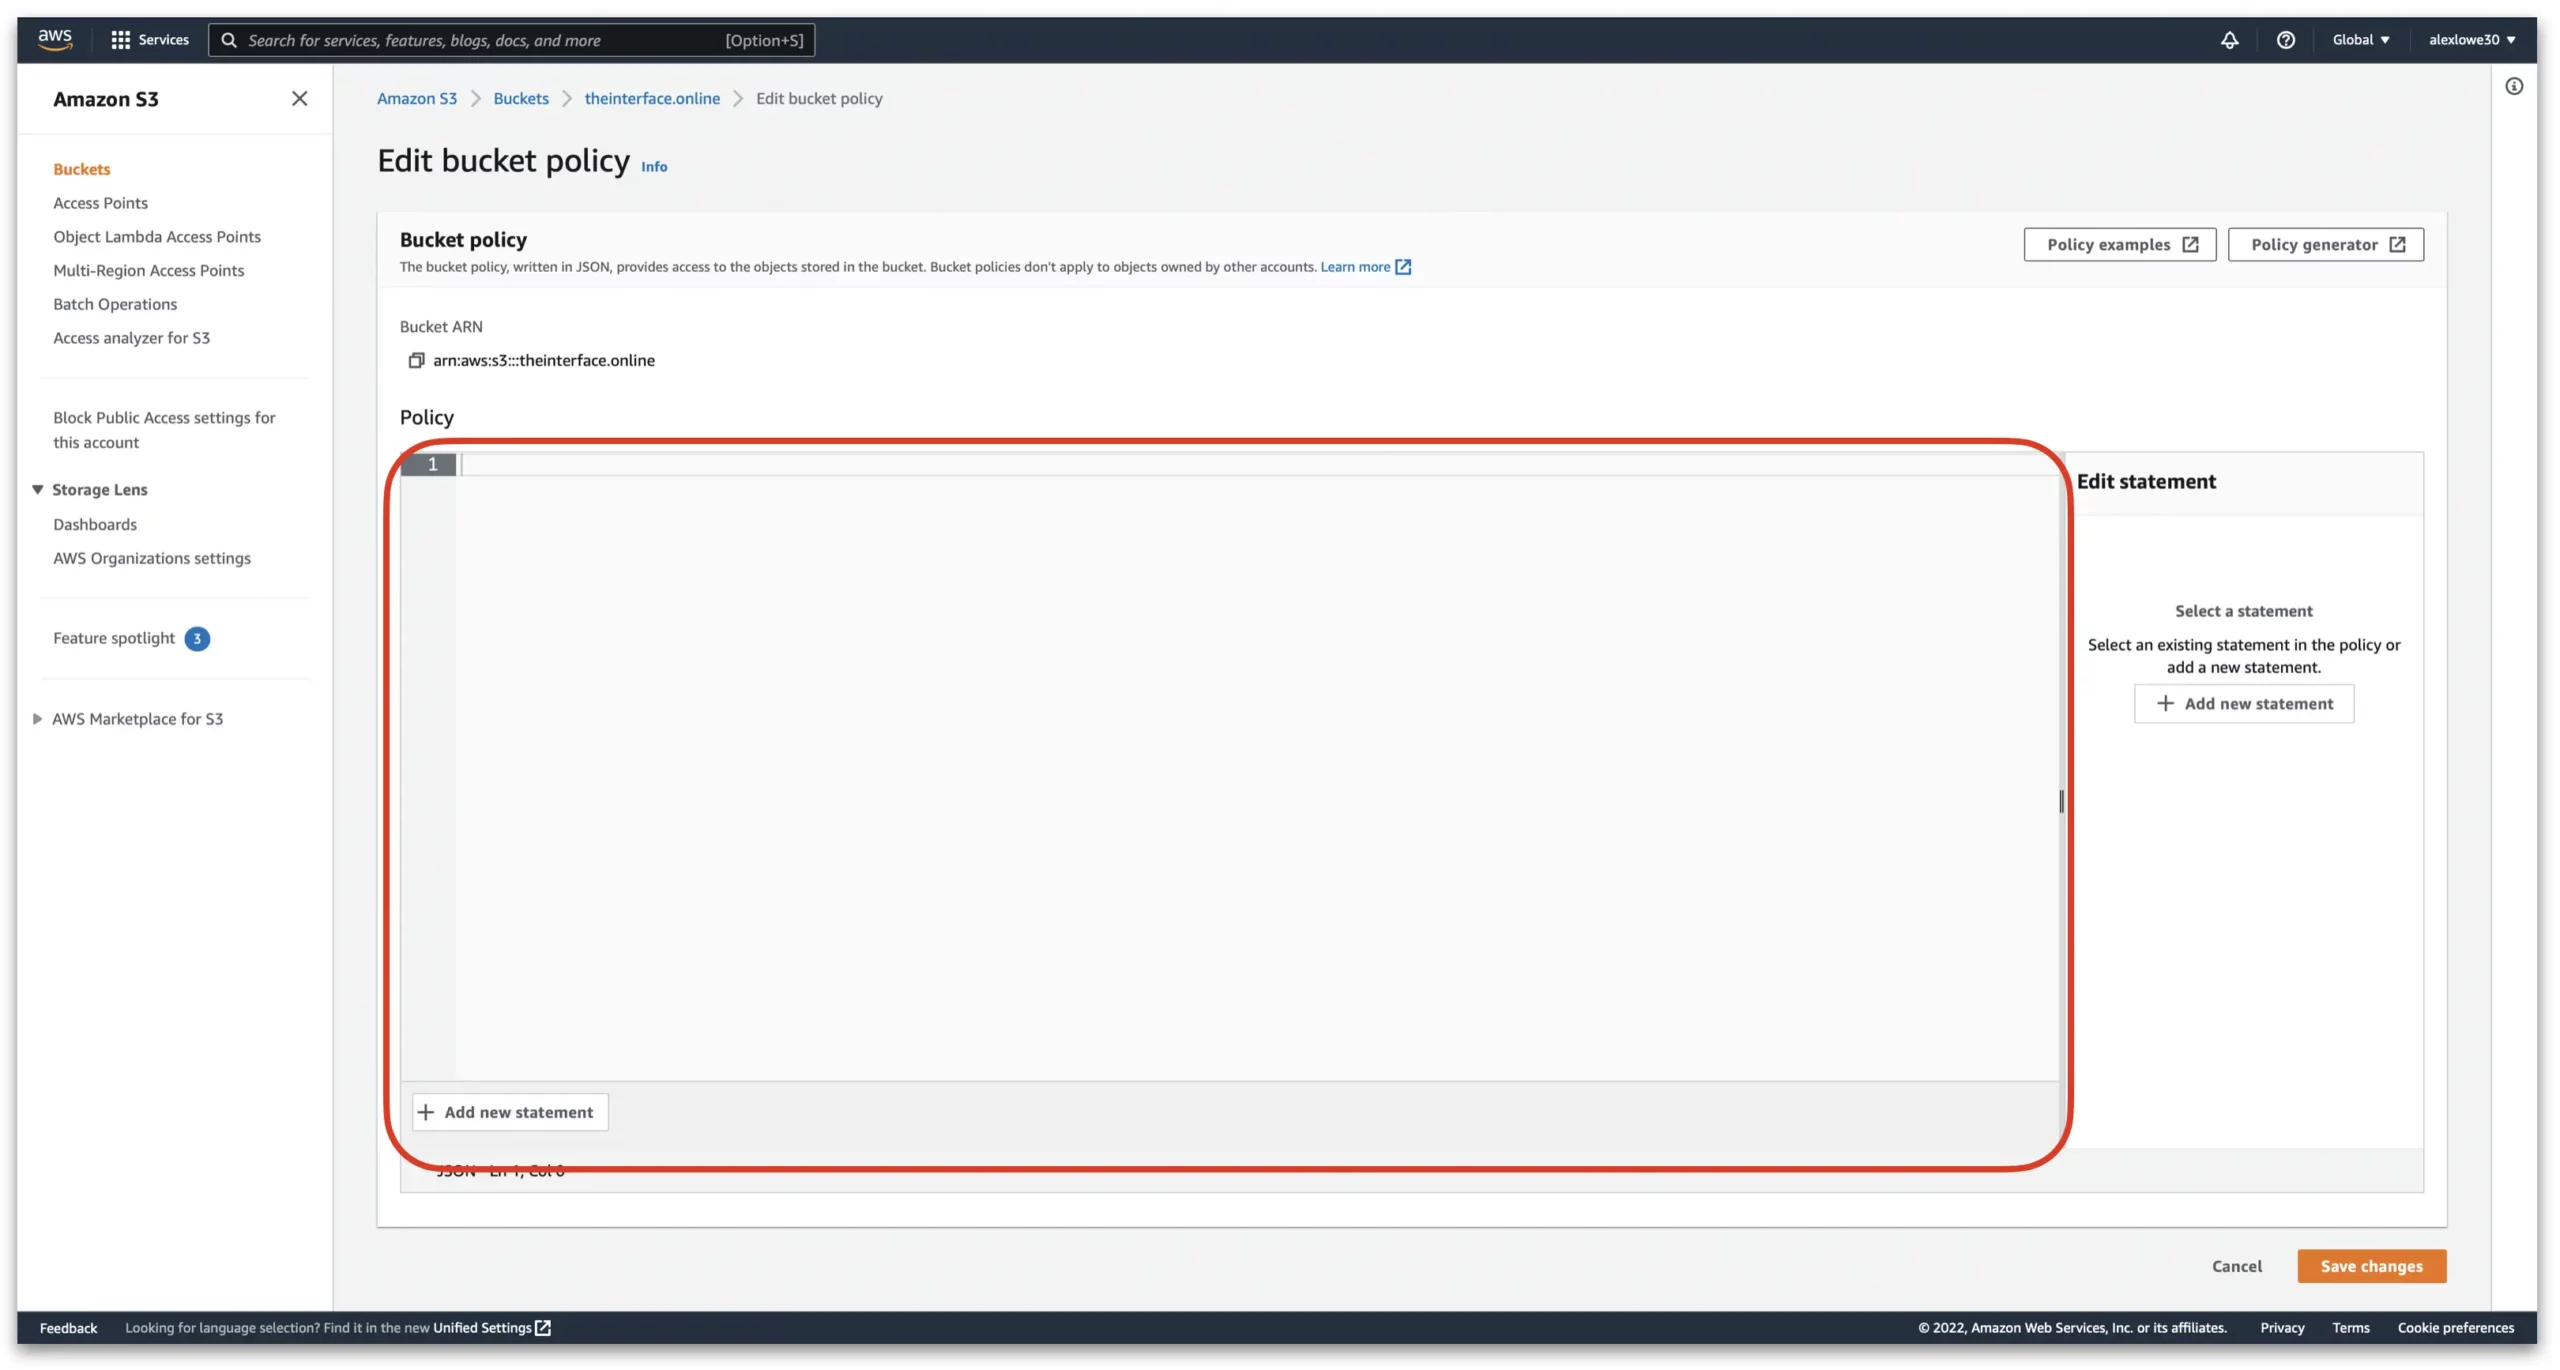
{
"Version": "2012-10-17",
"Statement": [
{
"Sid": "PublicReadGetObject",
"Effect": "Allow",
"Principal": "*",
"Action": [
"s3:GetObject"
],
"Resource": [
"arn:aws:s3:::Bucket-Name/*"
]
}
]
}
Where it says “arn:aws:s3:::Bucket-Name/”, replace that with the “Bucket ARN” found above the box. Once completed, it should look like this. Once entered, click on “Save changes”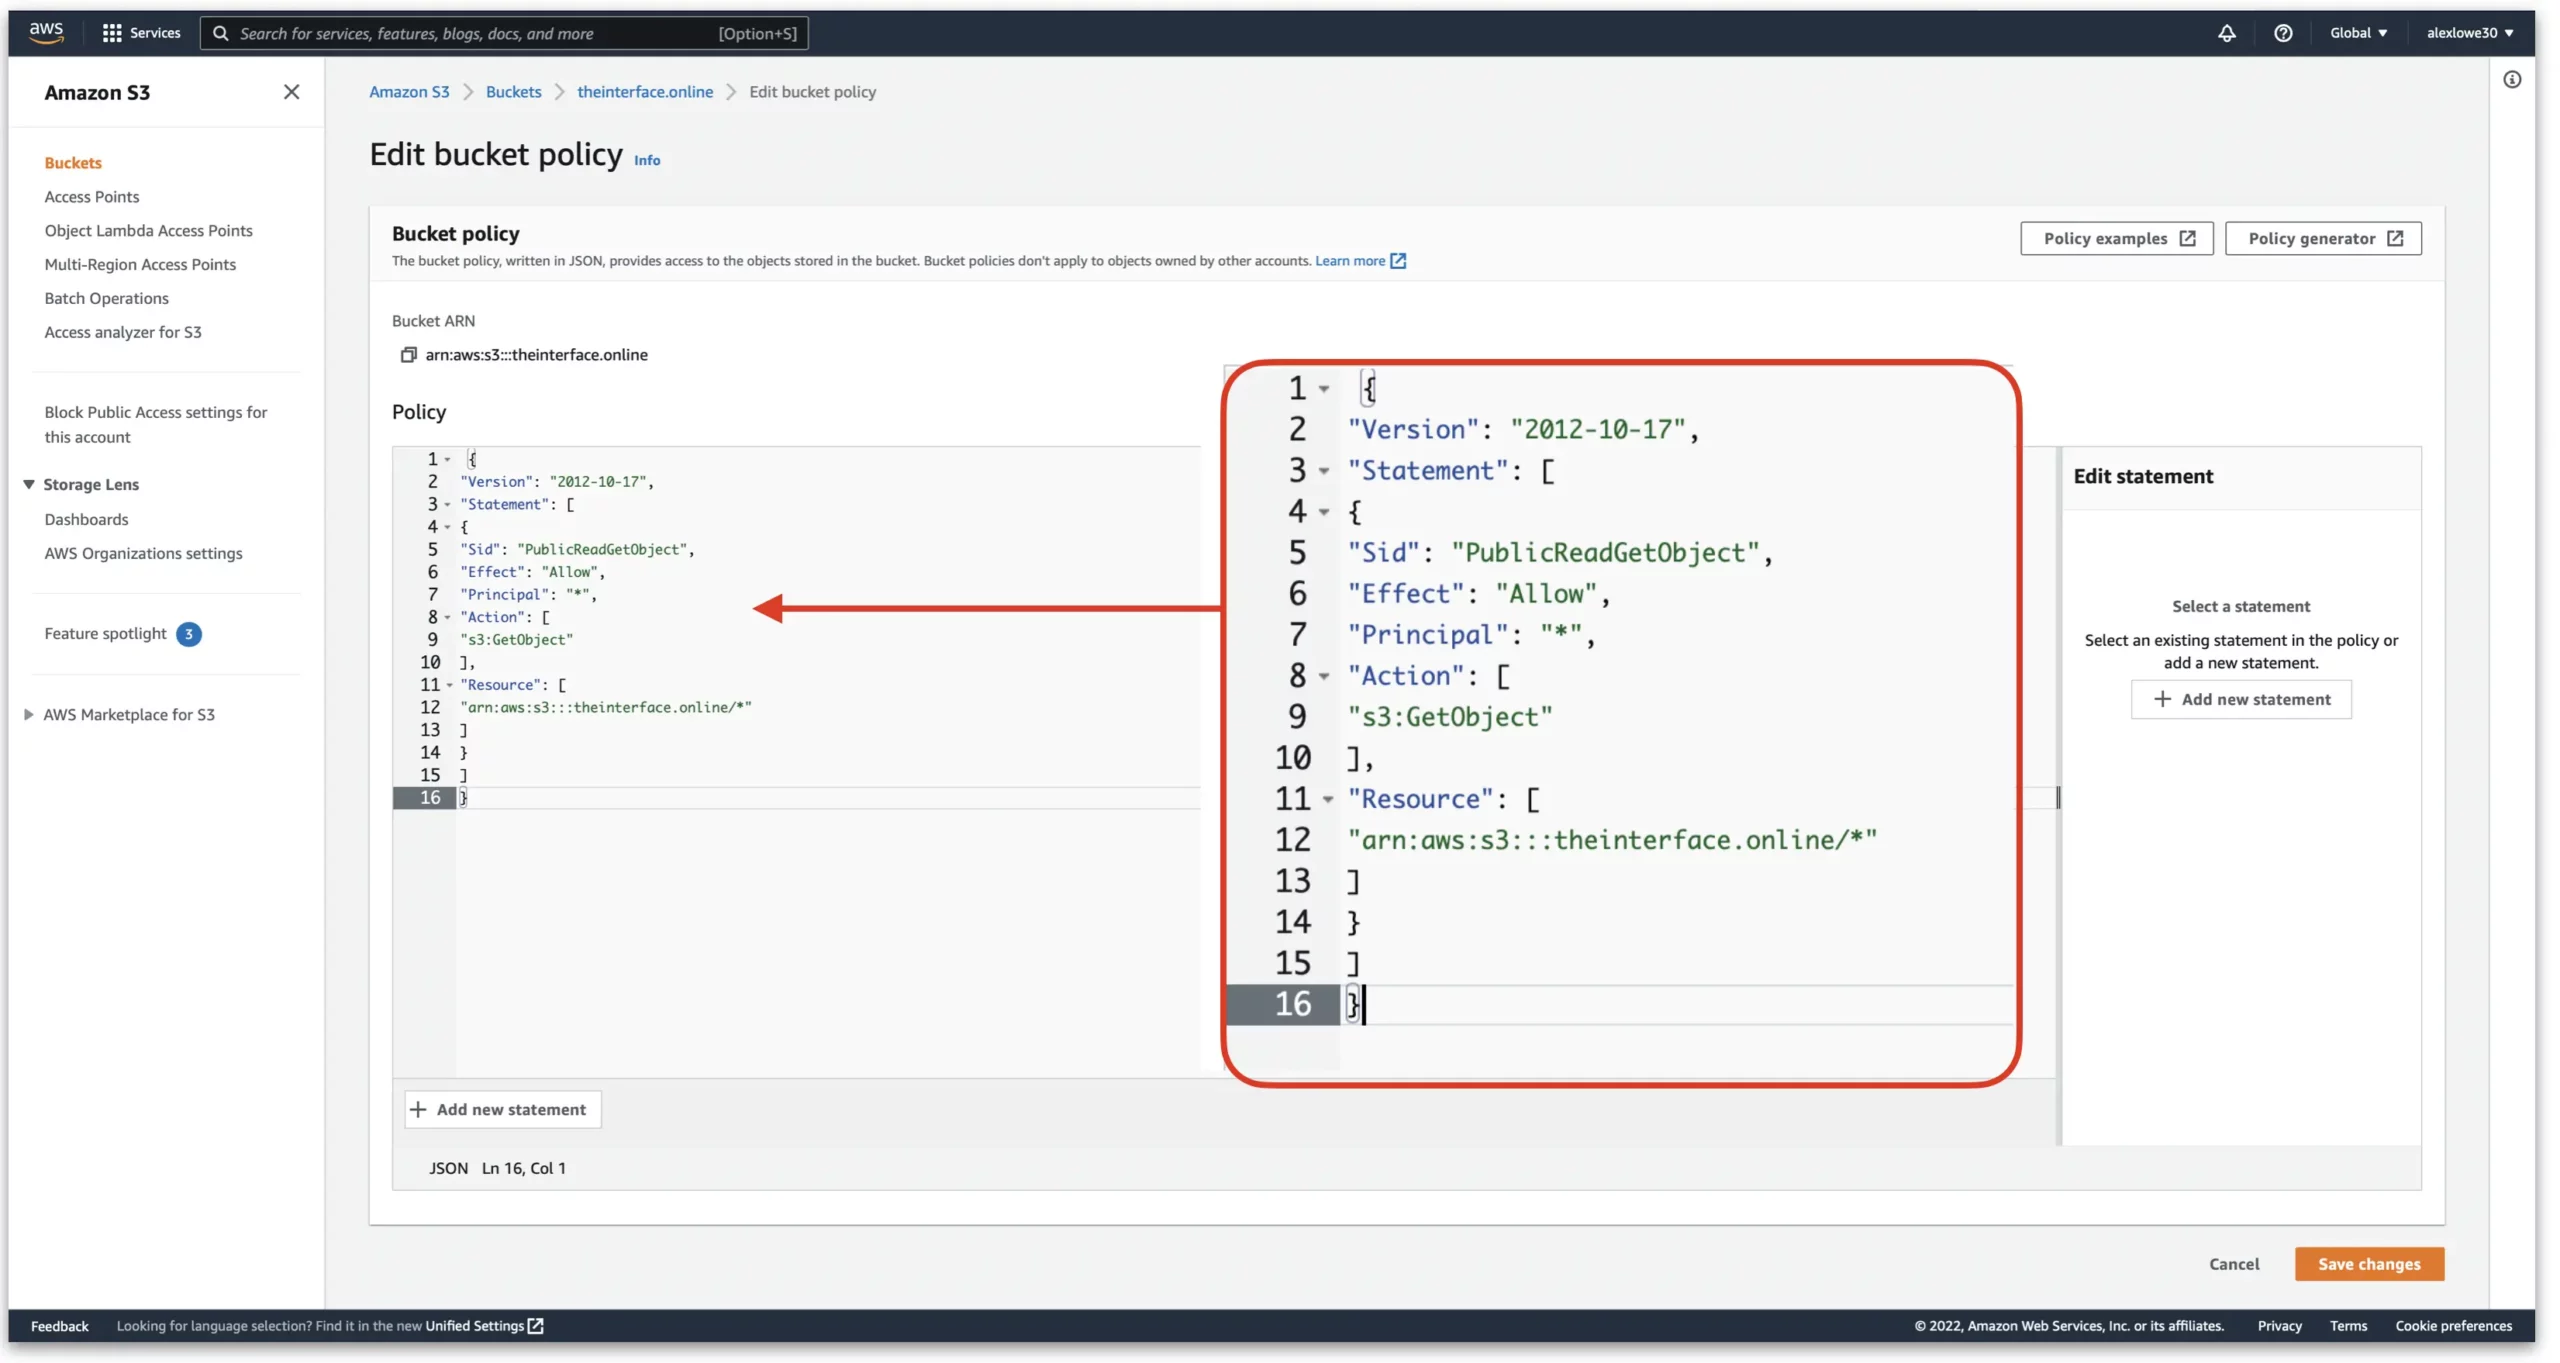
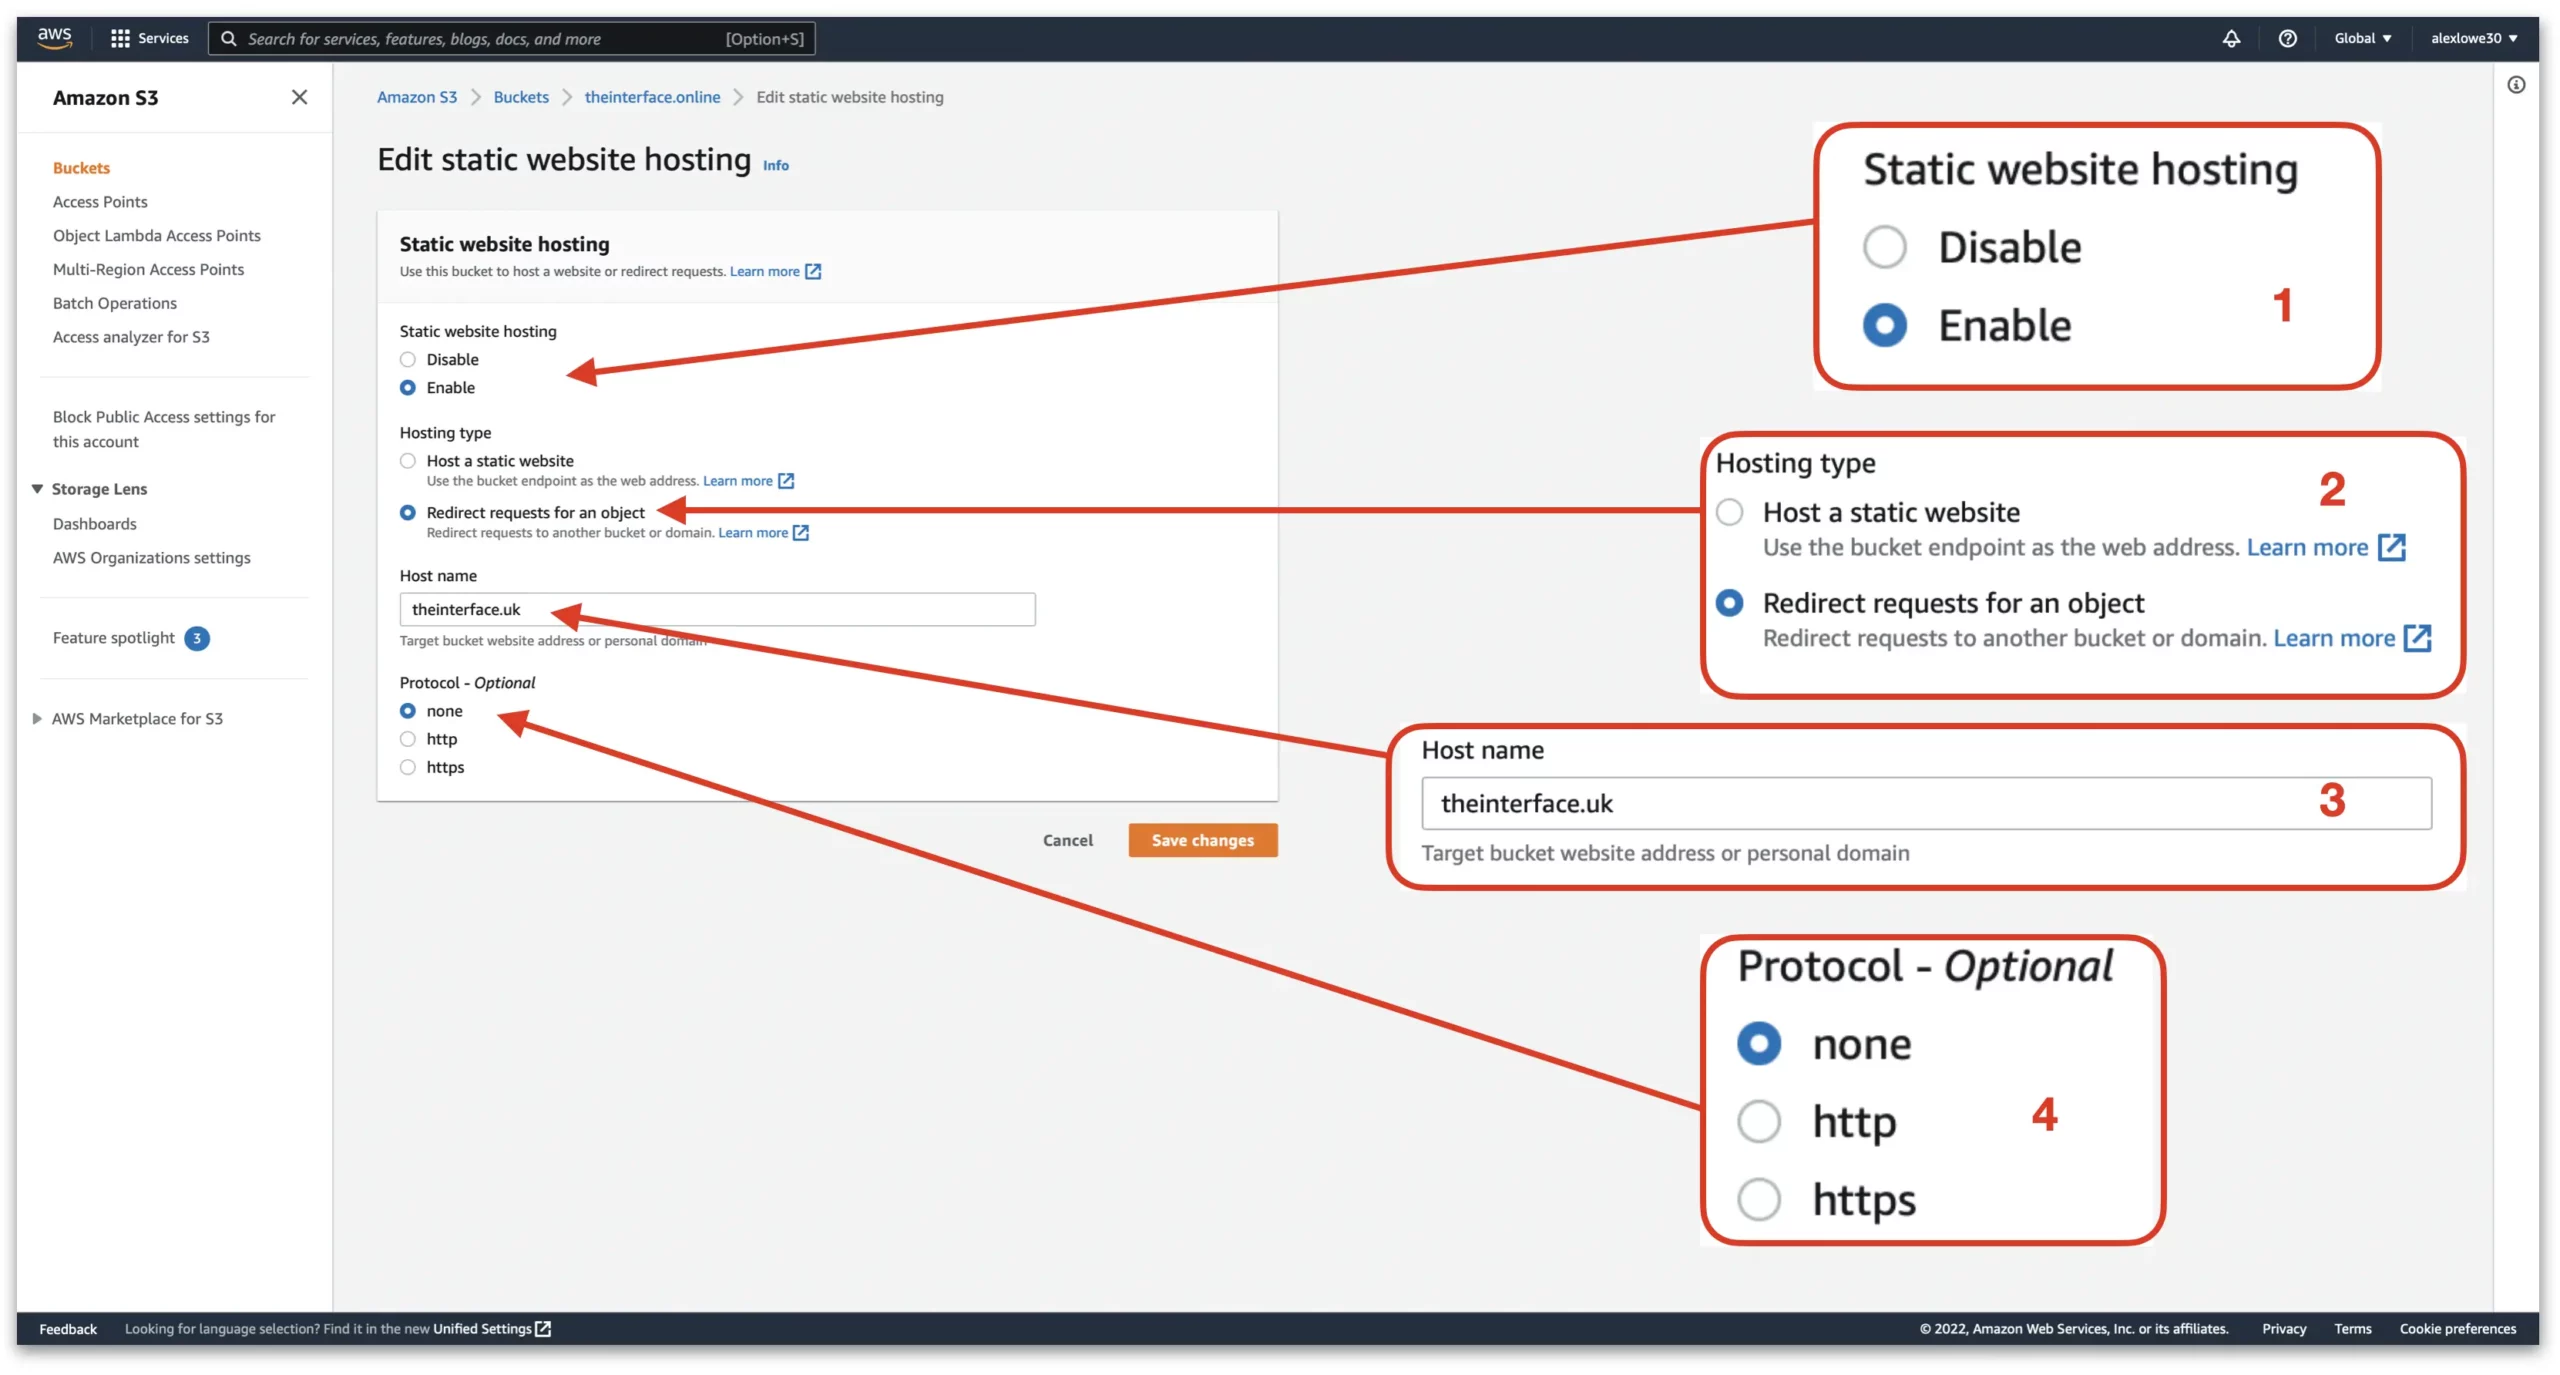
“Static website hosting” on S3 bucket and enable “Redirect requests for an object”
Now that our S3 bucket is set to public, we now need to tell the S3 bucket to forward requests to our main domain name. To do this, go back to the list of buckets within S3. A direct link to s3.console.aws.amazon.com/s3/buckets can be found here.
Next, click on the bucket you wish to edit.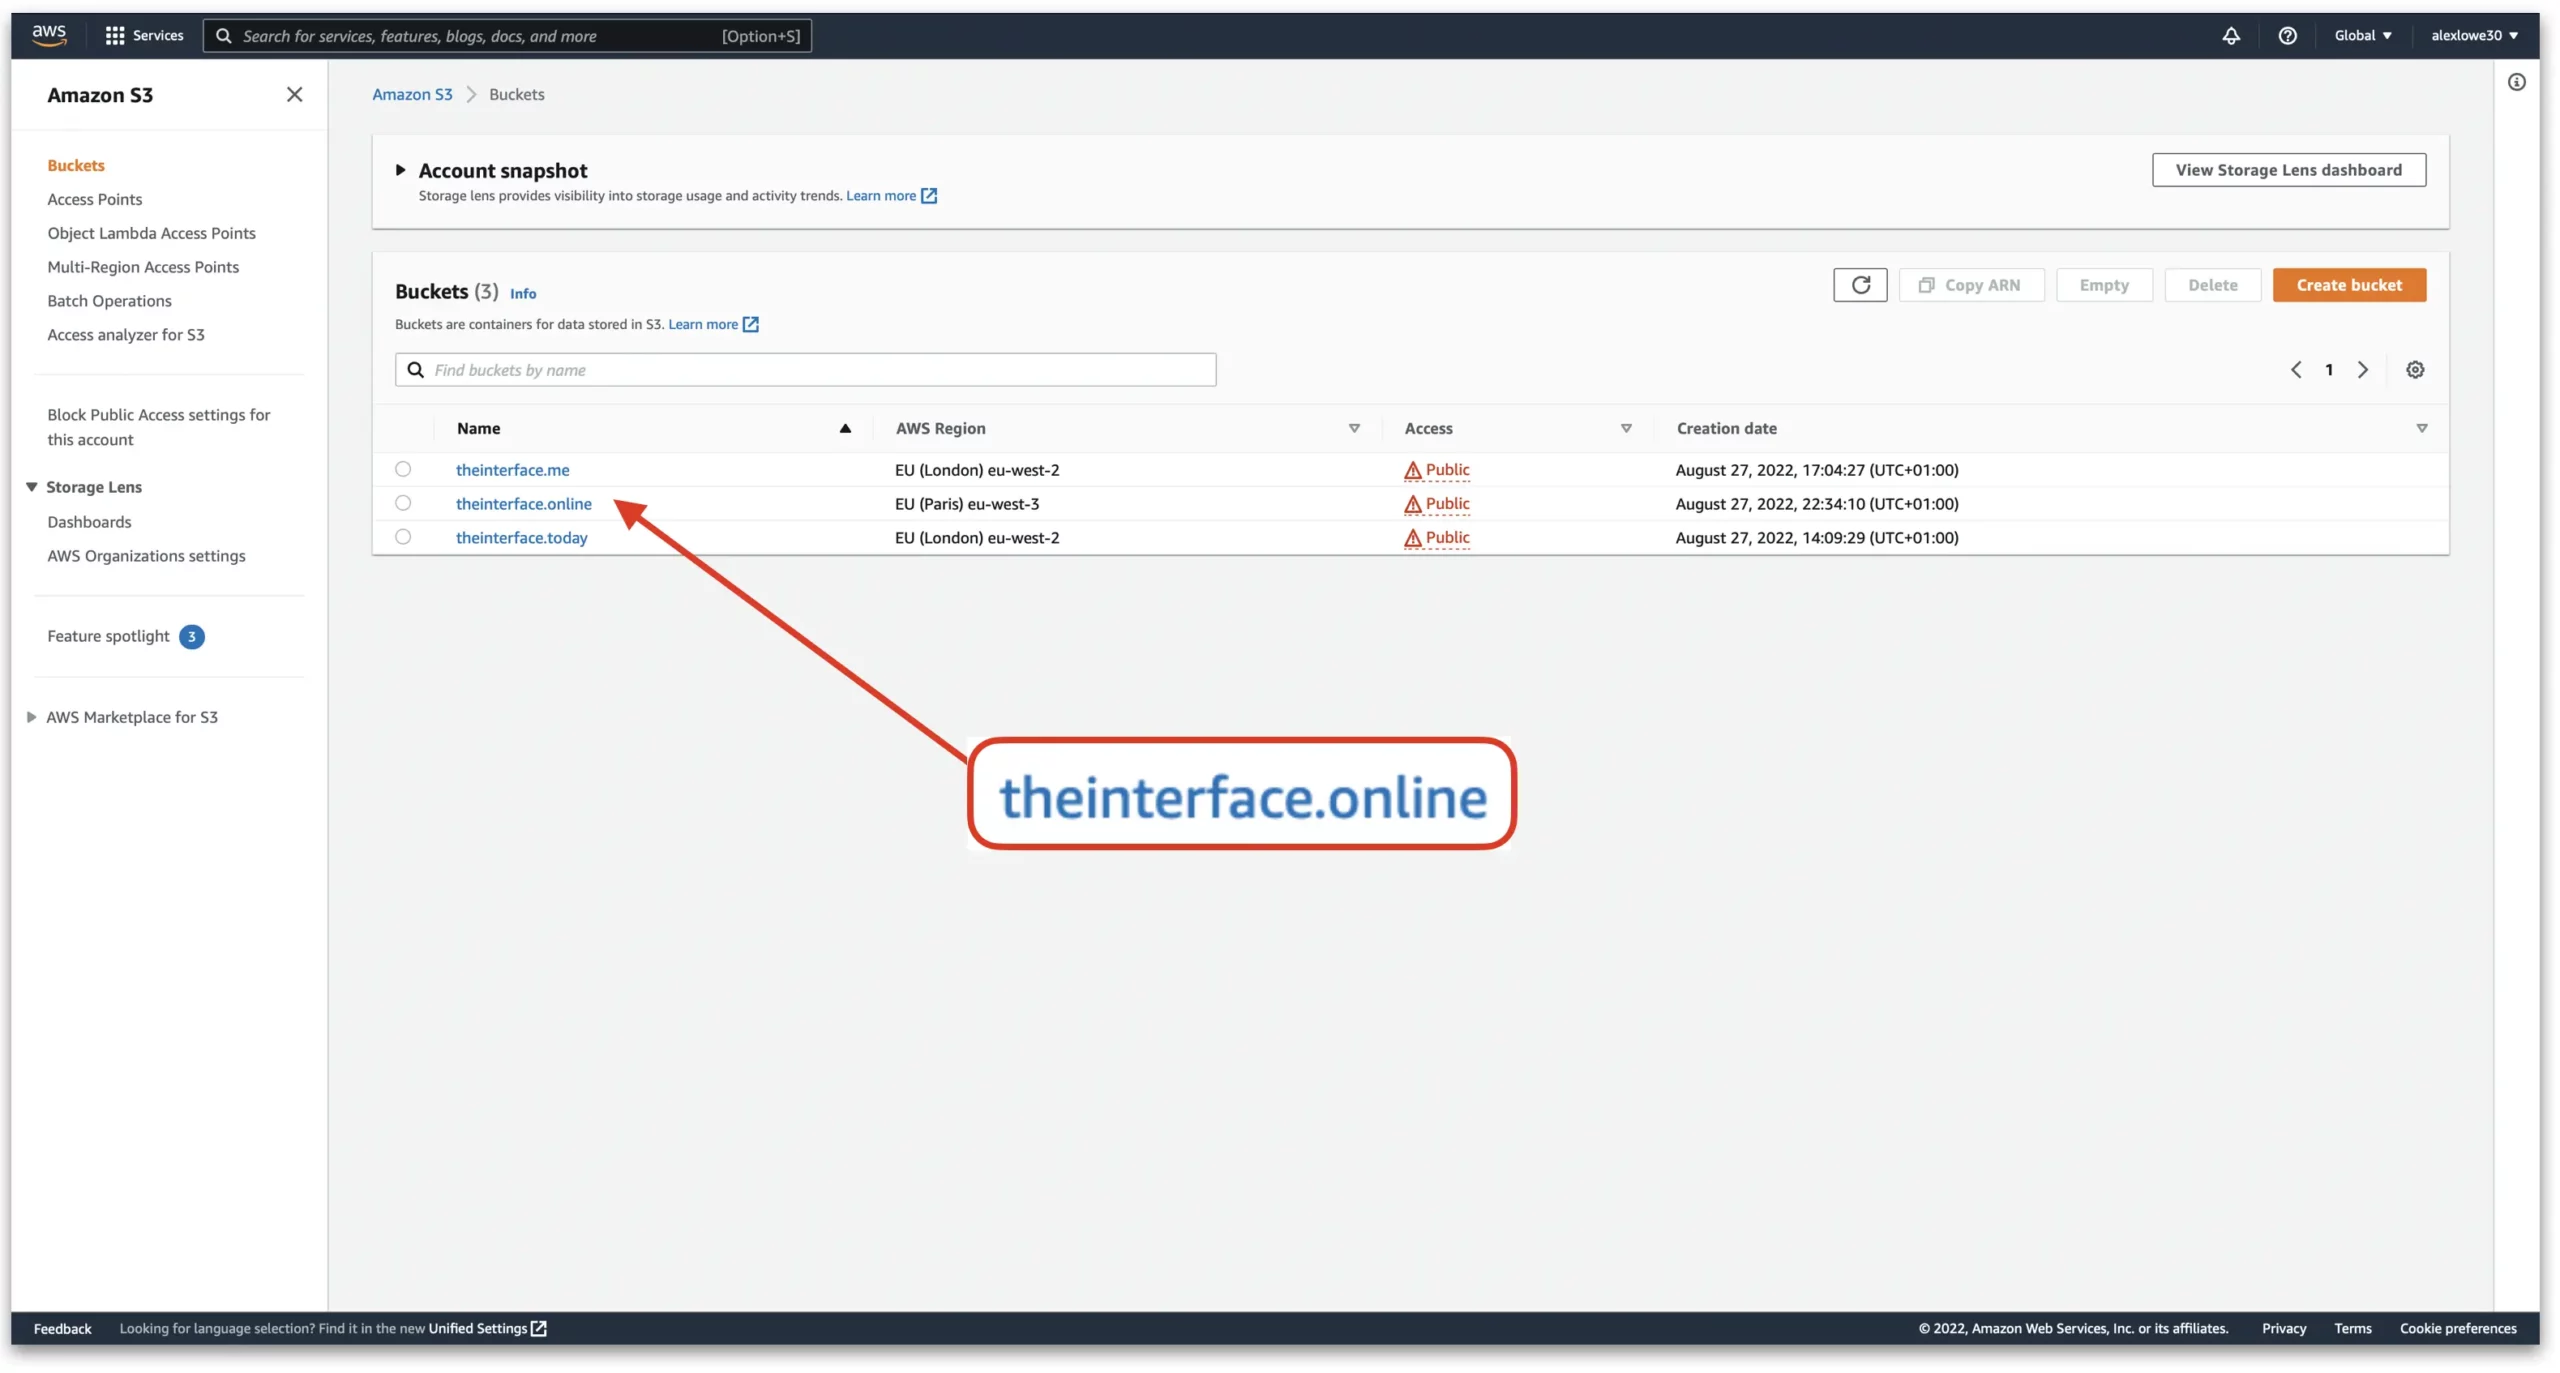
Next, click on “Properties”
Scroll right down the bottom of the page to the page to the “Static website hosting” section and click on “Edit”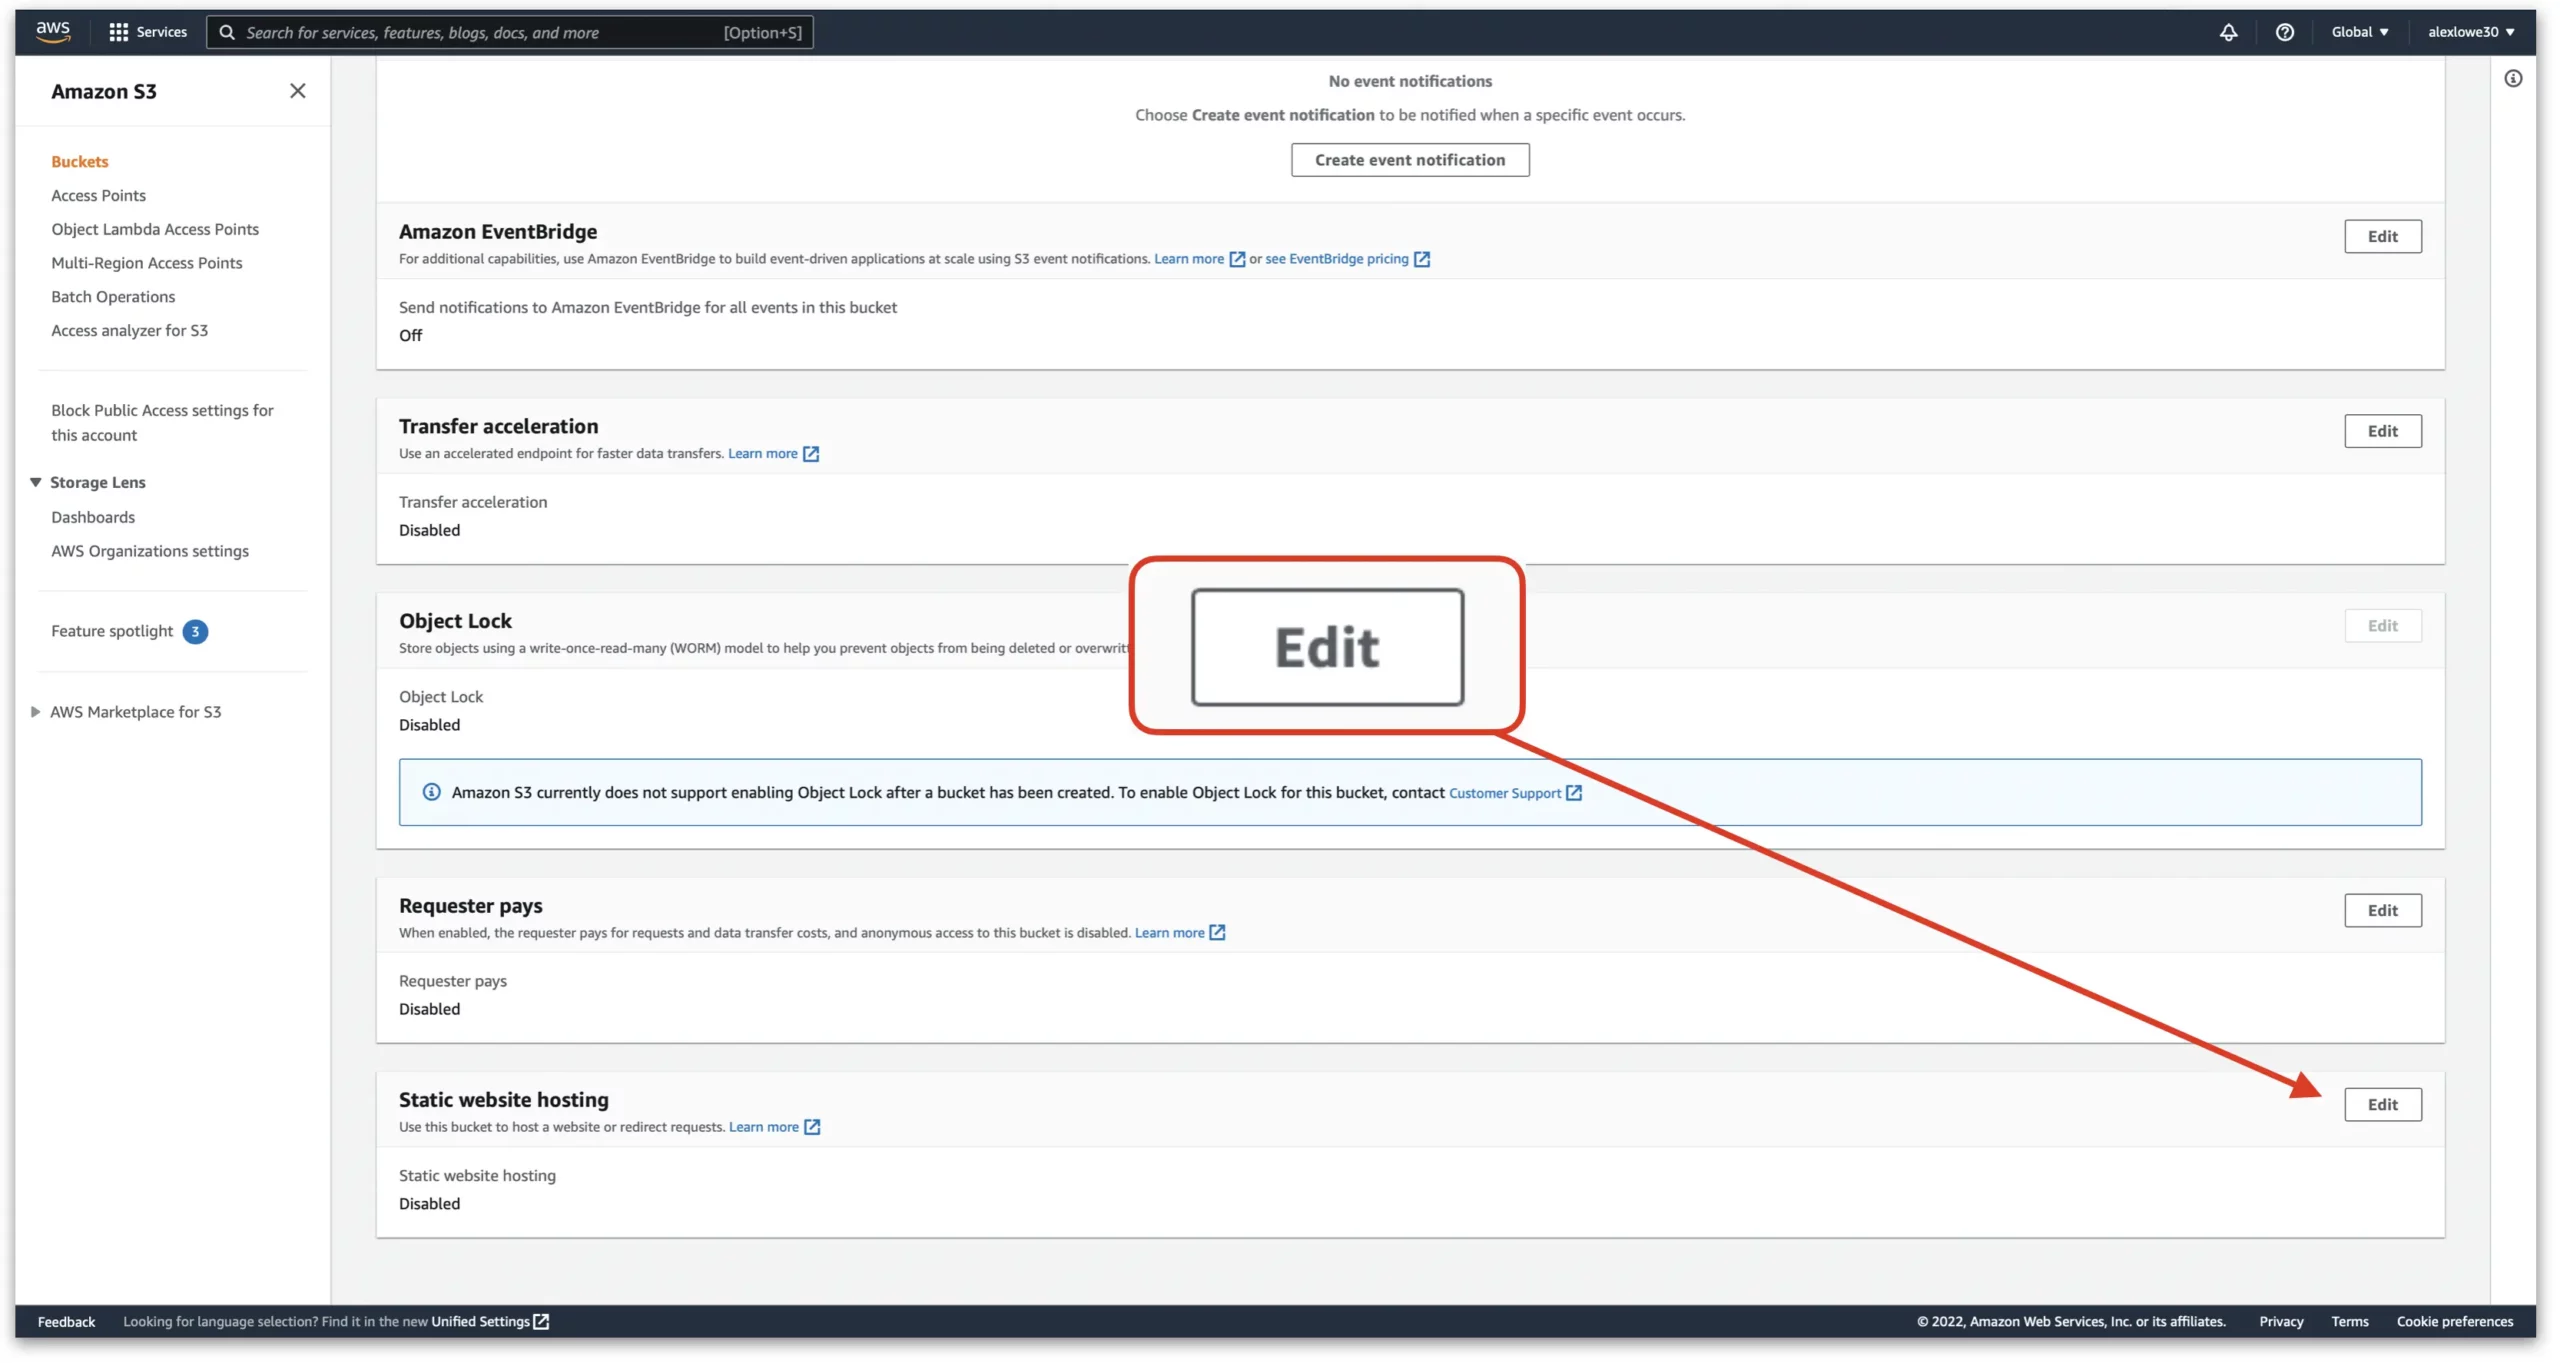
Next;
- Enable “Static website hosting
- Set hosting type as “Redirect requests for an object
- In the host name box, enter in the destination domain name for this redirect
- For protocol, leave it set to none. In later steps in this article, CloudFront will handle the HTTP>HTTPS requests.
The last step is verify that the basic HTTP redirect works. Once the static website hosting rule is added, you should now see a URL which looks similar to this “http://DOMAIN.COM.s3-website.eu-west-3.amazonaws.com” shown the below screenshot. Click on this URL, if this redirects to the intended destination domain name, then this HTTP rule is configured correctly.
This URL will be needed again in the next step
 Create a CloudFront distribution
The next step is to configure a new CloudFront distribution. This will handle the HTTPS redirect, as currently this is not something the S3 bucket can do. First, log into CloudFront.
Next, click on “Create Distribution”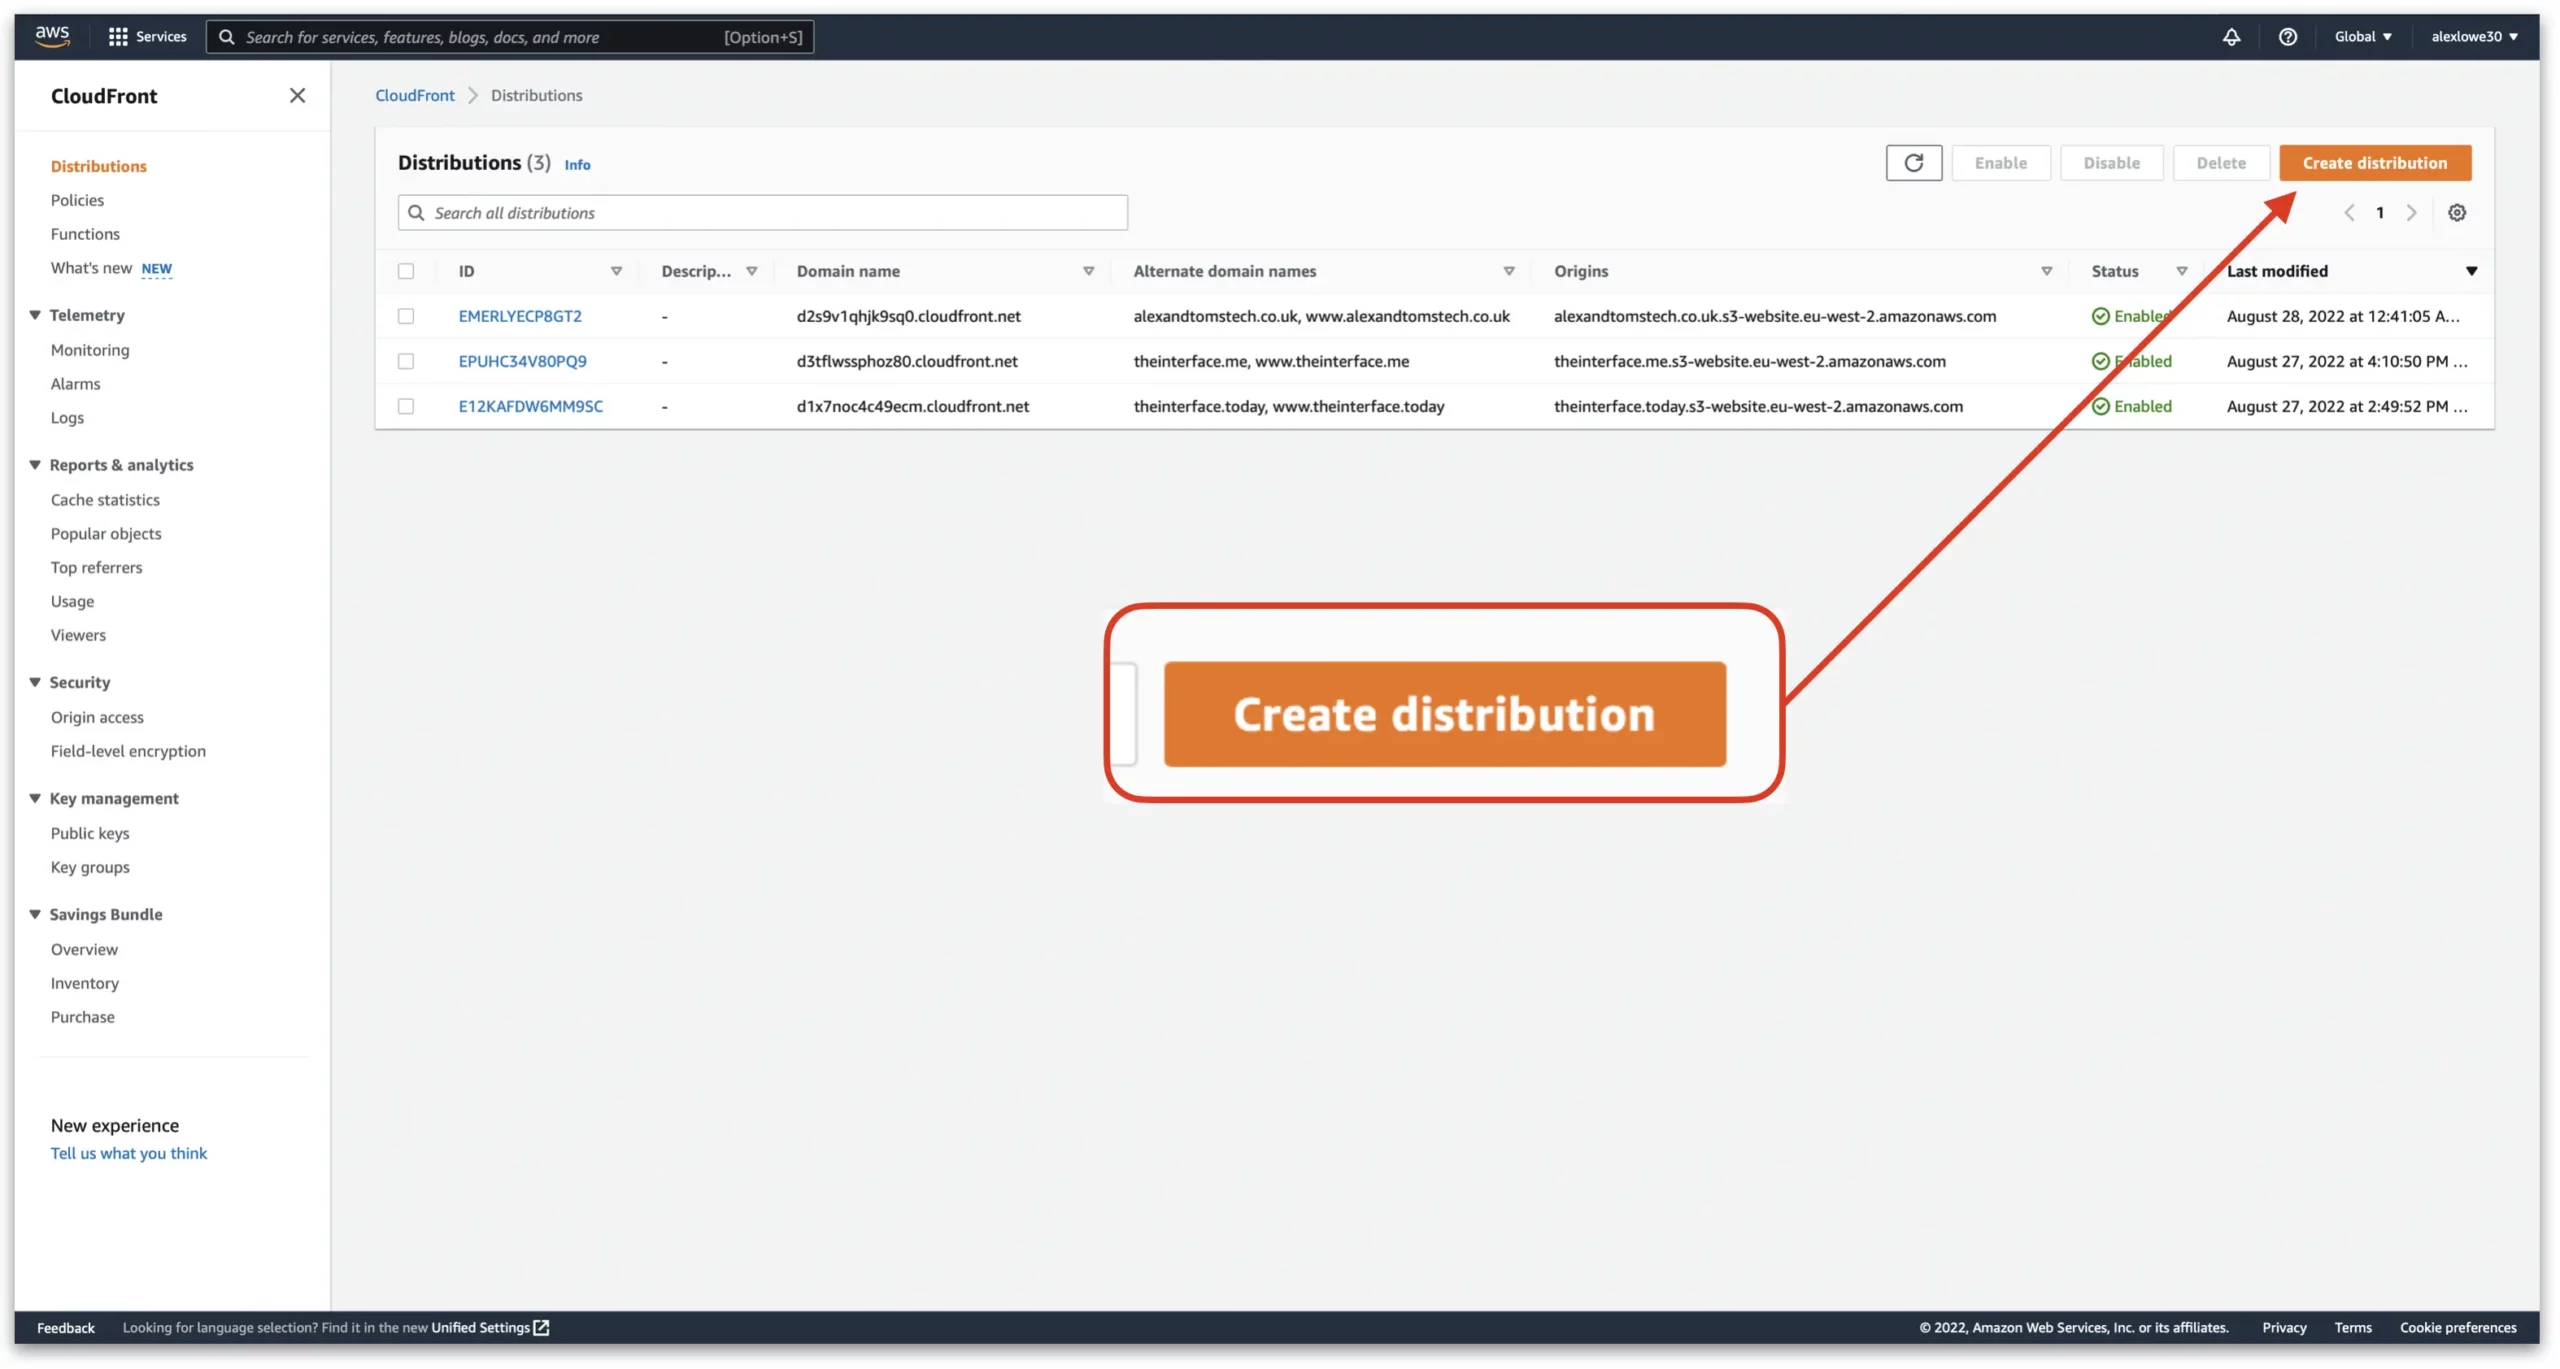
Next, we need to choose an origin domain for this distribution. This box can be pre-populated from the dropdown, but we need to enter in our own domain name. In here, we need to enter in the http://DOMAIN.COM.s3-website.eu-west-3.amazonaws.com we got from earlier in the guide.
The format for the drop will be “DOMAIN.COM.s3.eu-west-2.amazonaws.com”, this is the API format and will not work if we use this.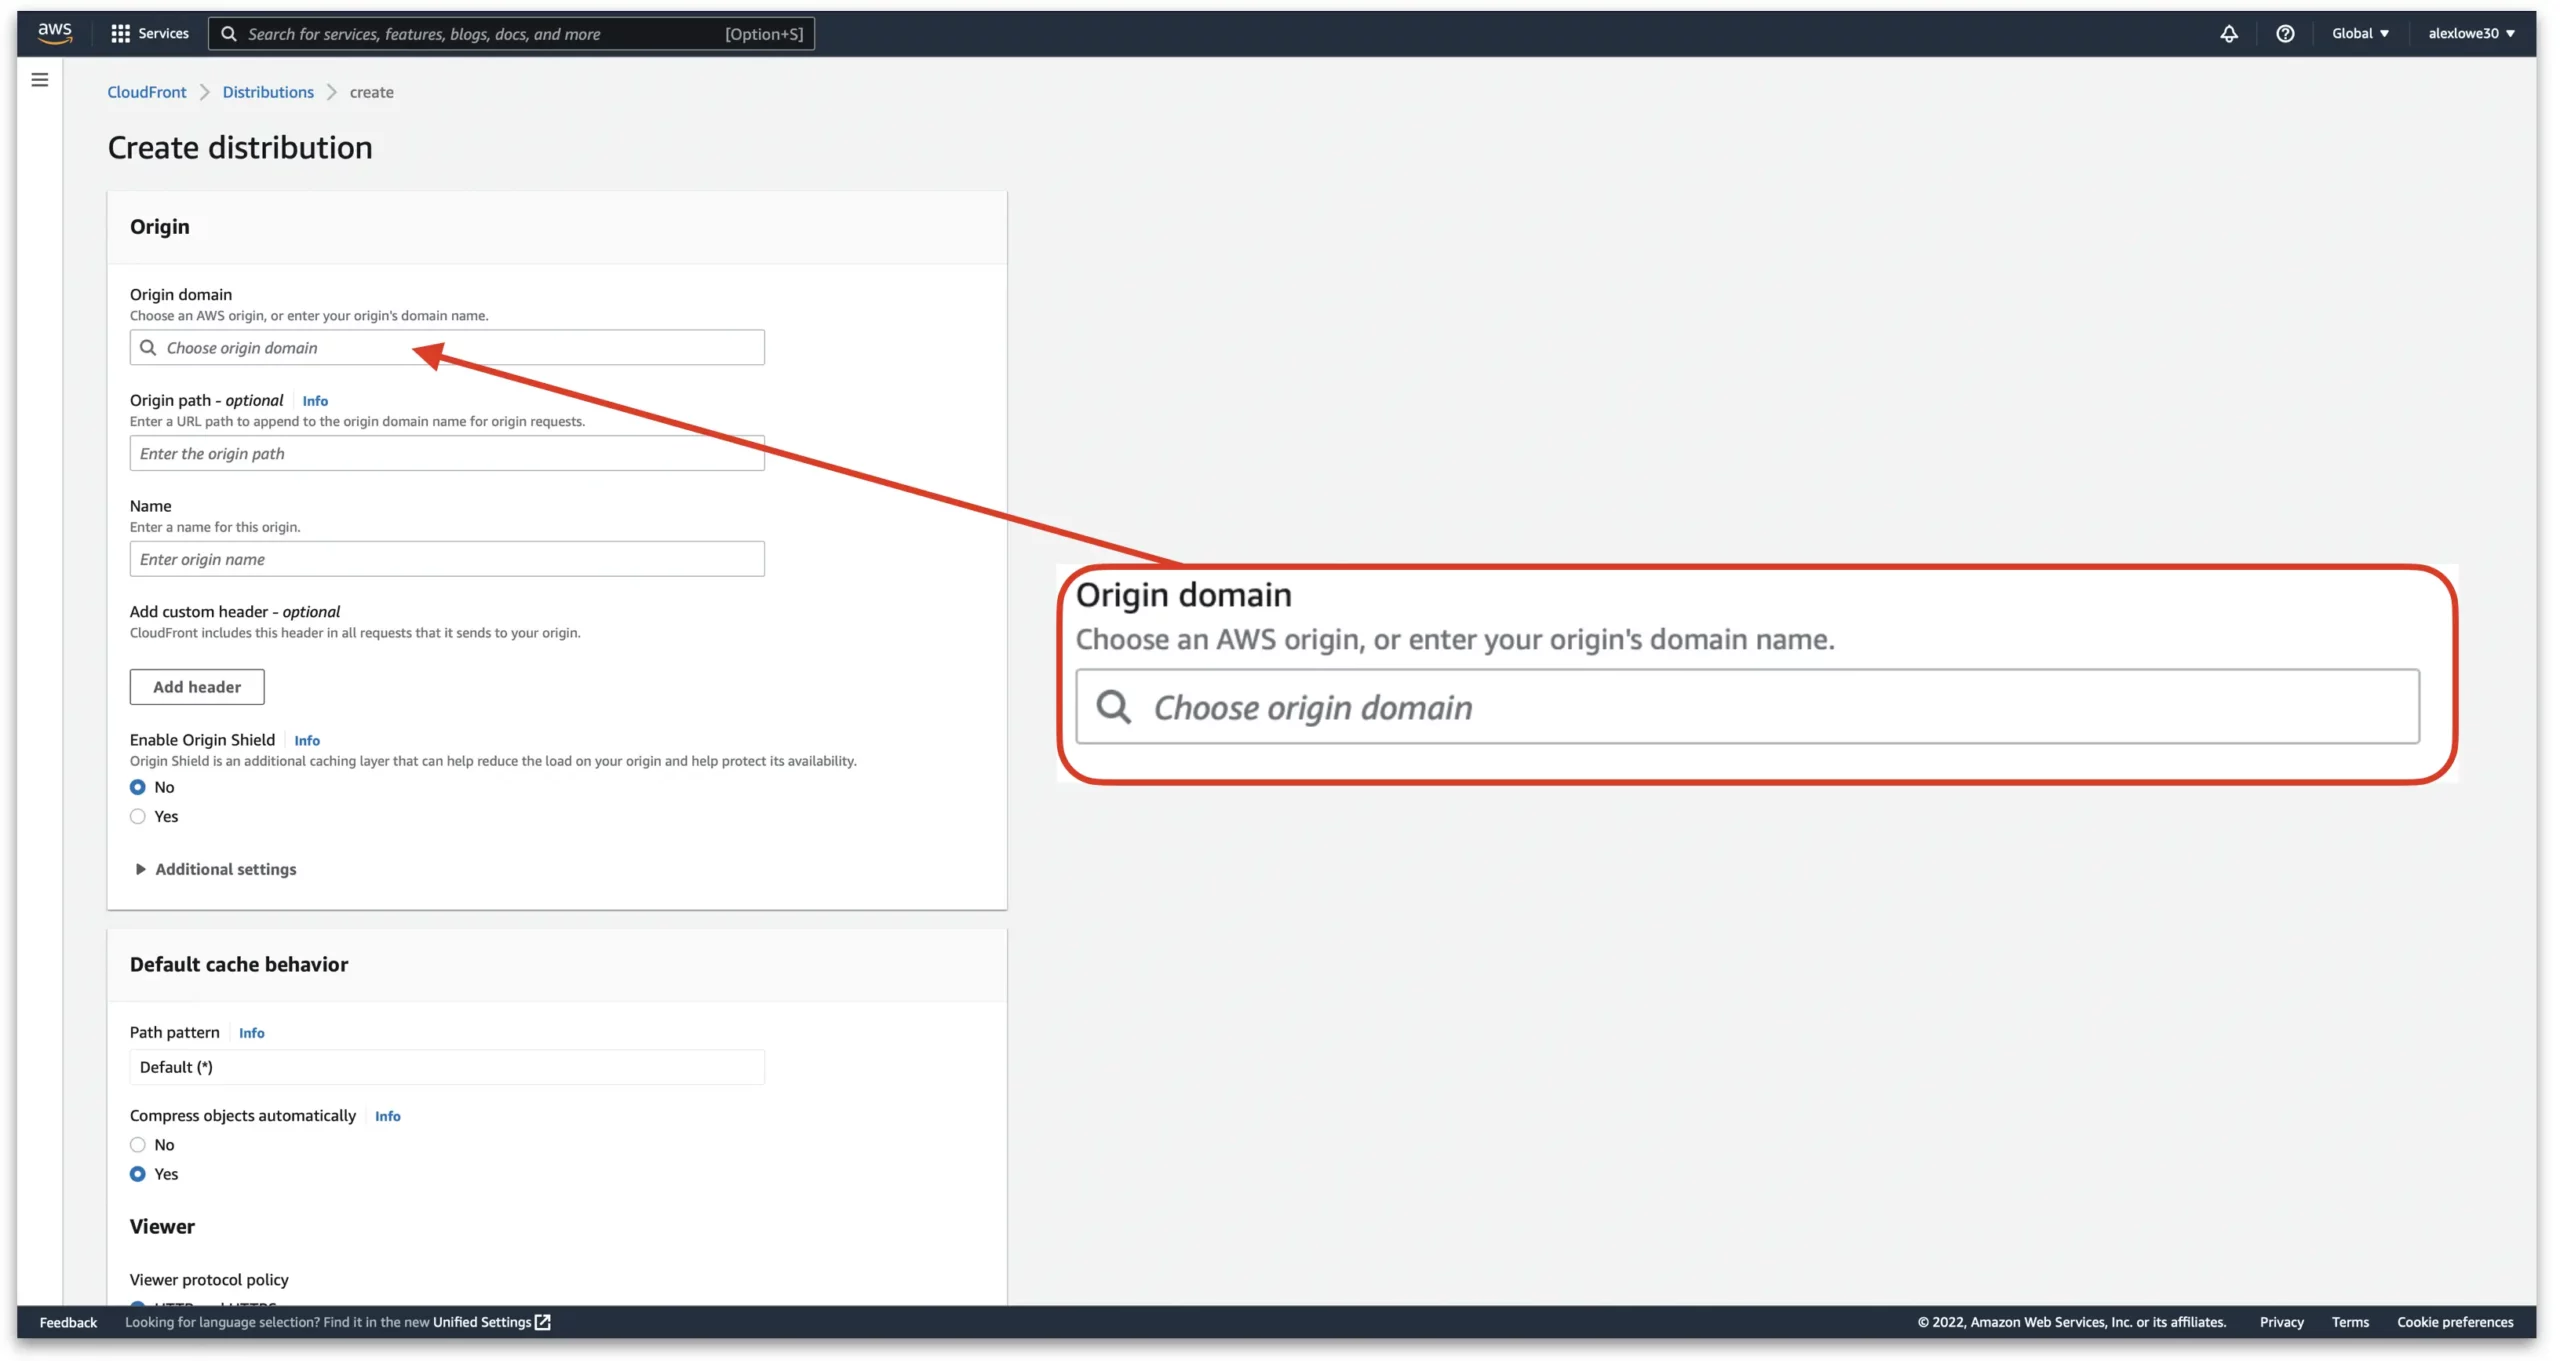
Next, set the “Viewer protocol policy” to “Redirect HTTP to HTTPS.” This will tell CloudFront to forward any HTTP requests to HTTPS.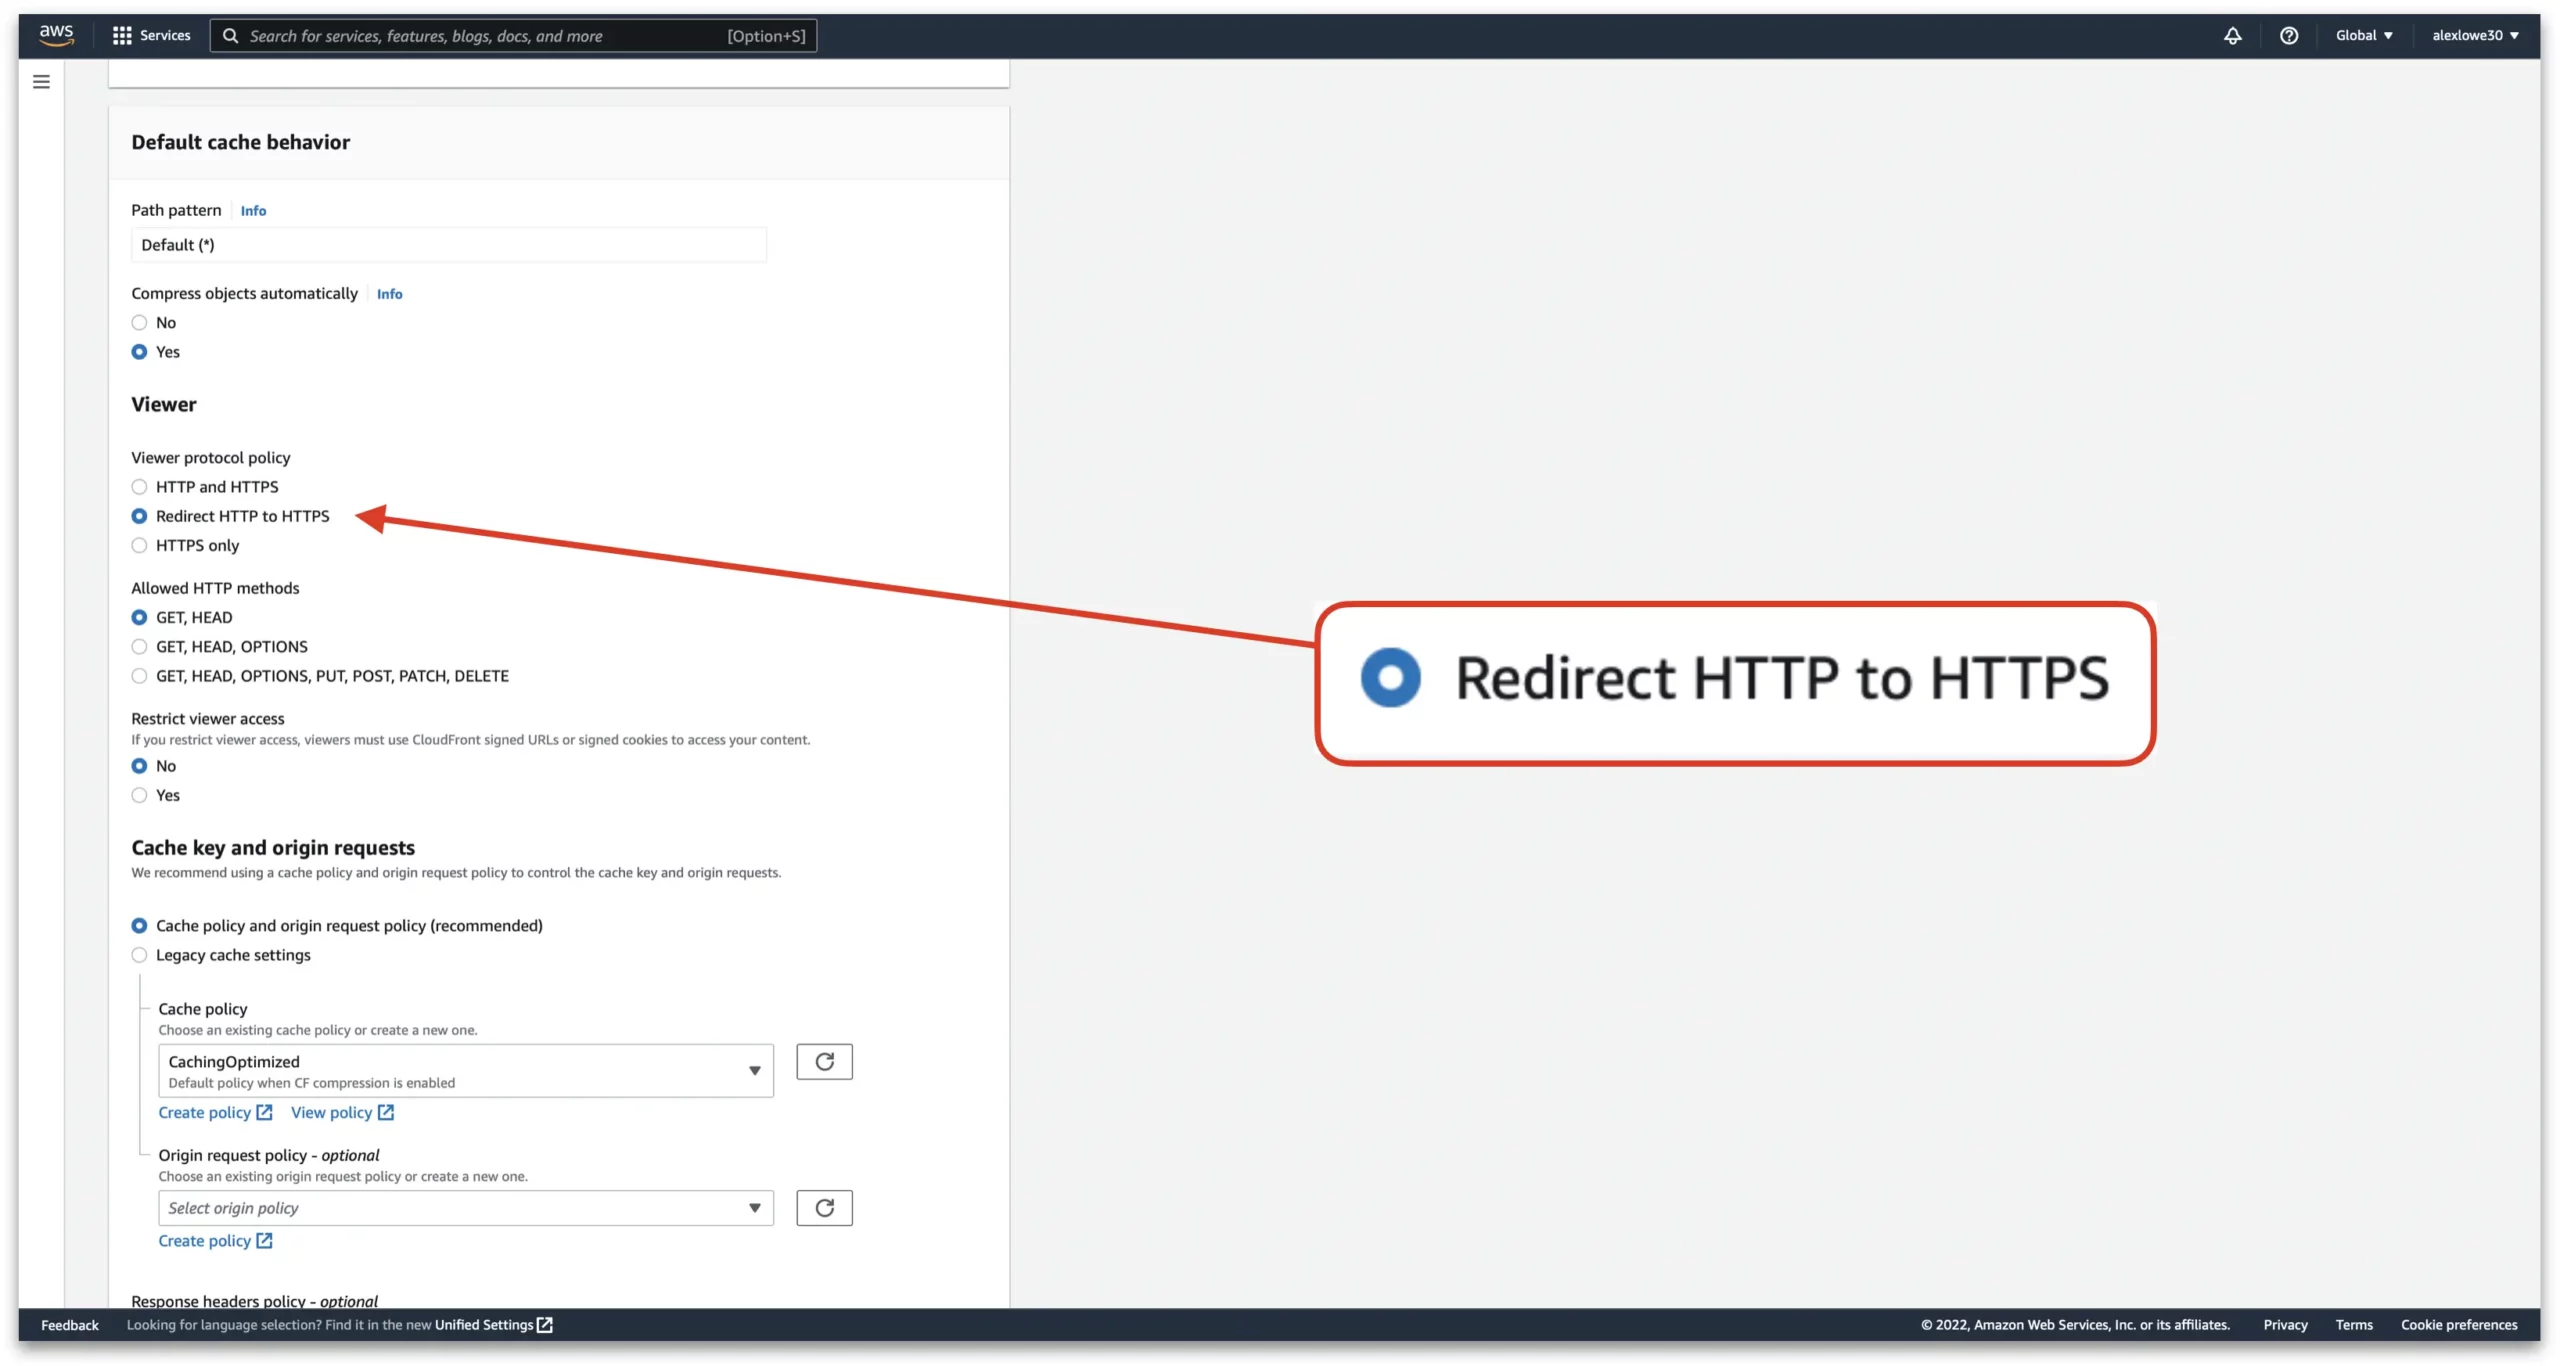
Before the next step of registering a new HTTPS certificate, the alternative domains need to be entered into the distribution. To do this scroll down to “Alternate domain name (CNAME) – optional”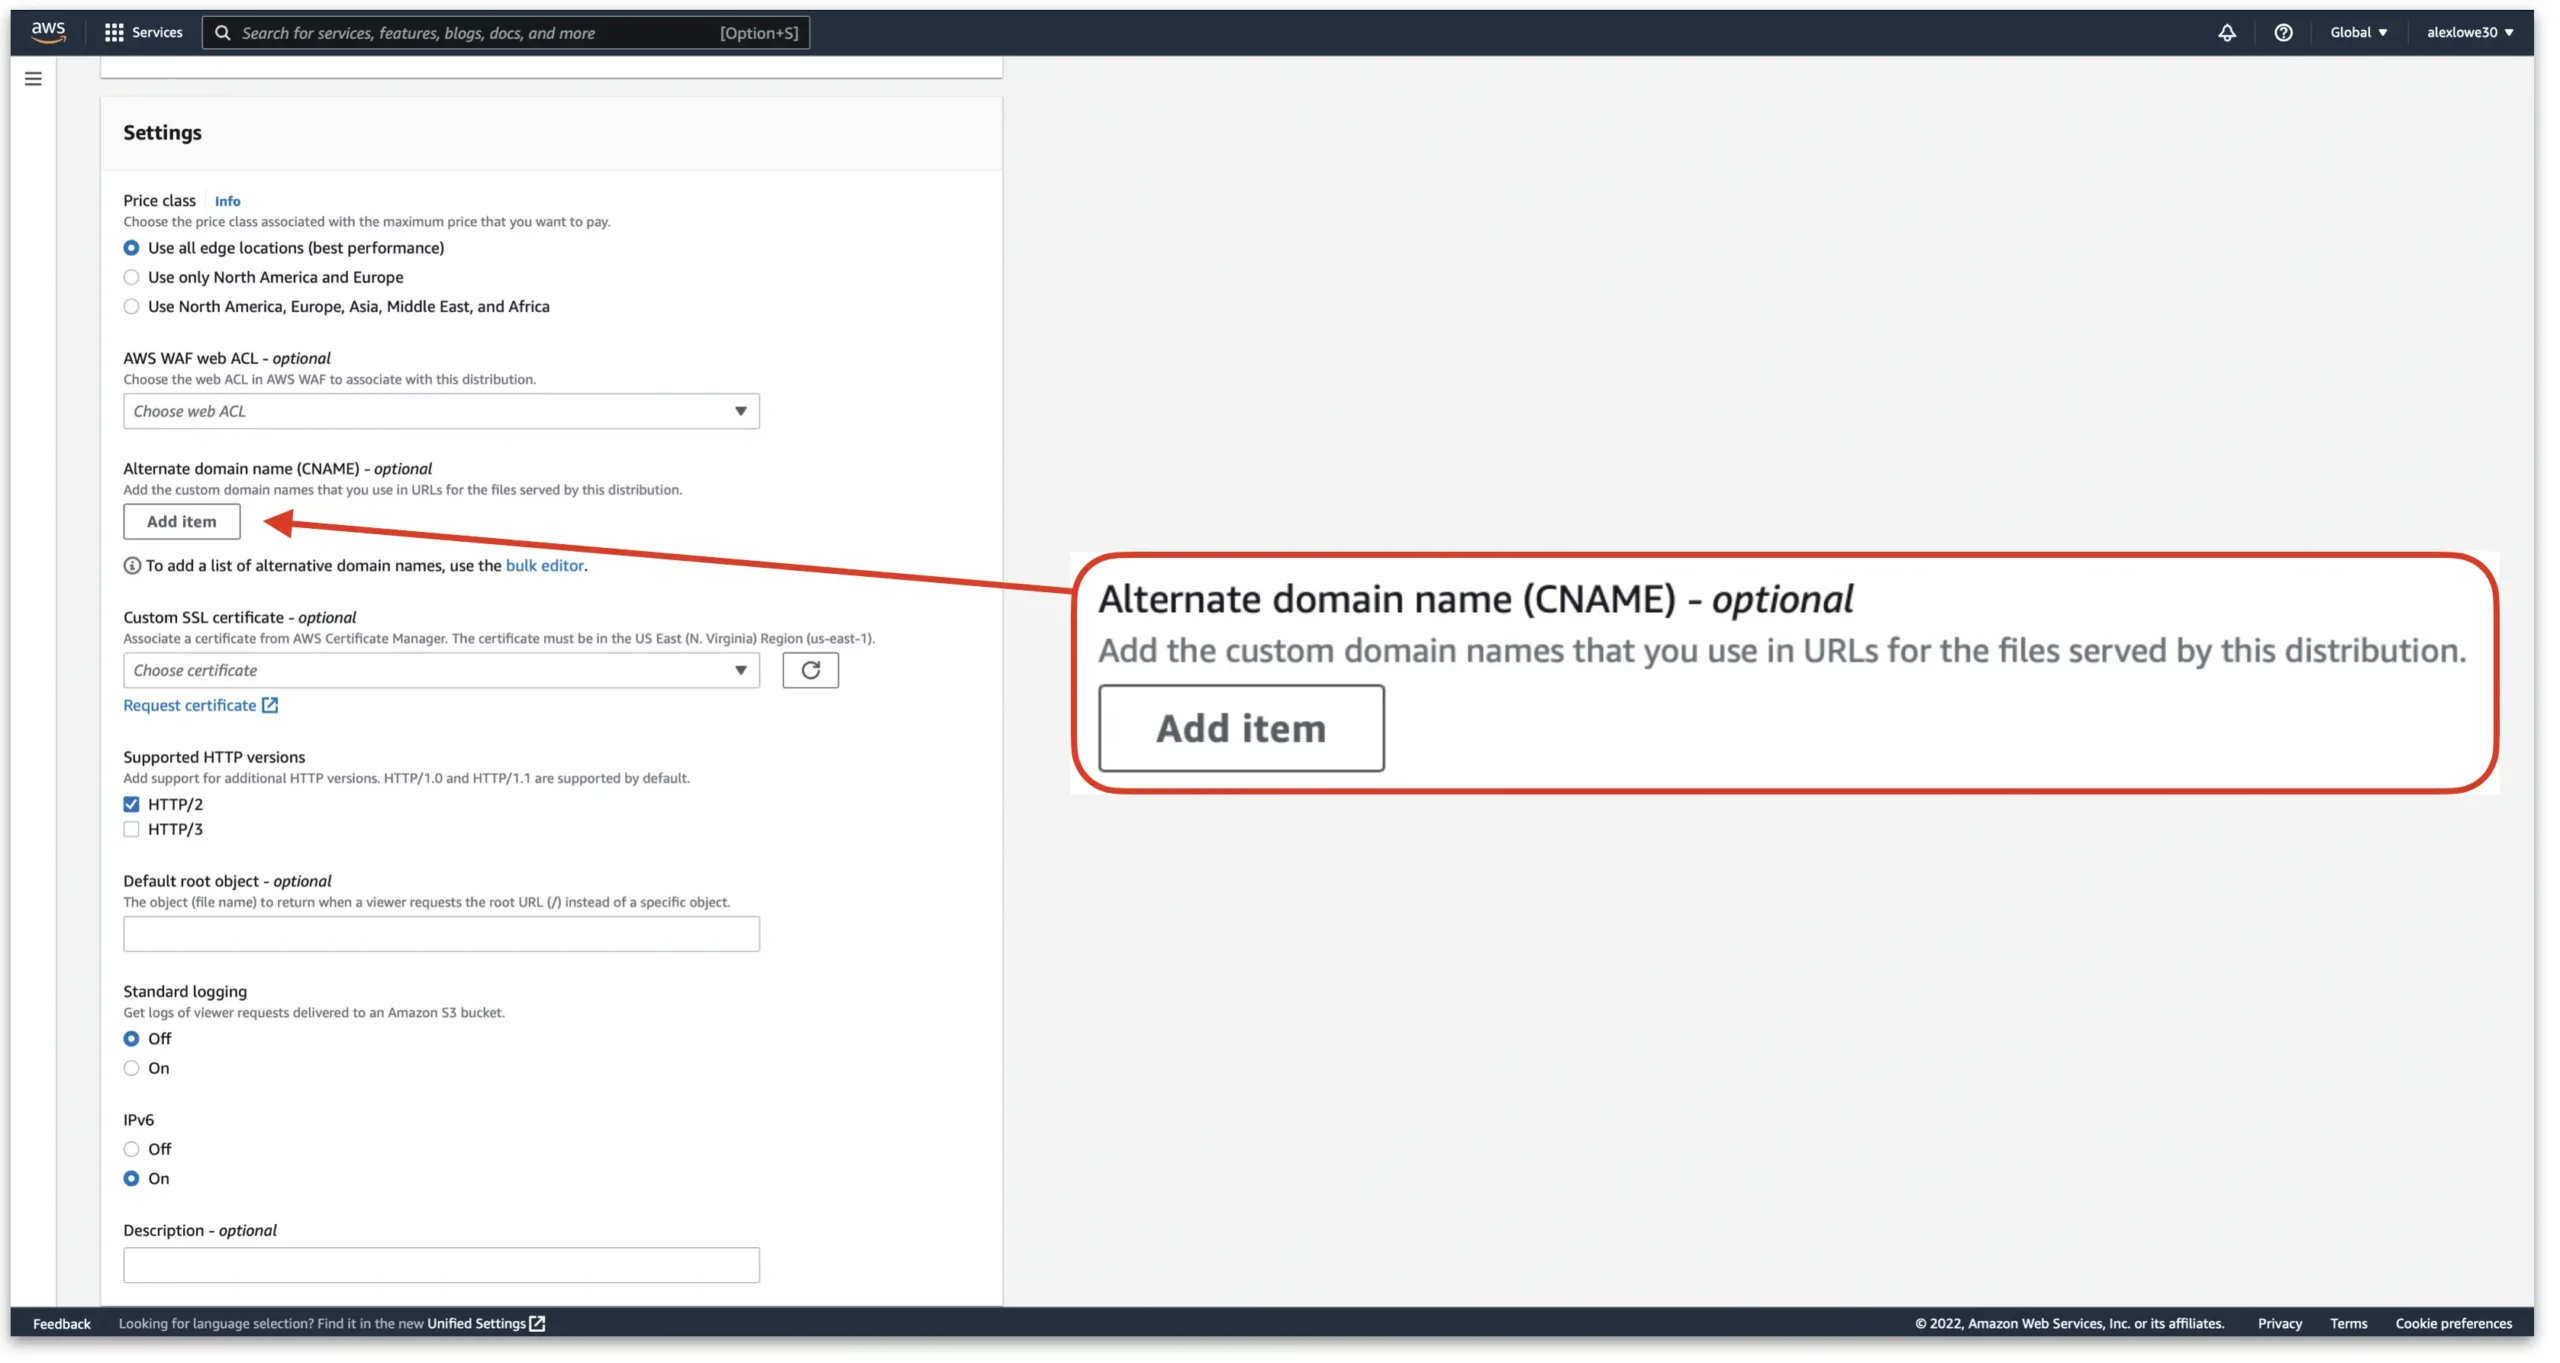
Once done, you should have entered in the root domain and the www version of the domain.
Register a certificate for HTTPS on CloudFront
Next, for HTTPS to property work we need to register a new certificate. Luckily, with CloudFront this is fairly easy.
First, from the same “Create distribution” page, click on “Request certificate”

Once clicked, the AWS Certificate Manager will open up and we can proceed to request a public certificate.
First, enter in the full qualified root domain for the domain we are routing from. i.e example.com.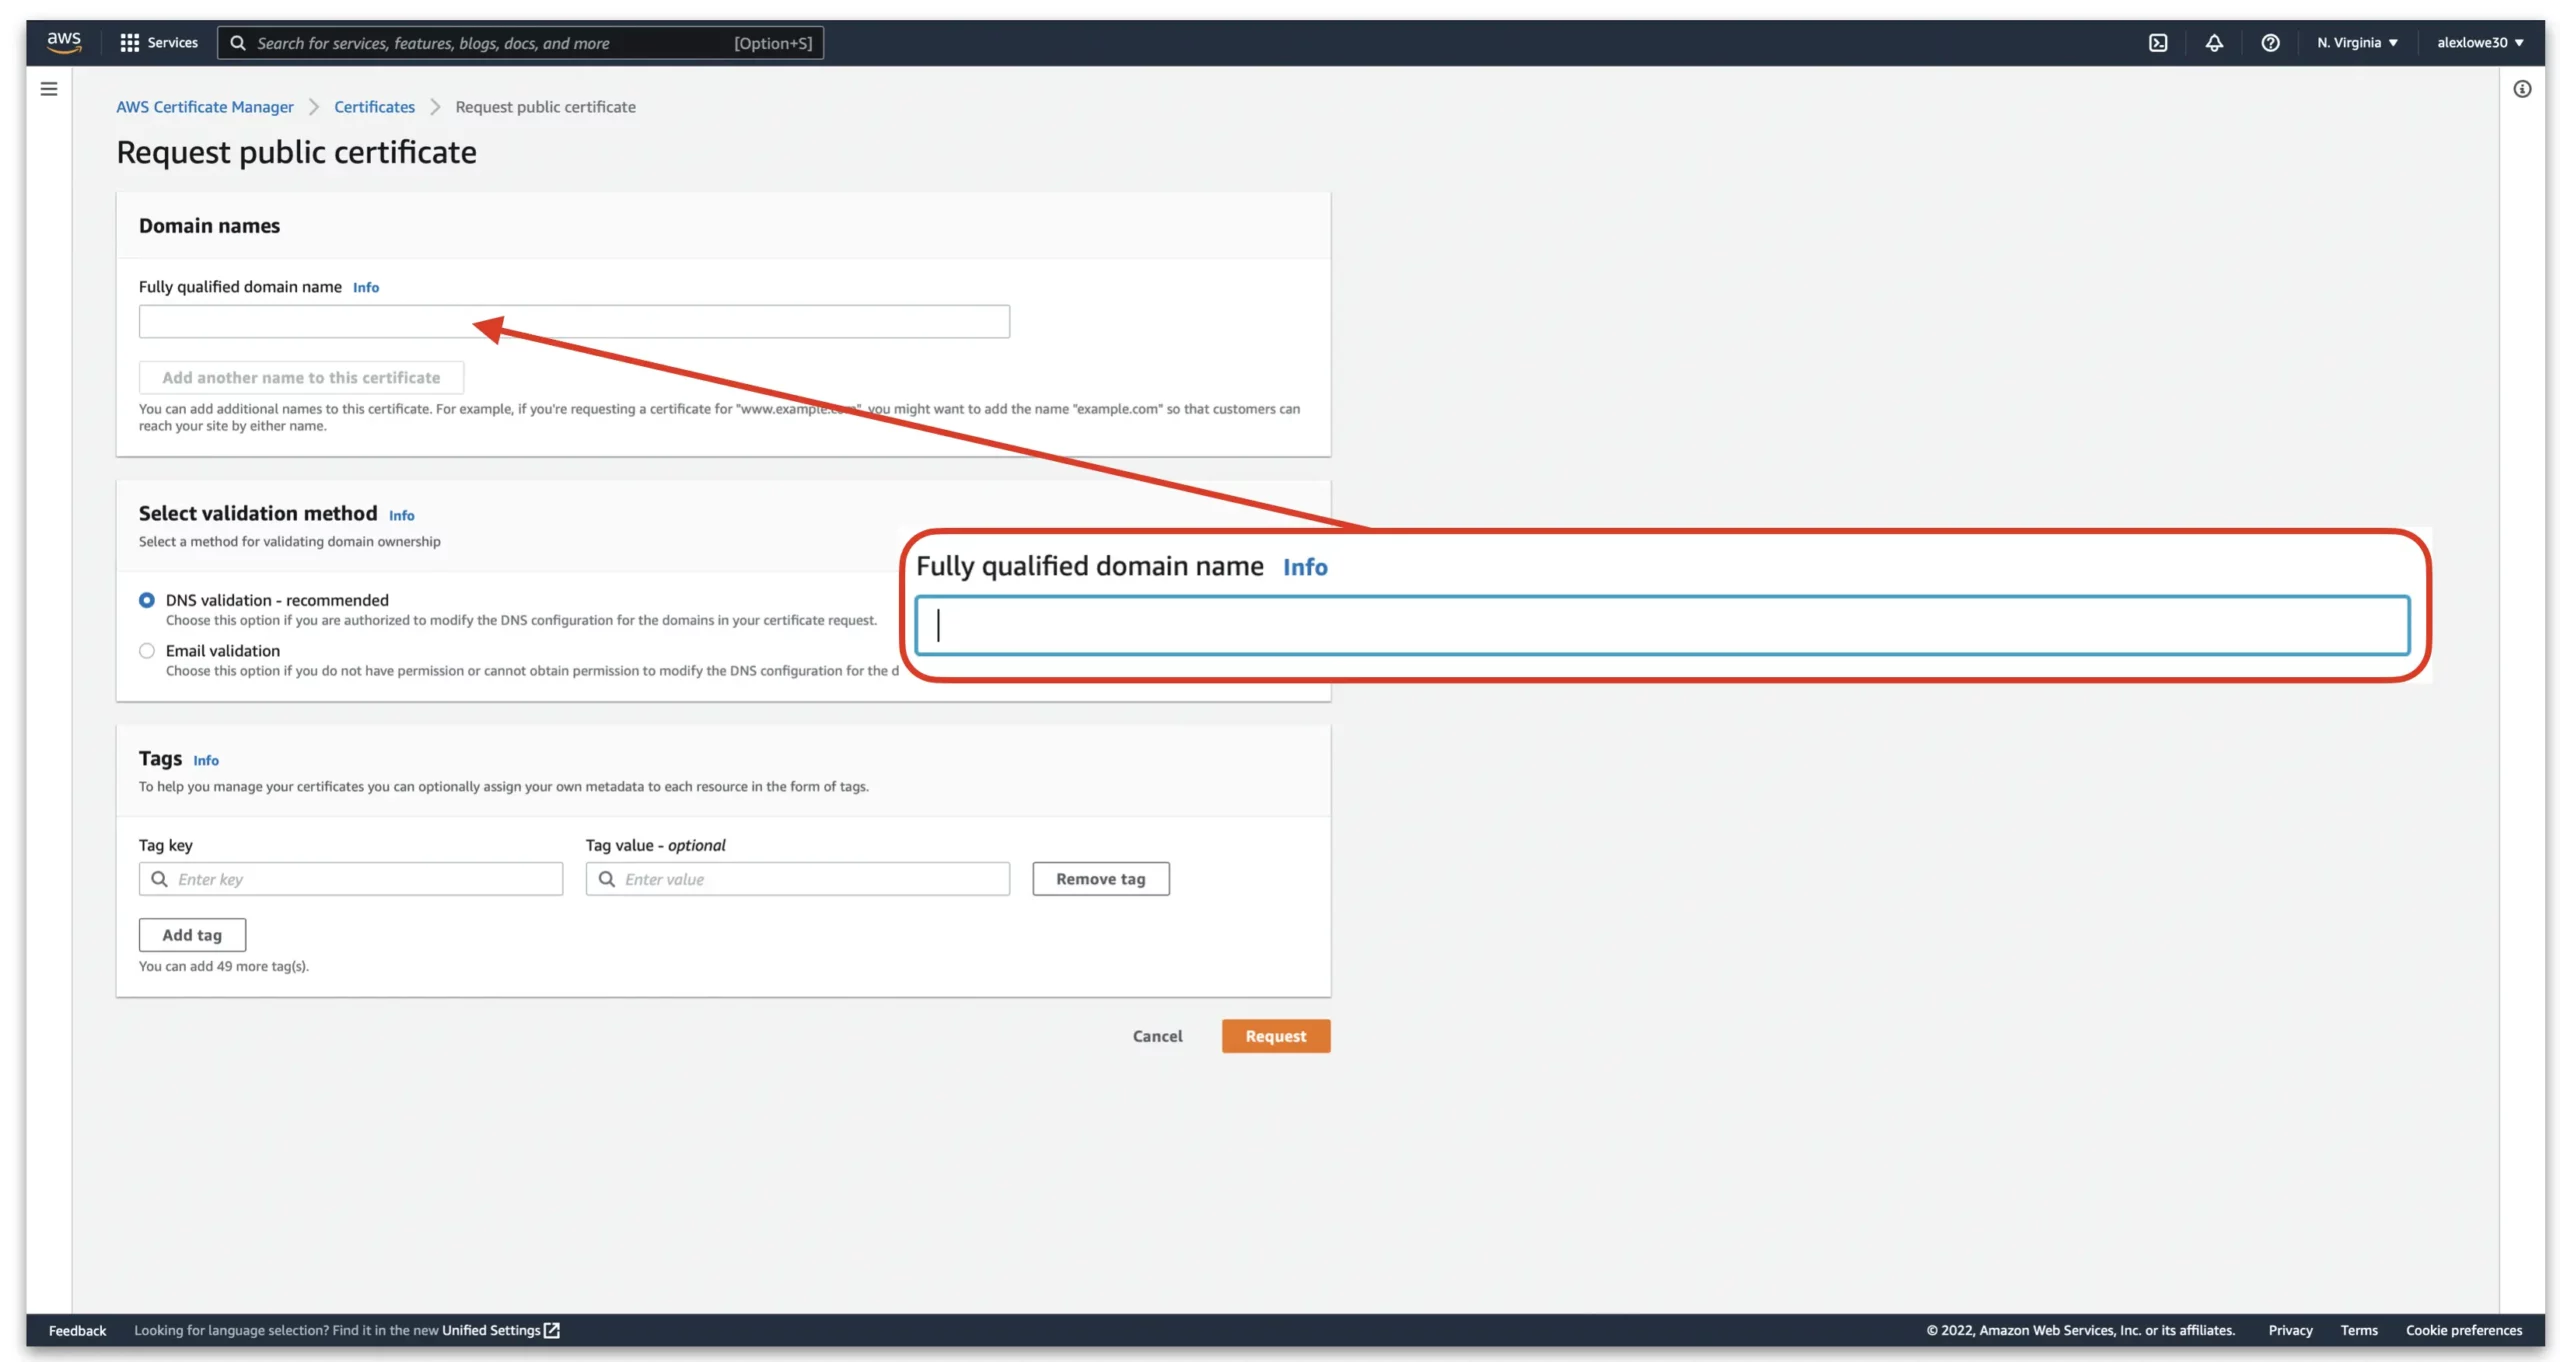
Make sure to add a second domain in the certificate for the www subdomain. Once done, click “Request”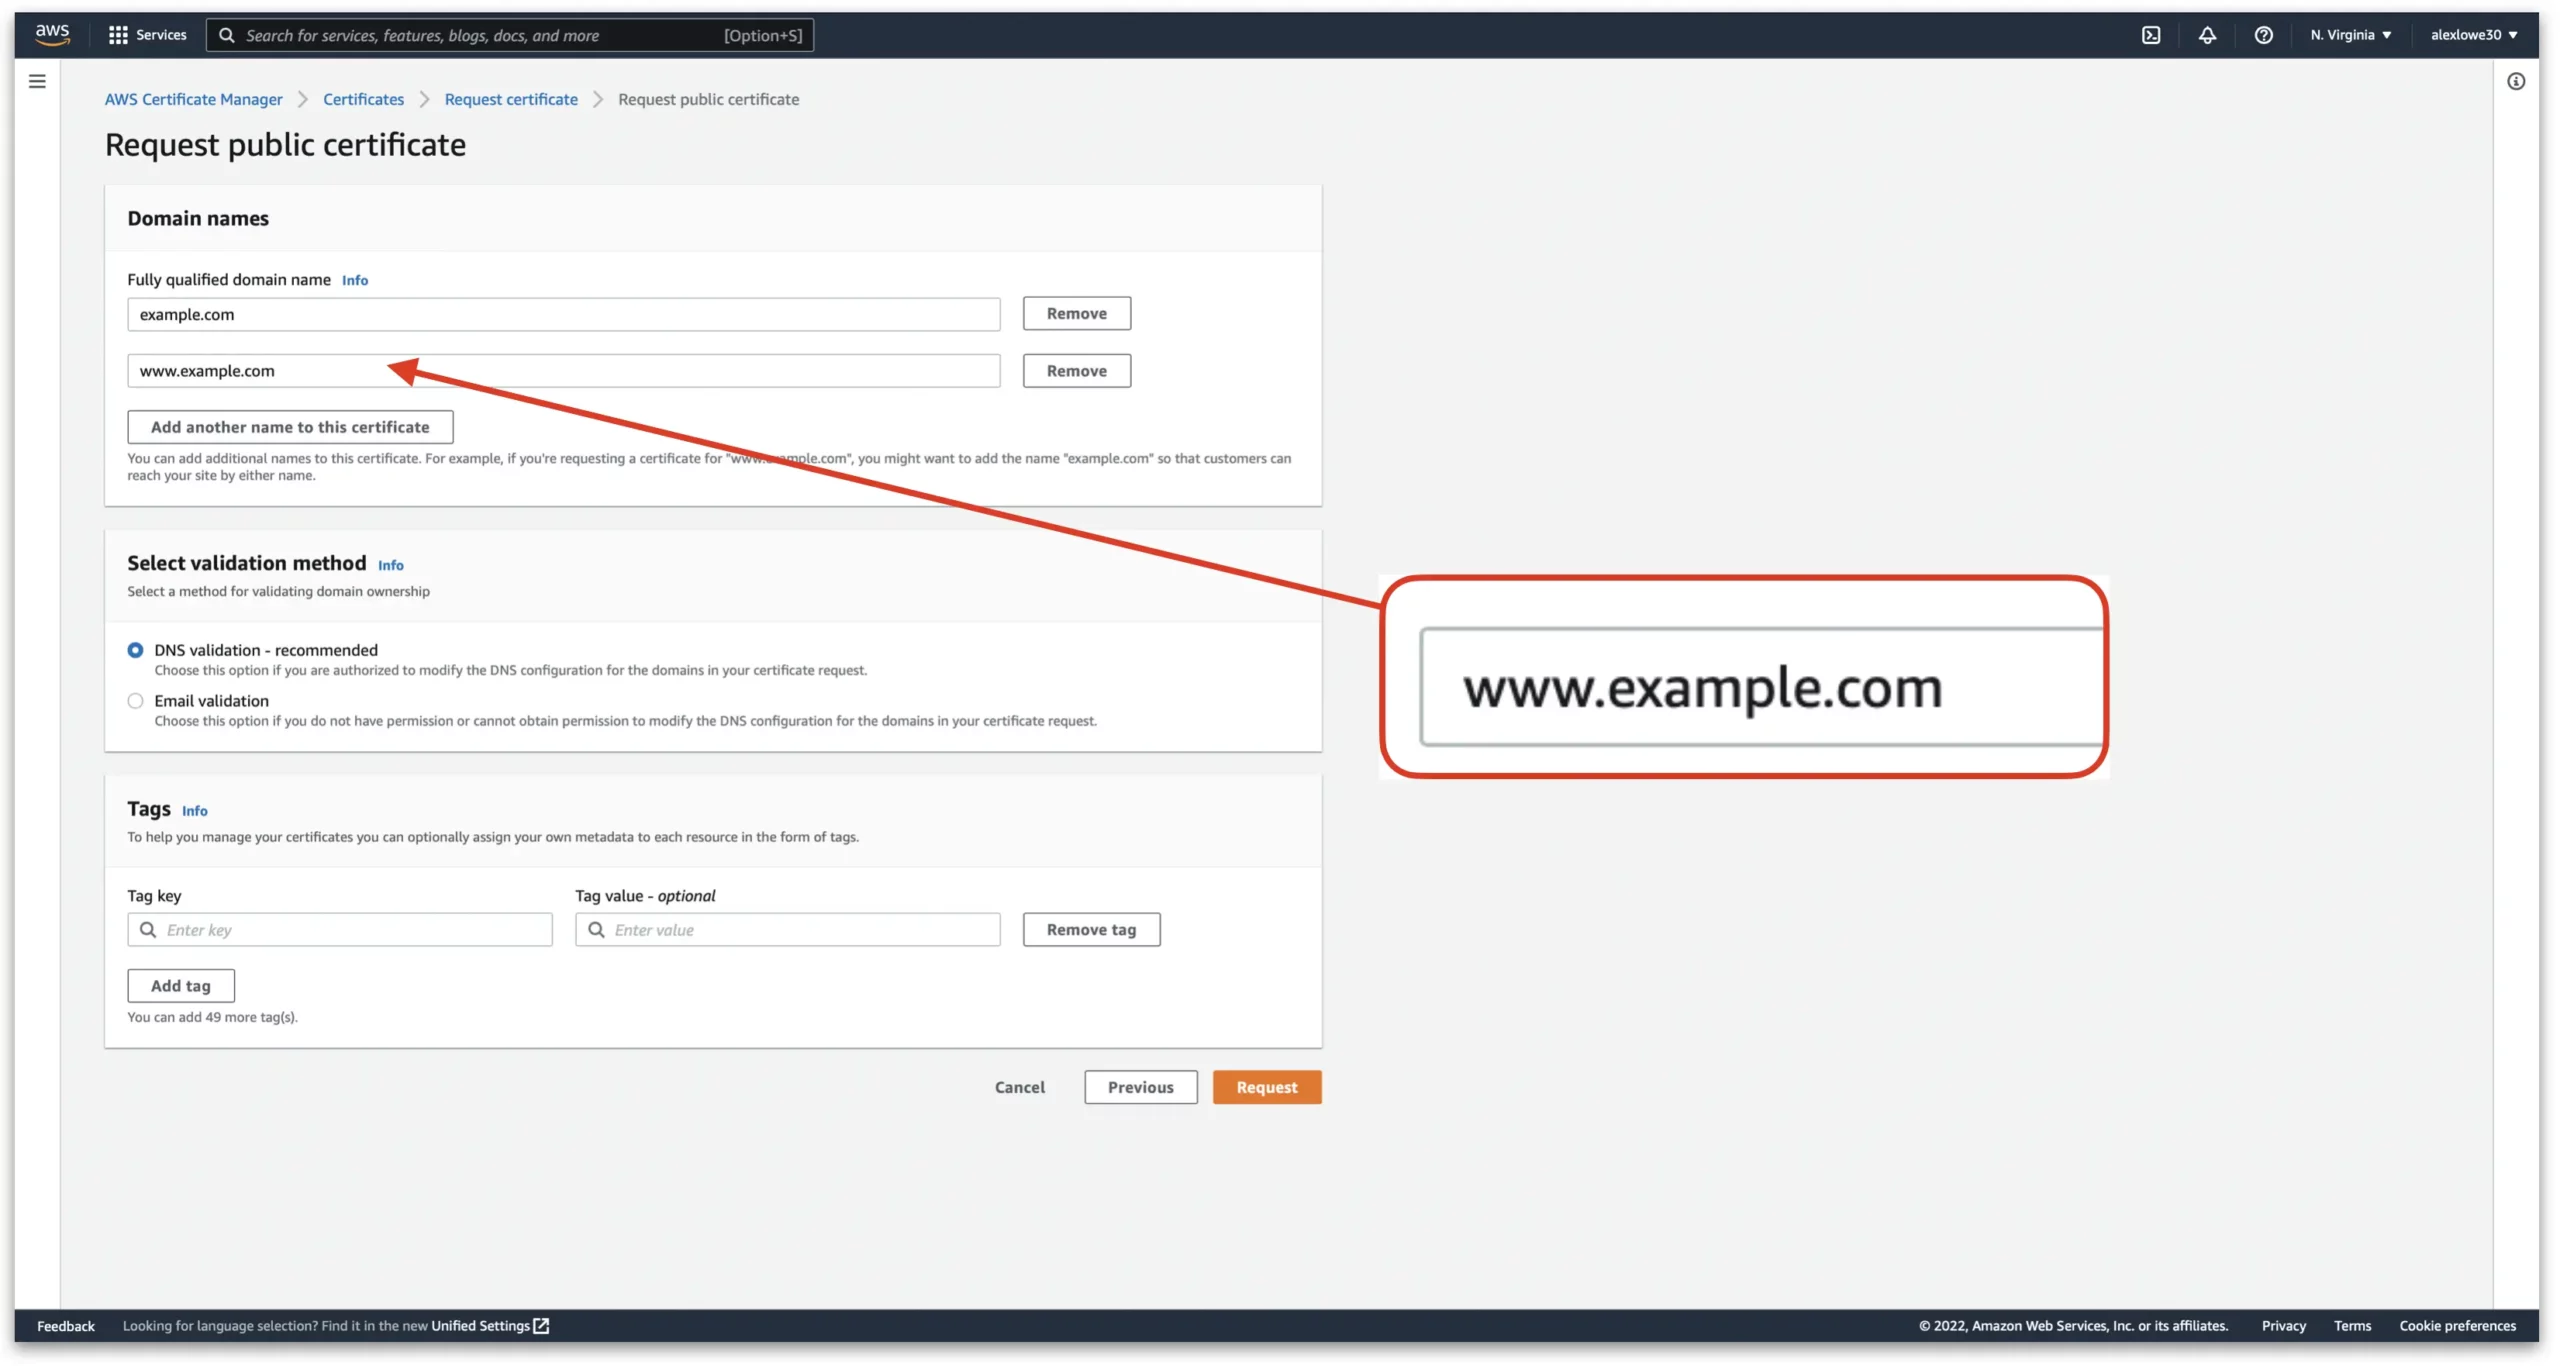
Update CNAME records for certificate
In order to get the certificate to authorise, we now need to add two CNAME records in Route 53. One for the root domain and one for the www subdomain. To do this, go to the AWS Certificate Manager and click on the new certificate we just made.
If you don’t use Route 53, then you will need to add these CNAME records manually in your domain registrar’s admin panel.
Click “Create records in Route 53”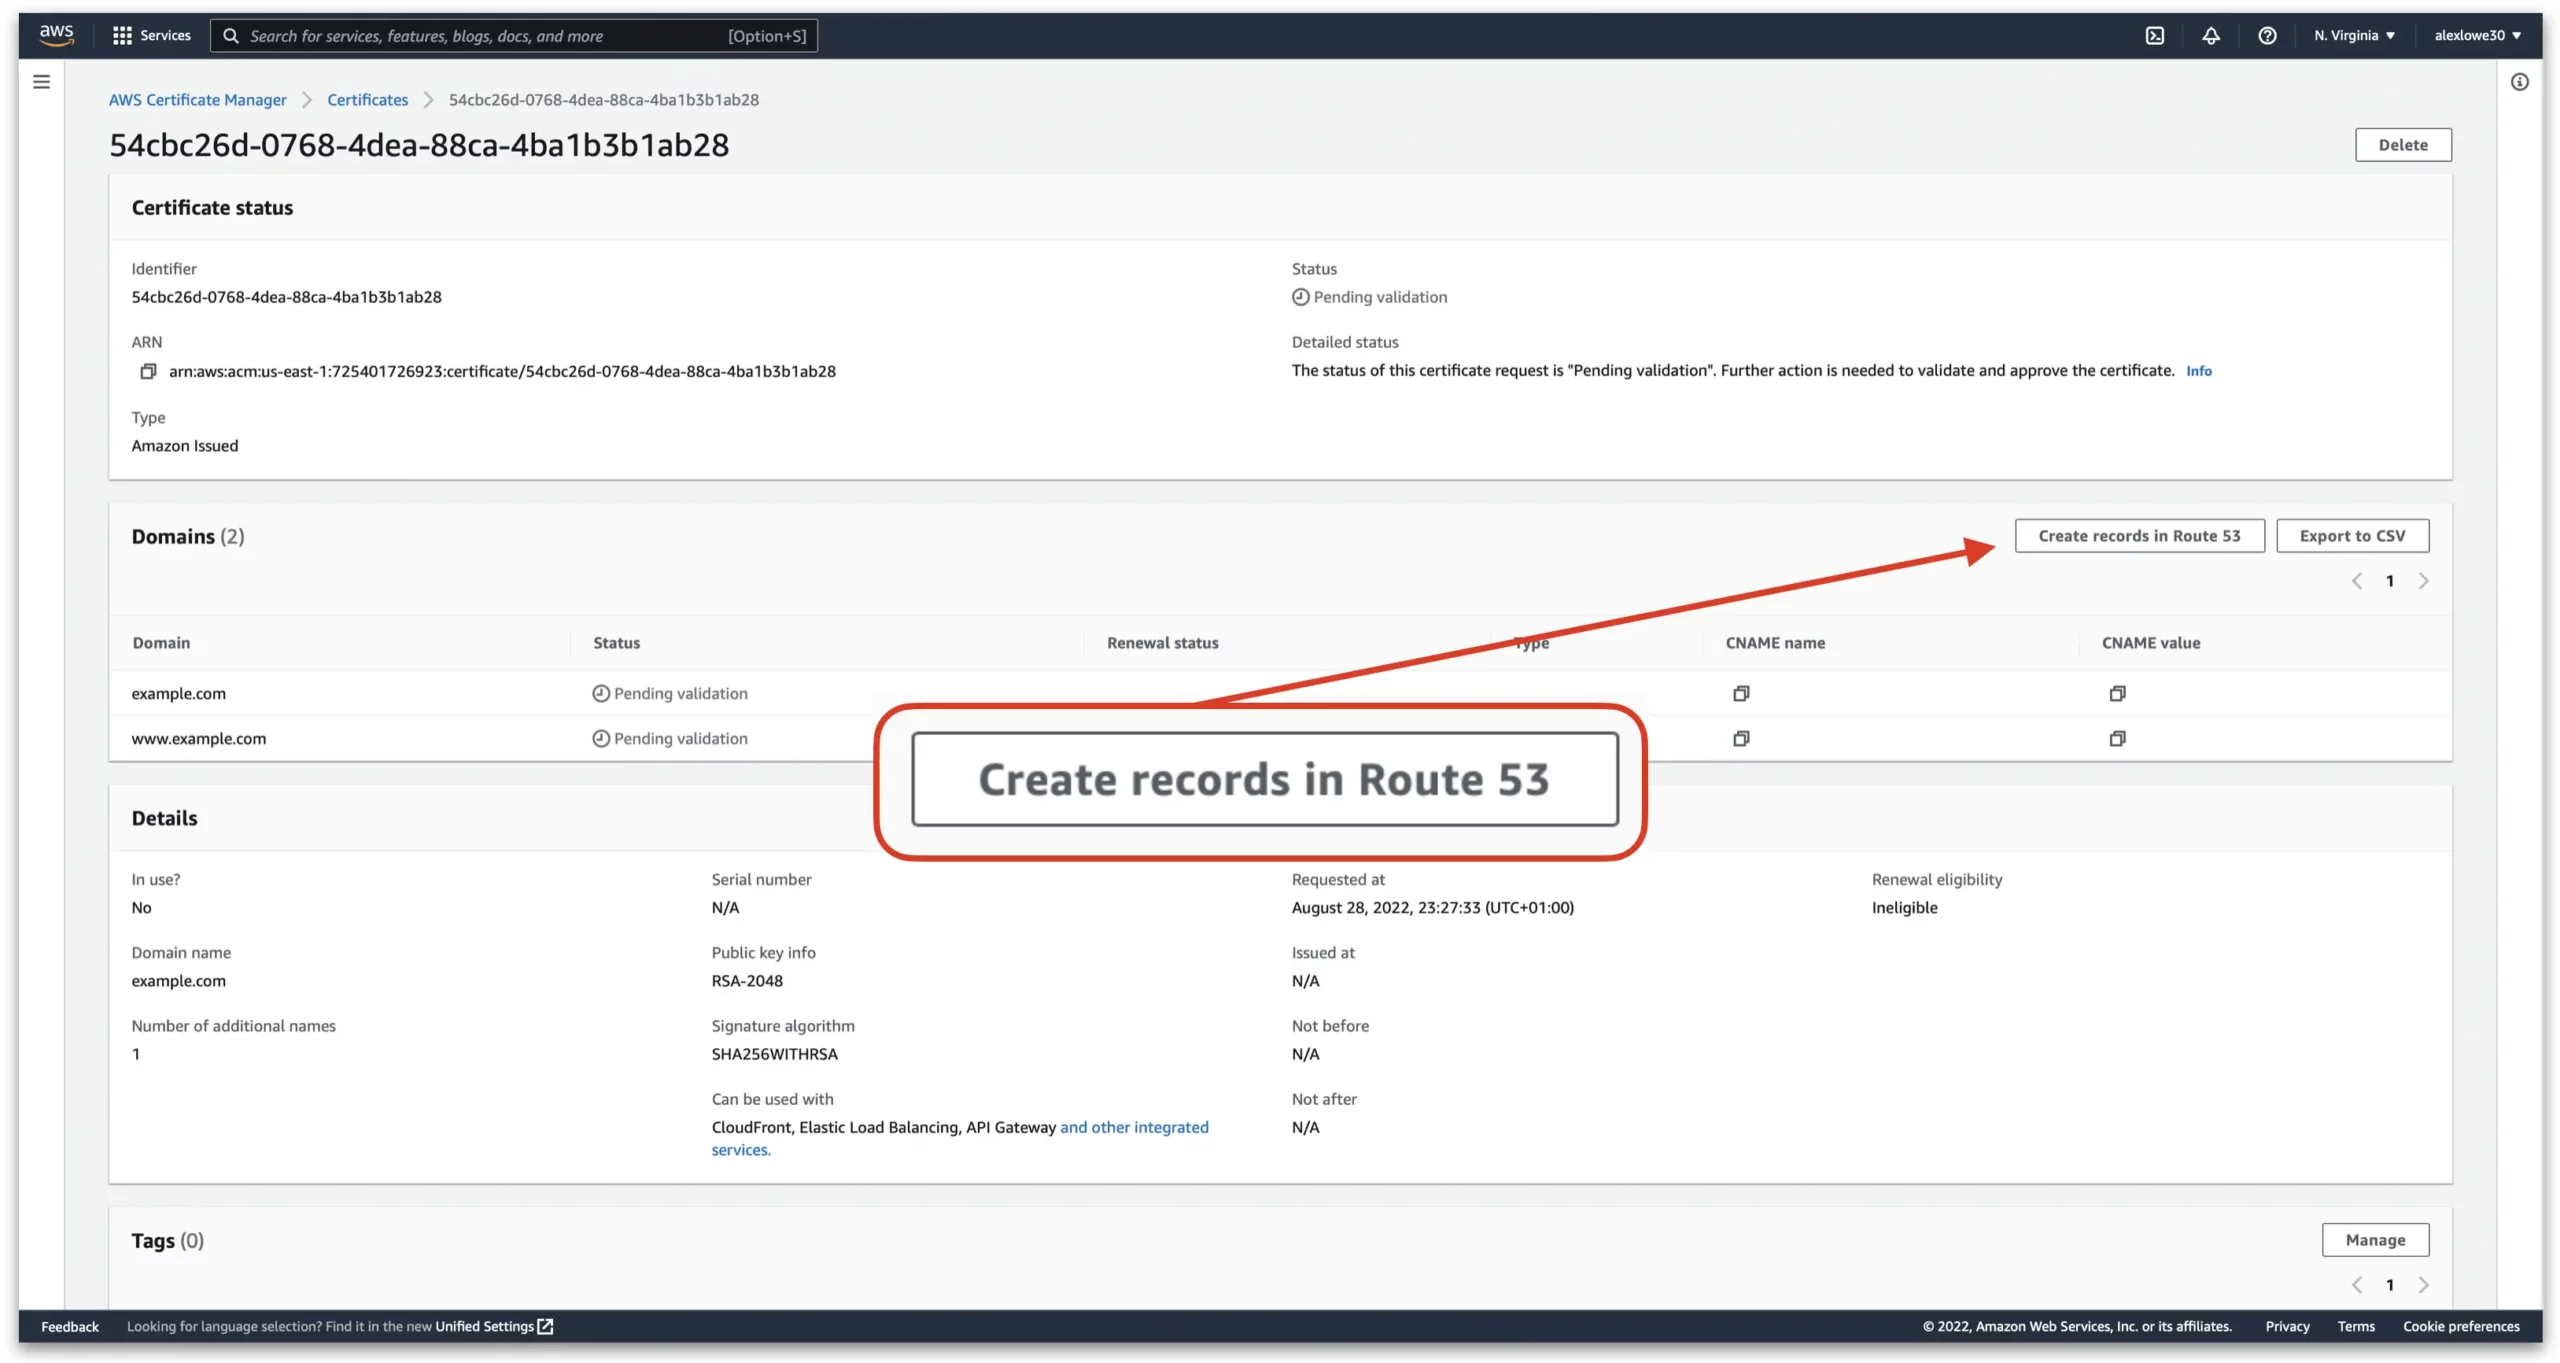
Update DNS A records for root and www domain
To do this in Route 53, follow the next steps. If you don’t use Route 53, then you will need to add these A records manually in your domain registrar’s admin panel.
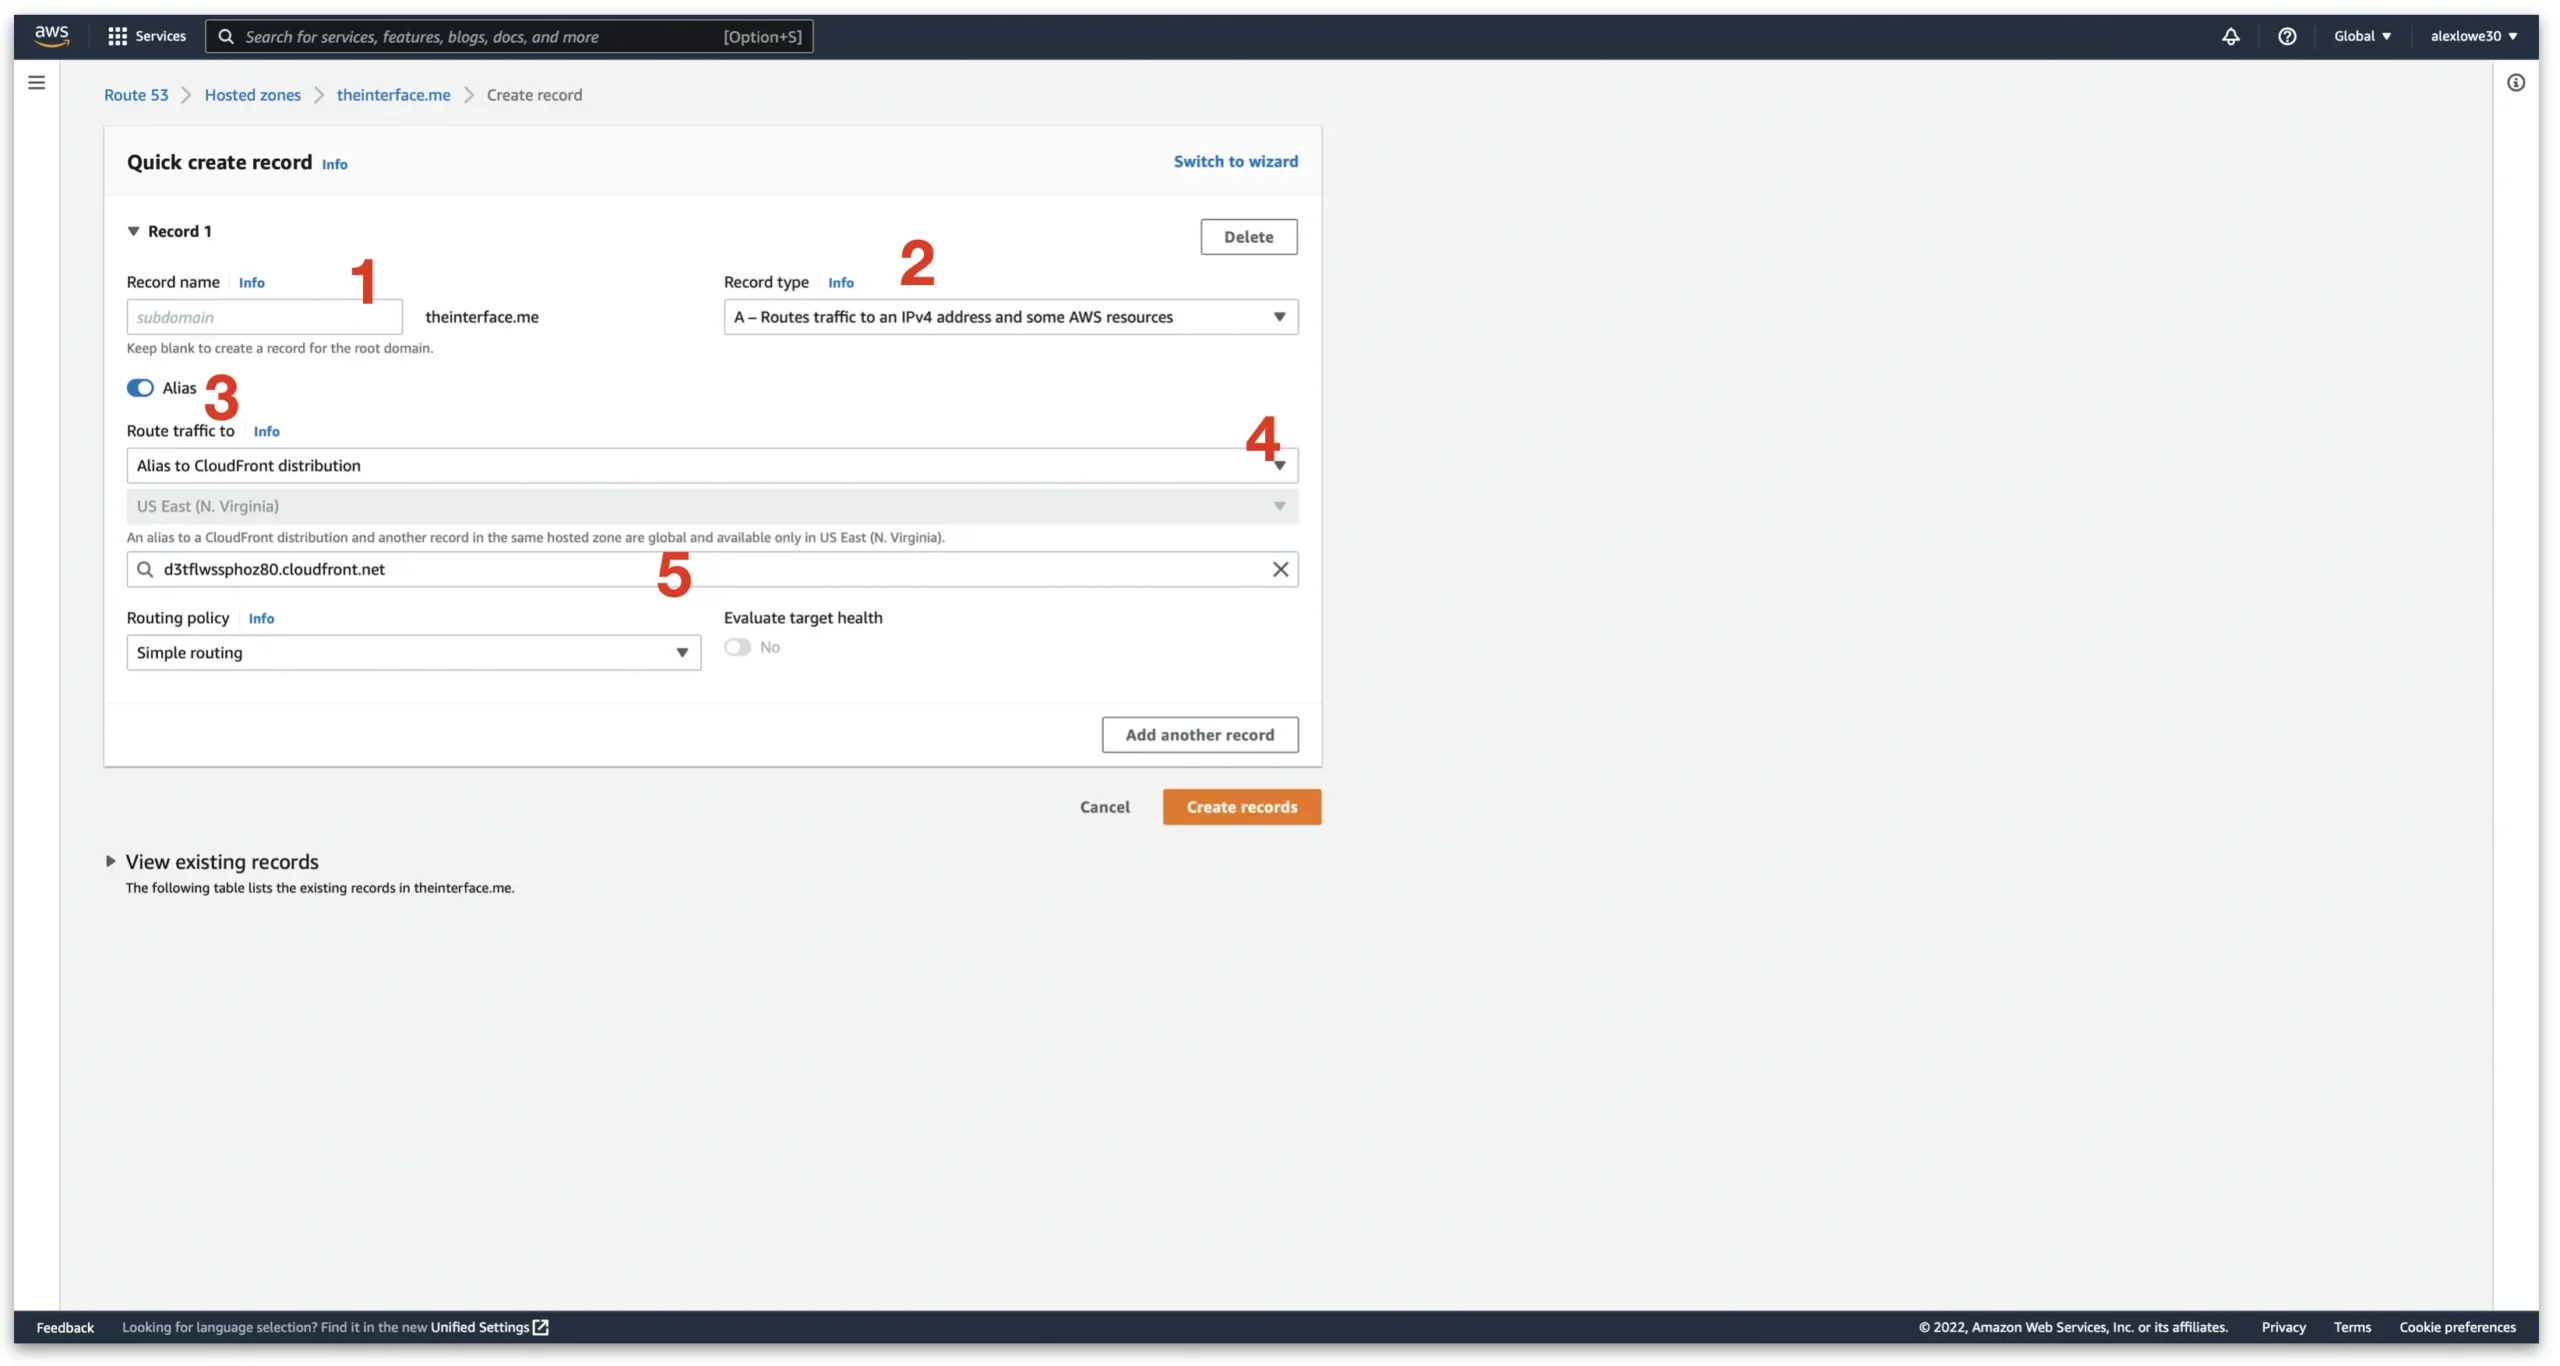
First, log back into Route 53 and select the domain name we are looking to edit, then click “Create Record”
- Leave the subdomain blank
- Set “Record Type” as A record
- Click Alias
- Select “Alias to CloudFront distribution”
- In the next dropdown, your new distribution will appear
Once done, click create records
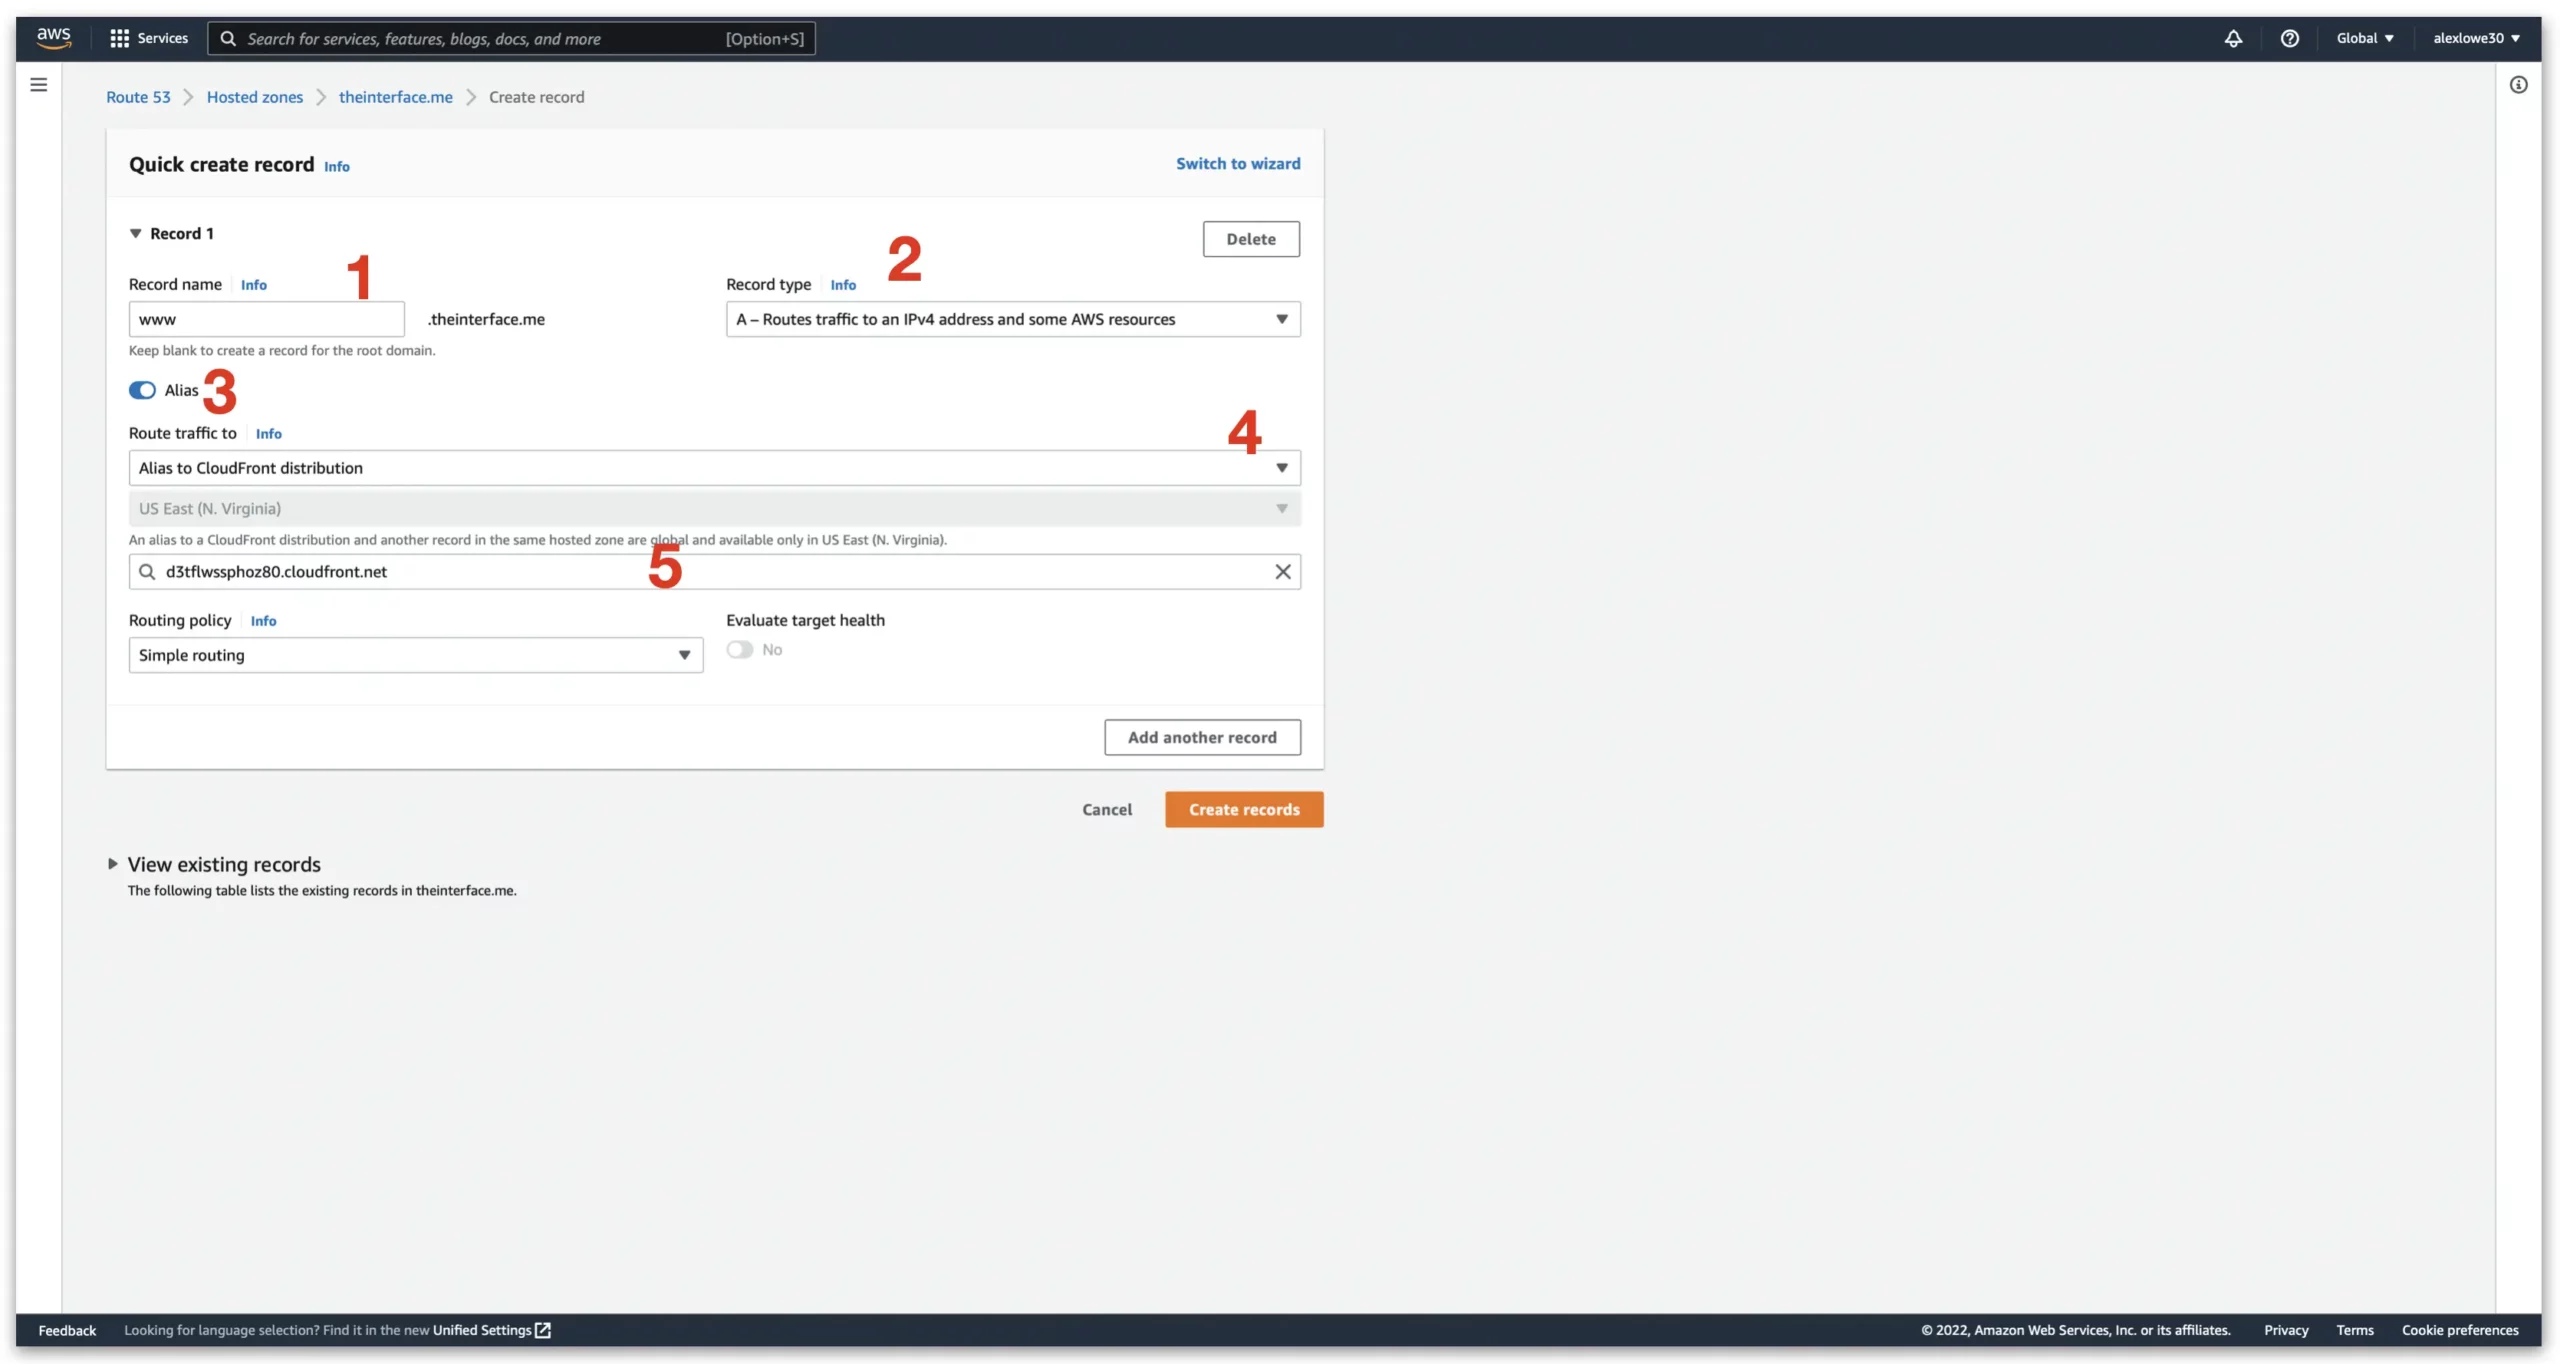
We need to make one more record for the www subdomain.
- Enter in www in the subdomain section
- Set “Record Type” as A record
- Click Alias
- Select “Alias to CloudFront distribution”
- In the next dropdown, your new distribution will appear
Once done, click create records
Testing
With all the configuration out of the way, it is now time to test that it works. Personally, I would wait a little while for the DNS records to propergatre out through the internet. Sometimes this can take around 48 hours, but you can use something like dns.checker.org to check if it is getting there.
Best way to check is go to http://DOMAIN.com and see if it redirects to the original domain name at https://DOMAIN.com. Then do the same for HTTPS>HTTPS. If it doesn’t work straight away, wait some time for DNS then test again.
If you are stuck in any process, drop a comment down below and I’ll do my best to help you out with your configuration.