

Among the many utilities included in OS X, Time Machine makes managing backups for a Mac a breeze. Time Machine can be used to back up, restore and get files back on your Mac. This how to guide will walk through the process of setting up an initial back up, setting a schedule, how to restore and more.
Setting up a Time Machine backup
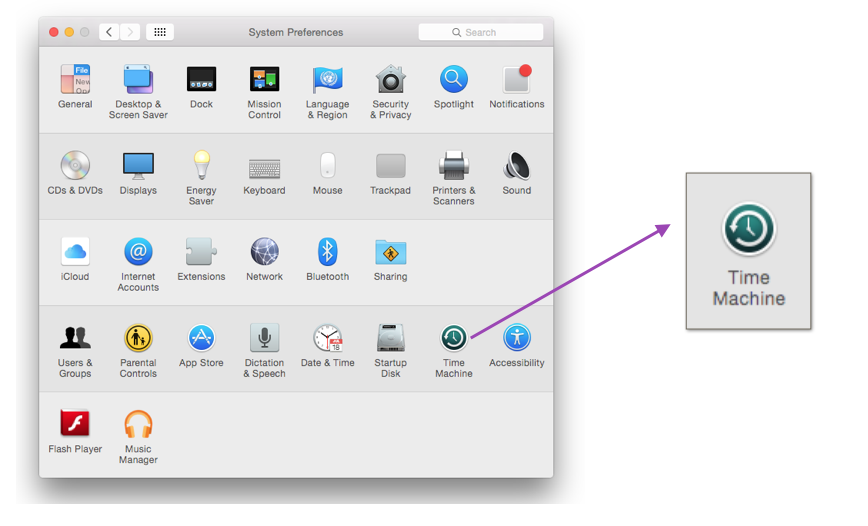
Unlike Windows, configuring a regular backup is very easy with OS X, Time Machine works with any hard drive or SSD that is connected to the Mac. On recent models Thunderbolt, USB and FireWire can be used. You can access the Time Machine settings by two different ways. By going to System Preferences or using the Time Machine icon from the menu bar.
With System Preferences
- Select System Preferences from the Dock
- Navigate to Time Machine
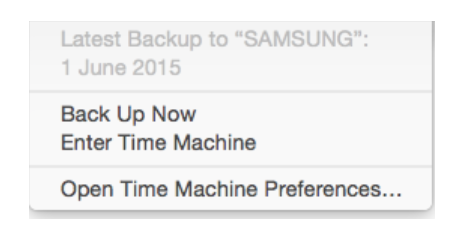
With the menu bar
- Select the Time Machine icon
- Click on Open Time Machine Preferences
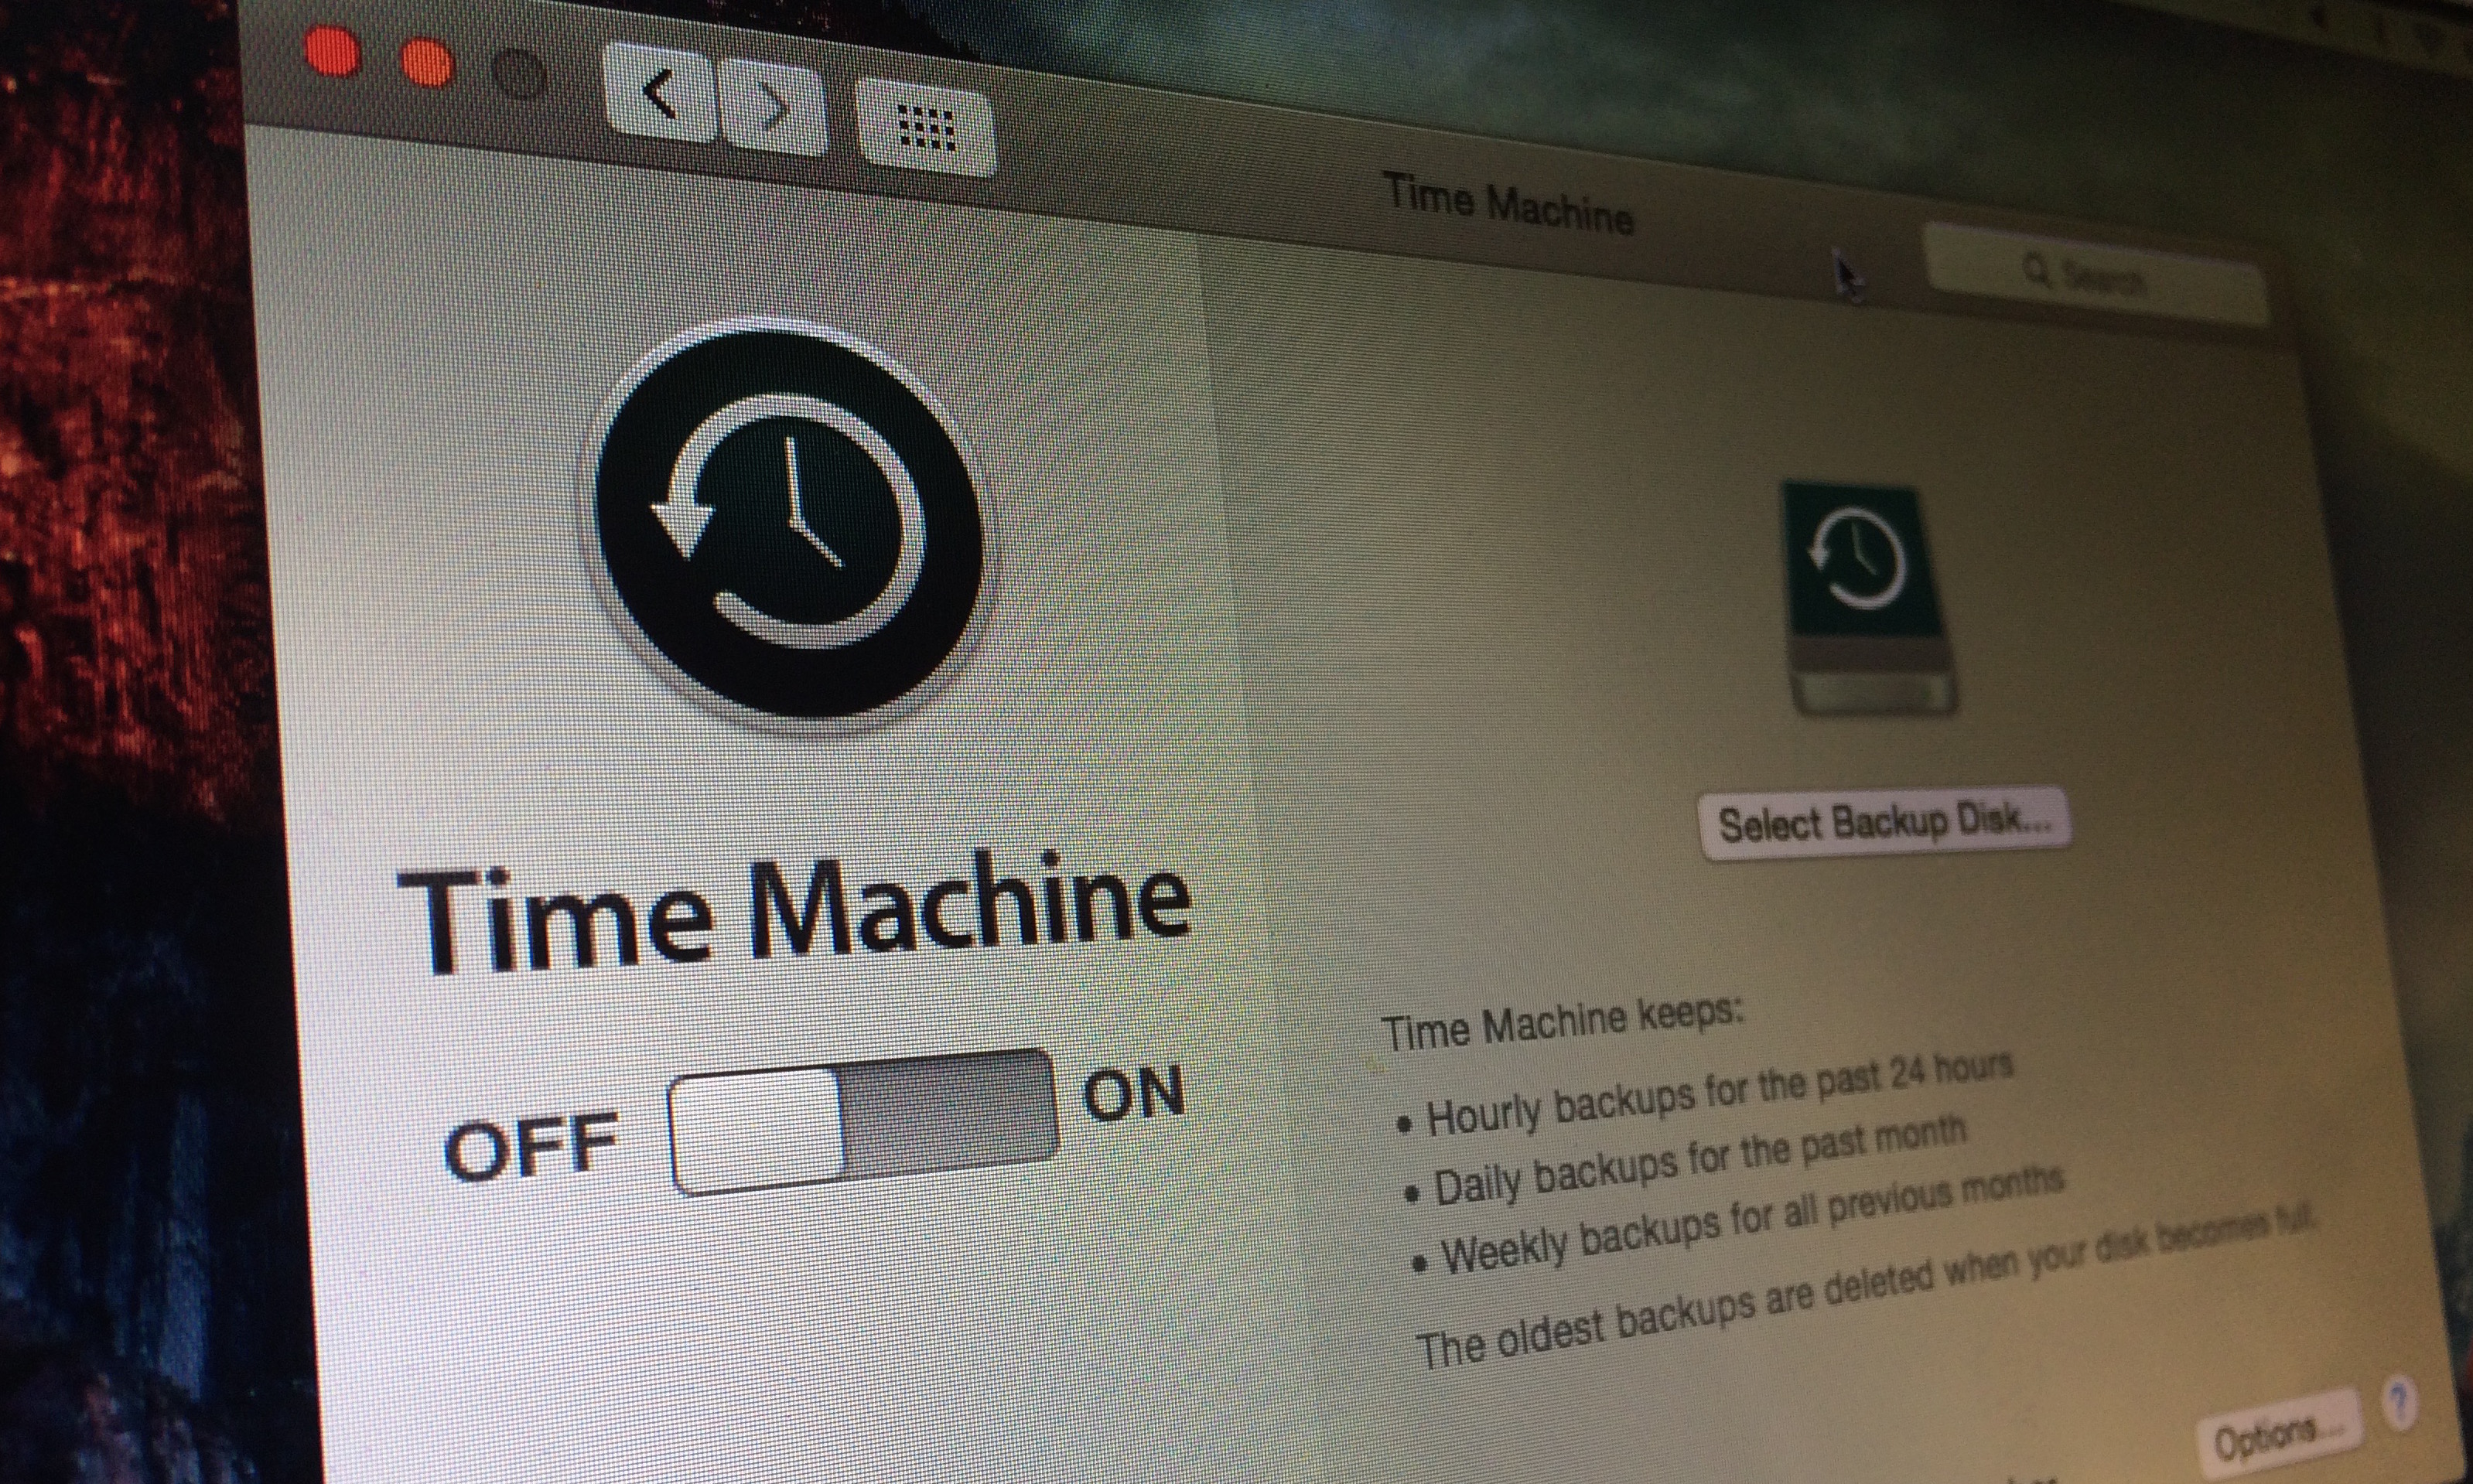
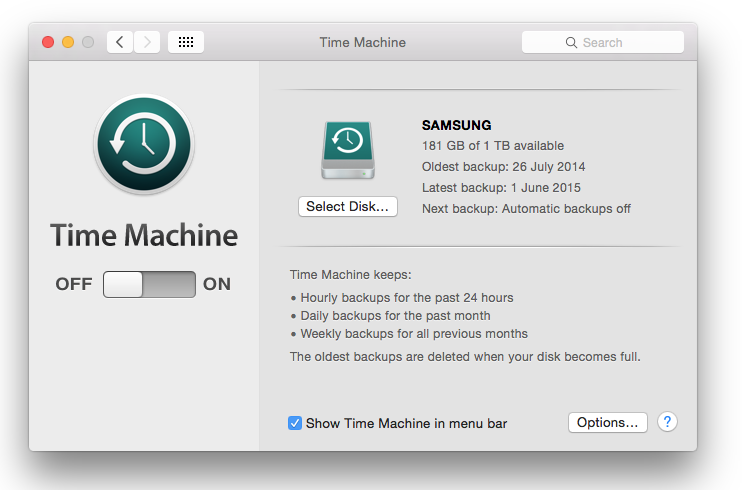
Both methods will take you to this screen
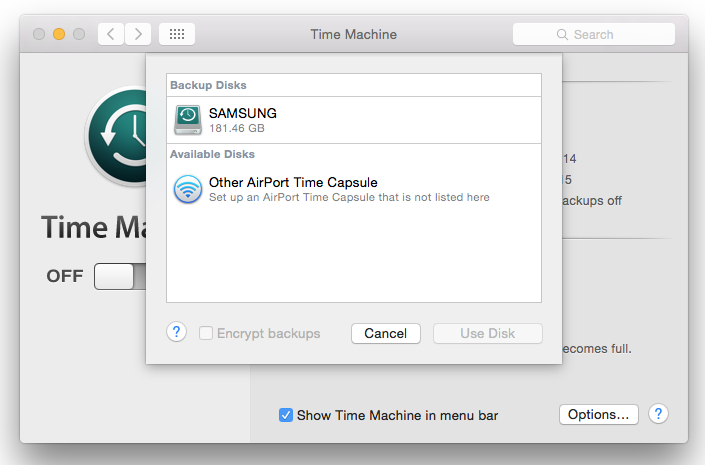
From here, turn on the switch to on, if it is off. The select a disk to use.
Once the disk has been selected, your Mac will then continue to back up the entire contents of the system. Following this the system will then continue to make continuous backups in hourly, daily and weekly increments. If you happen to have a Time Capsule from Apple, any machines on the local network can use this as a backup drive, this is especially useful for MacBooks as when it is plugged in to charge at night for instance, it automatically backups without the need to plug a hard drive in.


