So you are looking to create an account with Parental Controls on your Mac. If you are concerned what you’re child is looking at on the internet, you can limit them to time, apps and content on the Mac. Parental Controls can also be used to simplify the user interface for less experienced users.
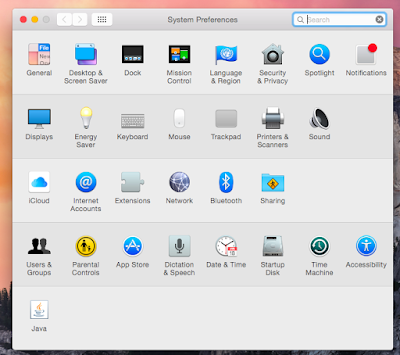
First things first, visit the Settings or System Preferences app on your Mac.
Then this window should appear (below)
Then navigate to the ‘Parental Controls’ tab
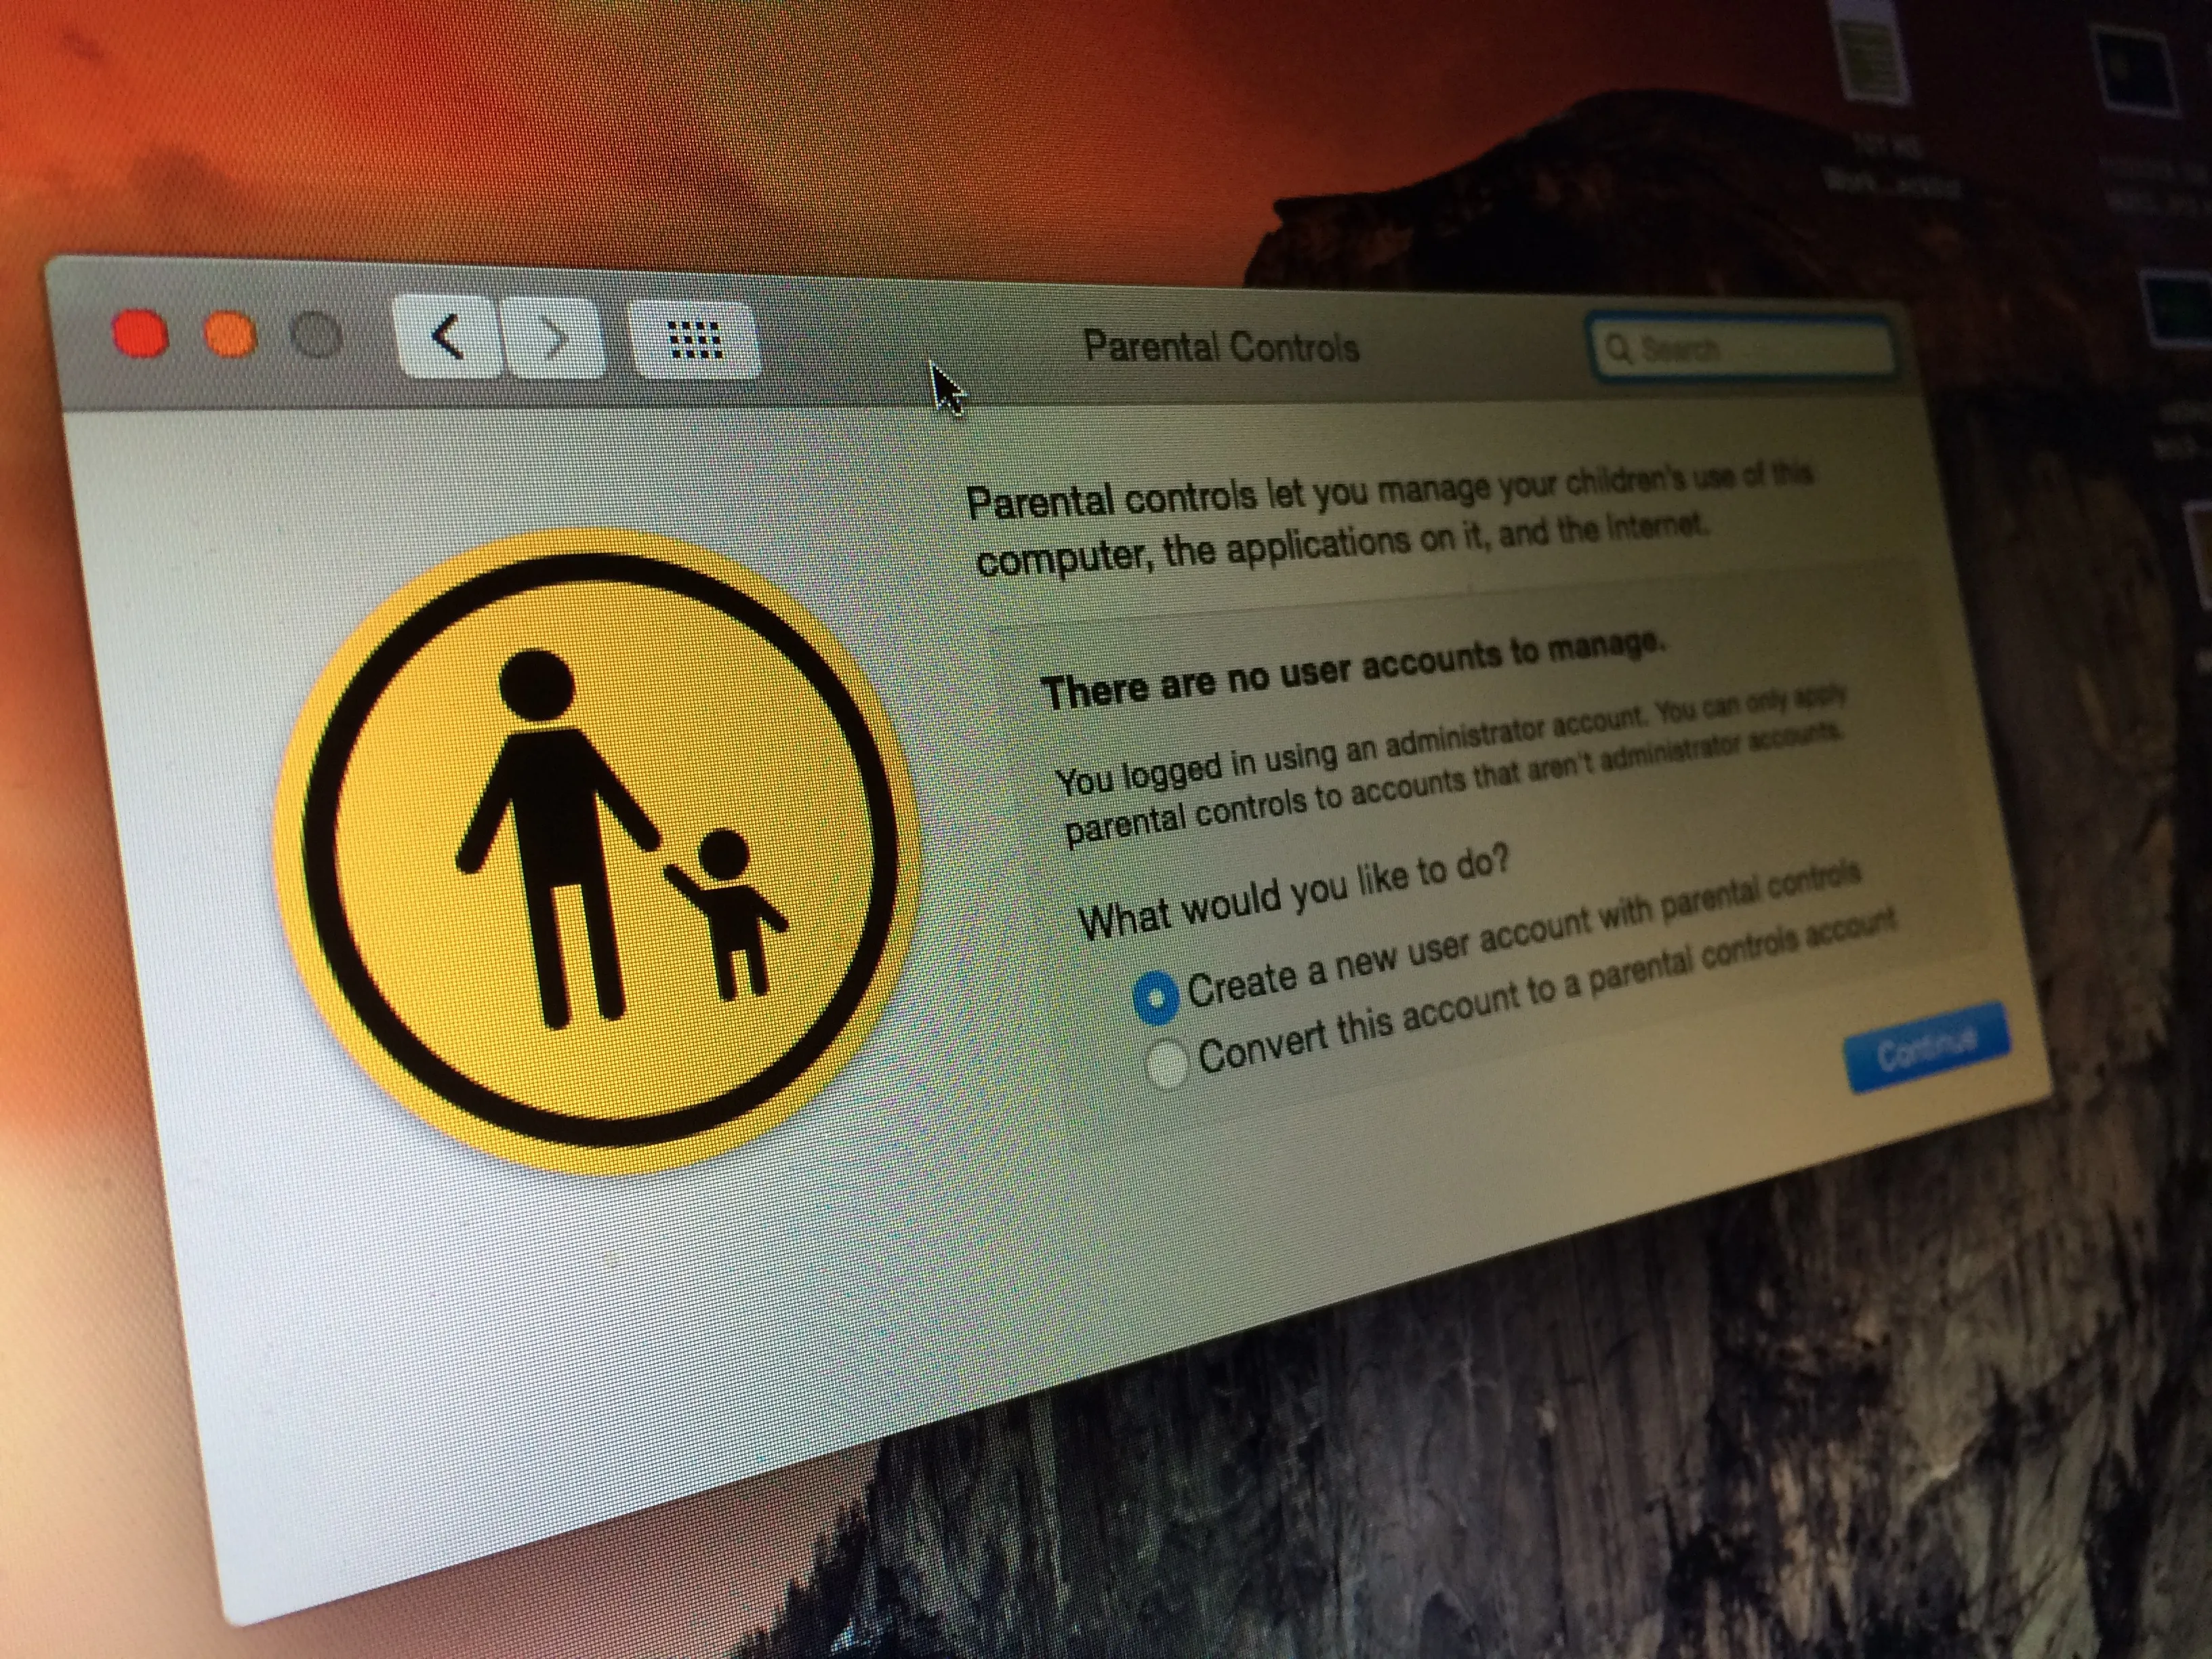
From within this menu you can either Create a new user with parental controls or convert an existing account to an account which will have parental controls. Select one and the click continue.
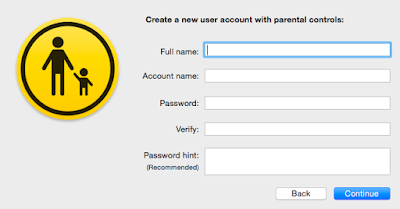
Create Account
Fill in the details for the new user. Enter in the Full Name, Account name, Password, verify the password then you have the option of entering in a password hint. Once done, hit continue.
Once you’re in the account – you can now choose which items to restrict
In the ‘Apps’ section, you can specify different options such as using a Simple Finder and to limit certain applications.
Web Content
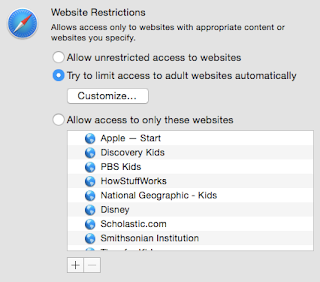
You can choose to block certain websites from kids. OS X can automatically try and limit access to adult sites, here Apple will attempt to filter inappropriate stuff from users, but you can also customise which websites are seen.
In the ‘Web’ section you can restrict certain websites which the user can go on, or let OS X try and limit inappropriate sites. To add a site to the whitelist, click the + icon.
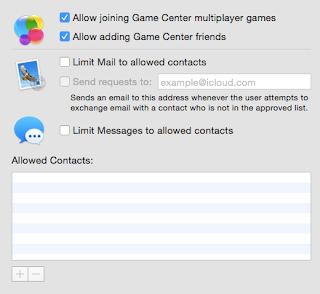
The ‘People’ tab allows you to;
- Allow or disallow any Game Centre communications, taking part in multiplayer games and or adding friends.
- Specifying a group of contacts that the user is allowed to communicate with via Mail and if emailing someone that isn’t on the approved list – sending the request to a specified email address.
- Having a list of approved contacts that the user is allowed to Message on iMessage.
The ‘Time Limits’ section has the same functionality as Windows, but from personal expeirce is a lot easier to use. From this menu you can;
- Set weekday time limits, setting a daily limit from 30 mins to 8 hours.
- Set a different weekend time limit.
- Setting a bedtime, which prevents access to the computer between specified hours. Different settings can be set for school nights and the weekend.
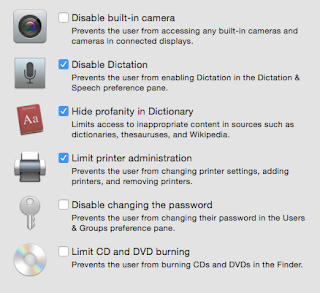
In the ‘Other’ tab –
- You can disable the built-in camera on the computer or any connected displays. This may be useful if a young person is using the device and you’d prefer for them to not have access to it.
- Disable dictation
- Hid inappropriate words from the dictionary
- Limit printer access. i.e. changing settings and adding or removing printers.
- Disable the user changing their account password.
- Disable CD and DVD Burning
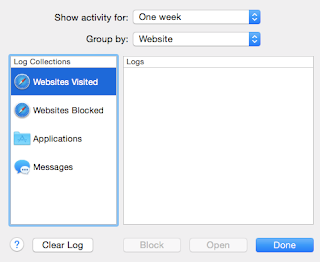
You can also view a log of websites visited, applications used and more.
Click Logs
Then you can view what sites were visited or blocked, what applications were used and what messages were sent.
You can also prevent the dock from being modified.
Next to the ‘Logs” button, tick this check box if you want to prevent the user from modifying the dock
That’s all you need to set up parental controls on Mac, any questions or comments, leave them below.

