Here at the interface, we recently took ownership of the Charging Status Podcast which was previously a collaboration between the interface and Crossed Wires. However, due to this migration, we had the need to route emails from podcast@chargingstatus.uk to info@theinterface.uk. In this guide, we’re going to go over the entire process of setting up a secondary domain in Google Workspace, creating the DNS records in our domain provider, which is Route 53 – but the same steps will be able to be replicated in your domain provider and then testing the email once everything is setup.
To save other people time and to give me something to come back to in the future when I inevitably need to do this again – this guide is the place to come to if you need to set up a secondary domain within Google Workspace.
Pre checks
Before we get started and to ensure this process goes smoothly, it is important to check a few things.
Once that is done, we can move on to the first section.
Create a new Secondary Domain in Google Workspace
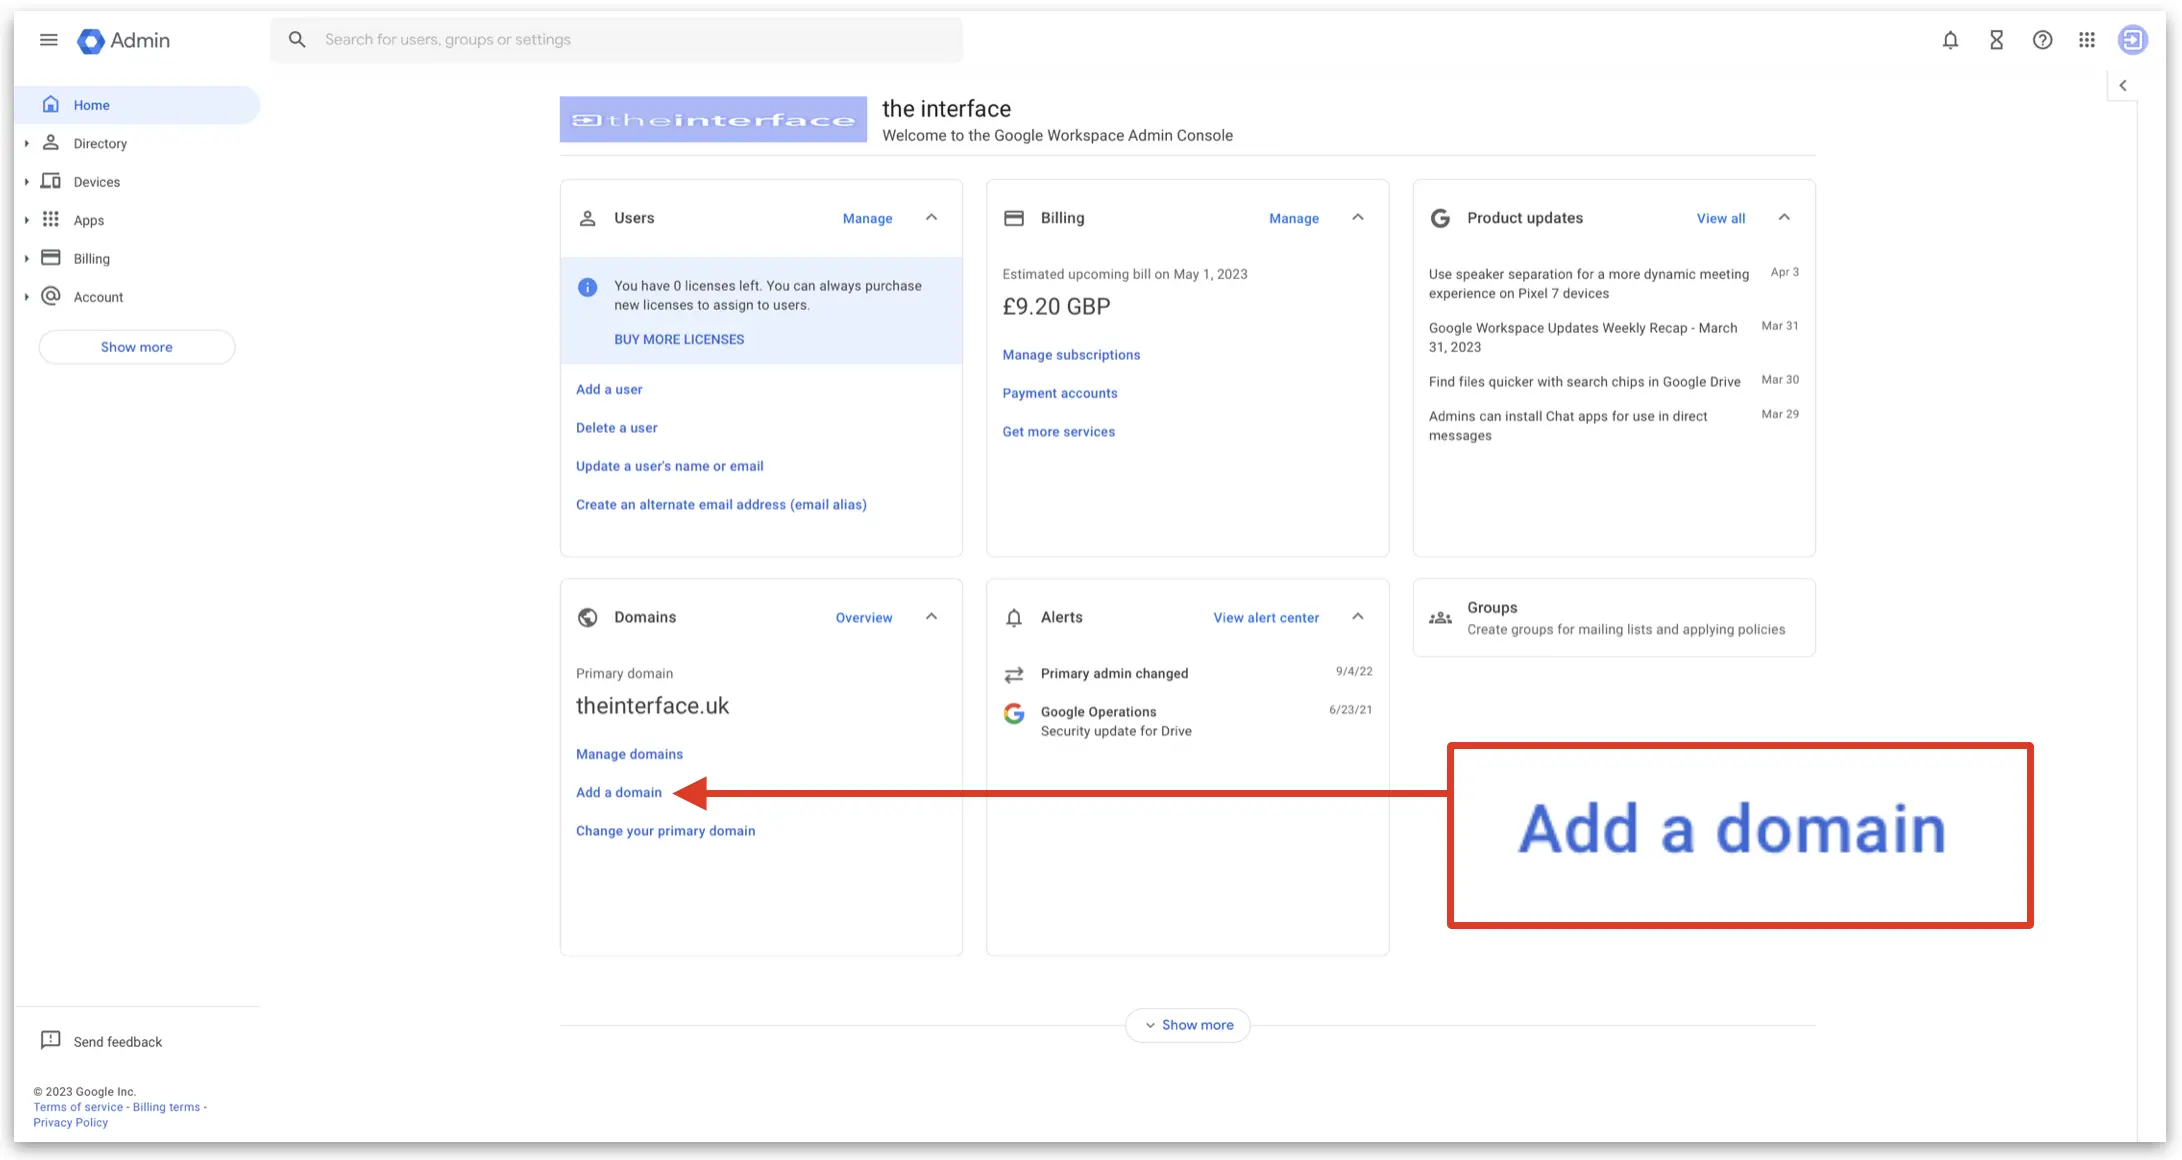
First, log into admin.google.com with your Google Workspace account and click on ‘Add a domain’
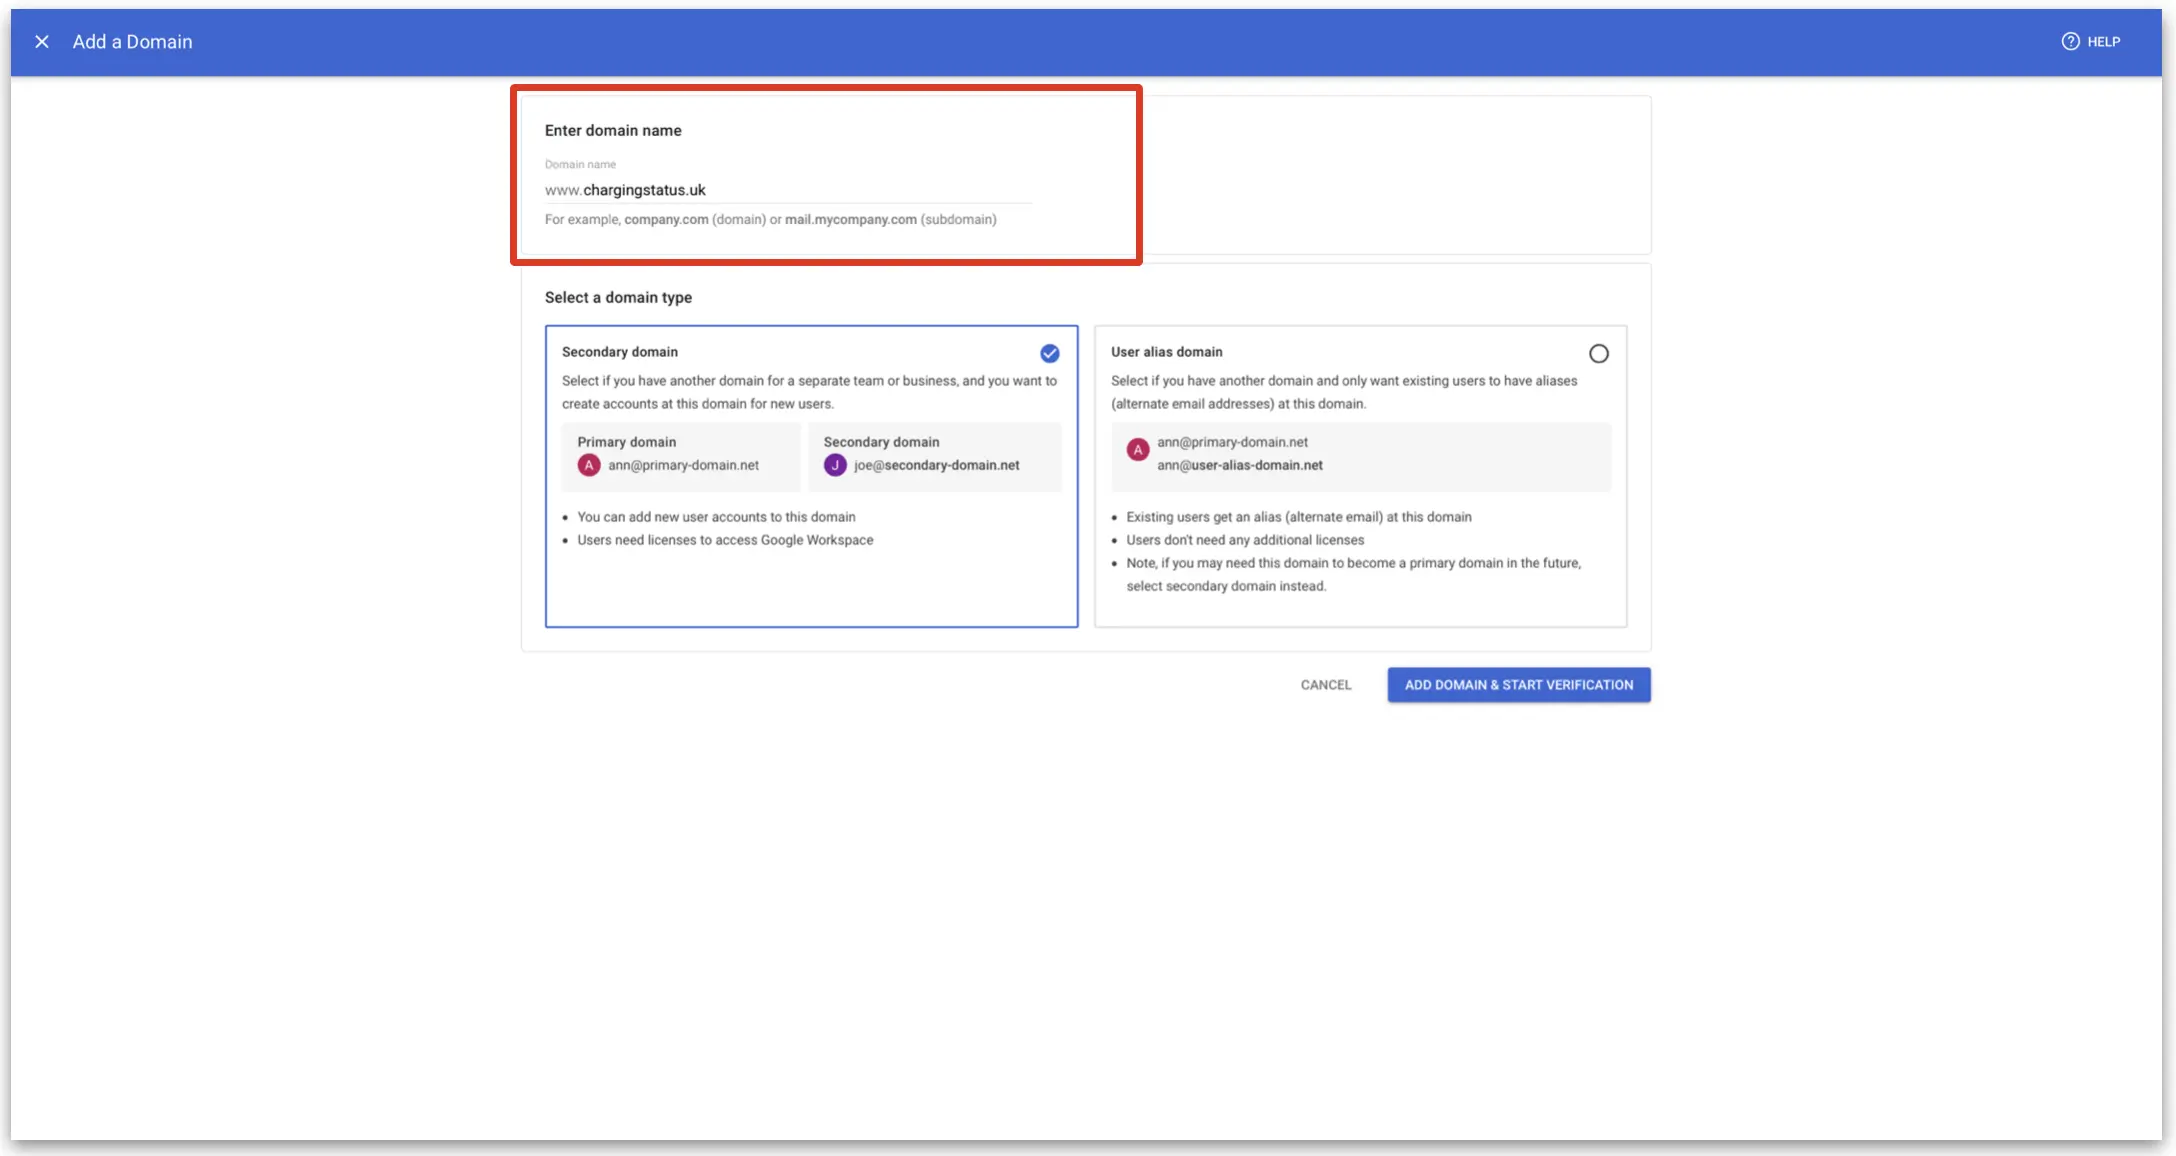
Next, enter in your new domain name and then click ‘Add Domain and Start Verification’
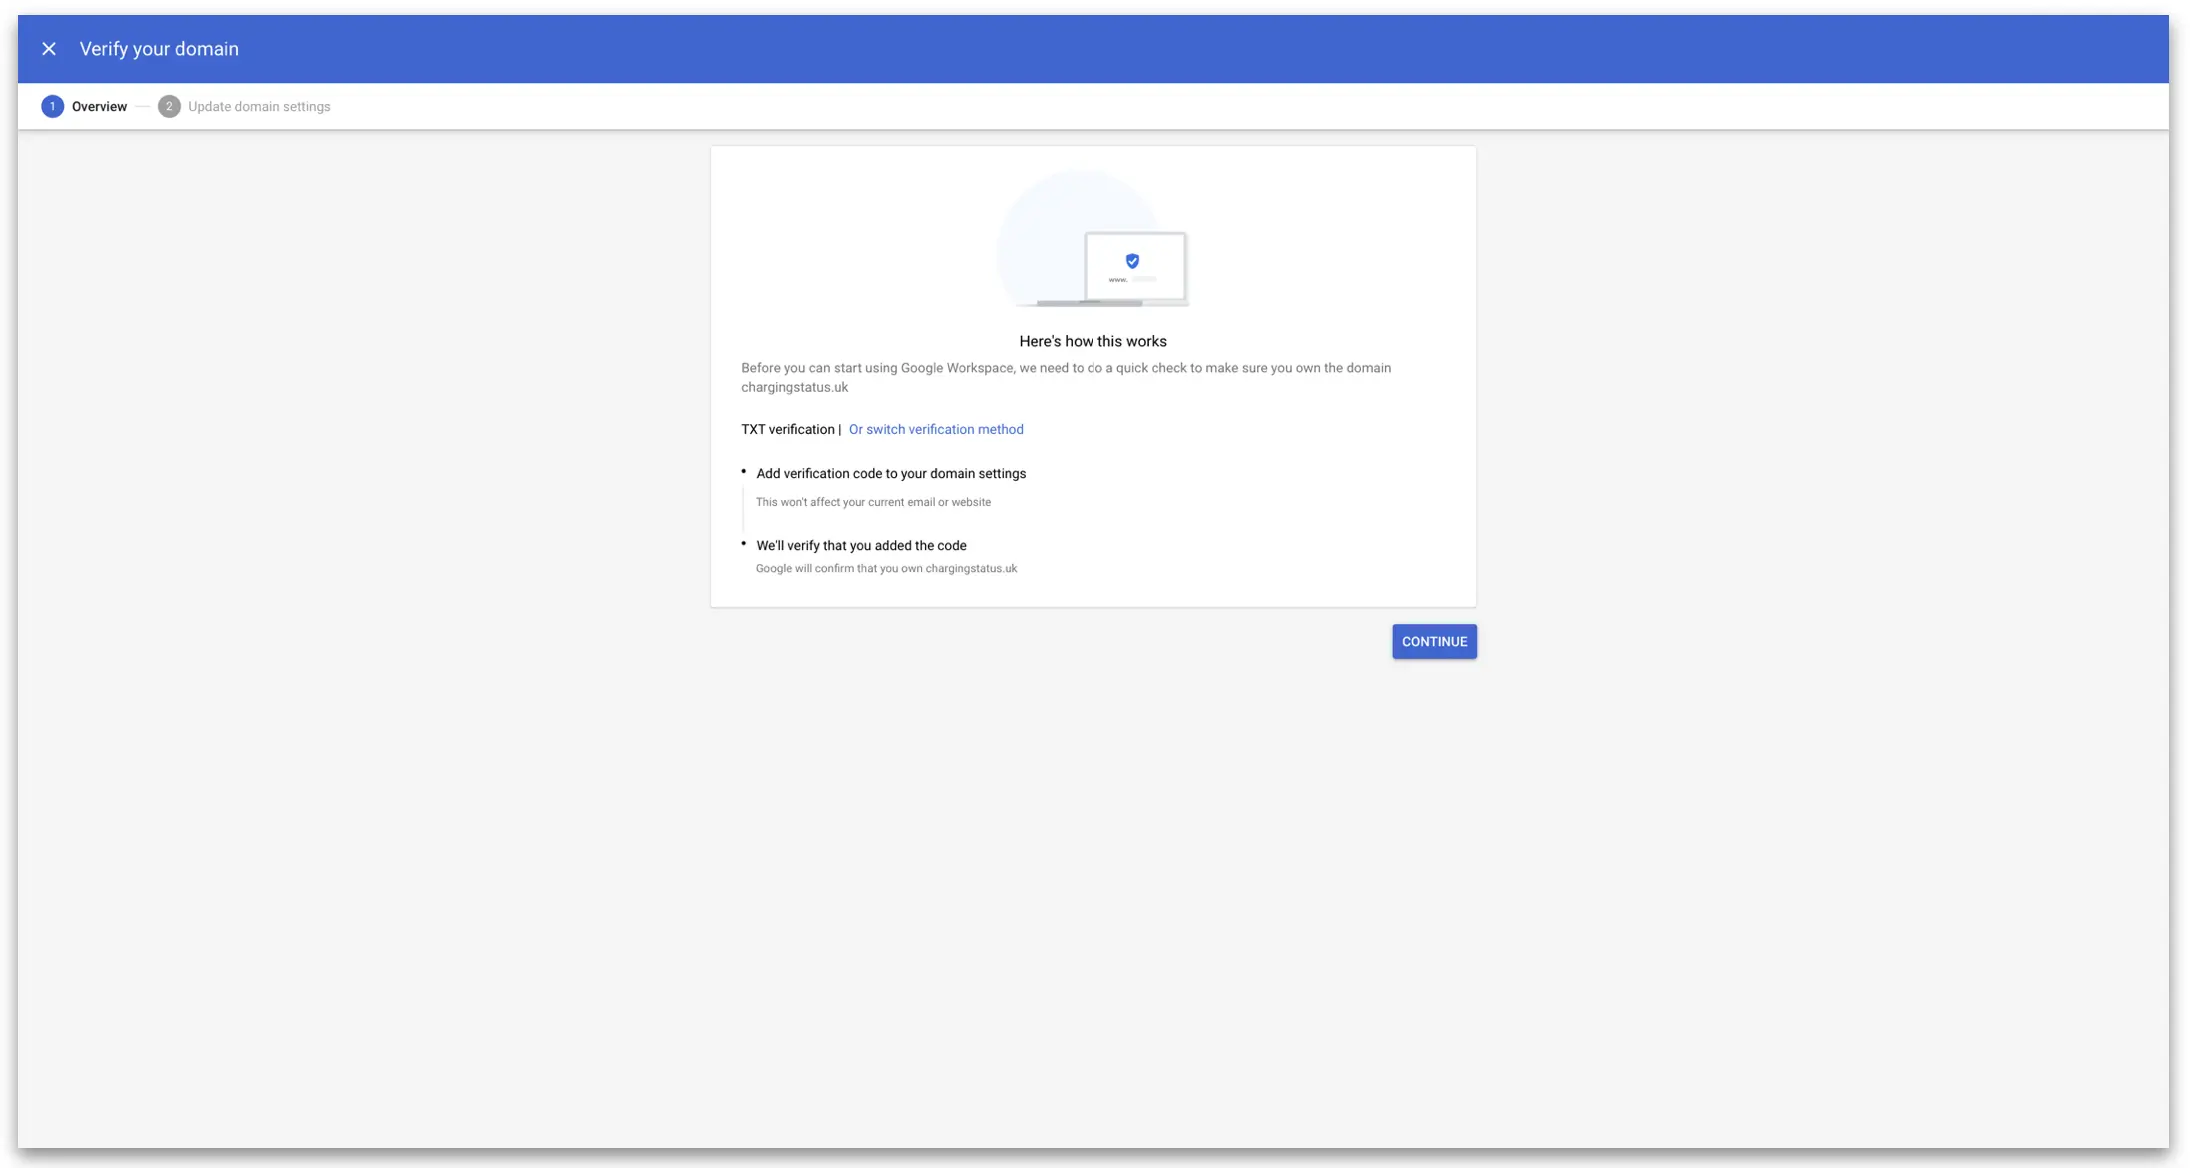
The next step is to verify the domain. This can be done by creating new TXT records with your domain provider. We’re going to do it here in Route 53, from AWS but the same process could be applied to any other domain provider. Click Continue
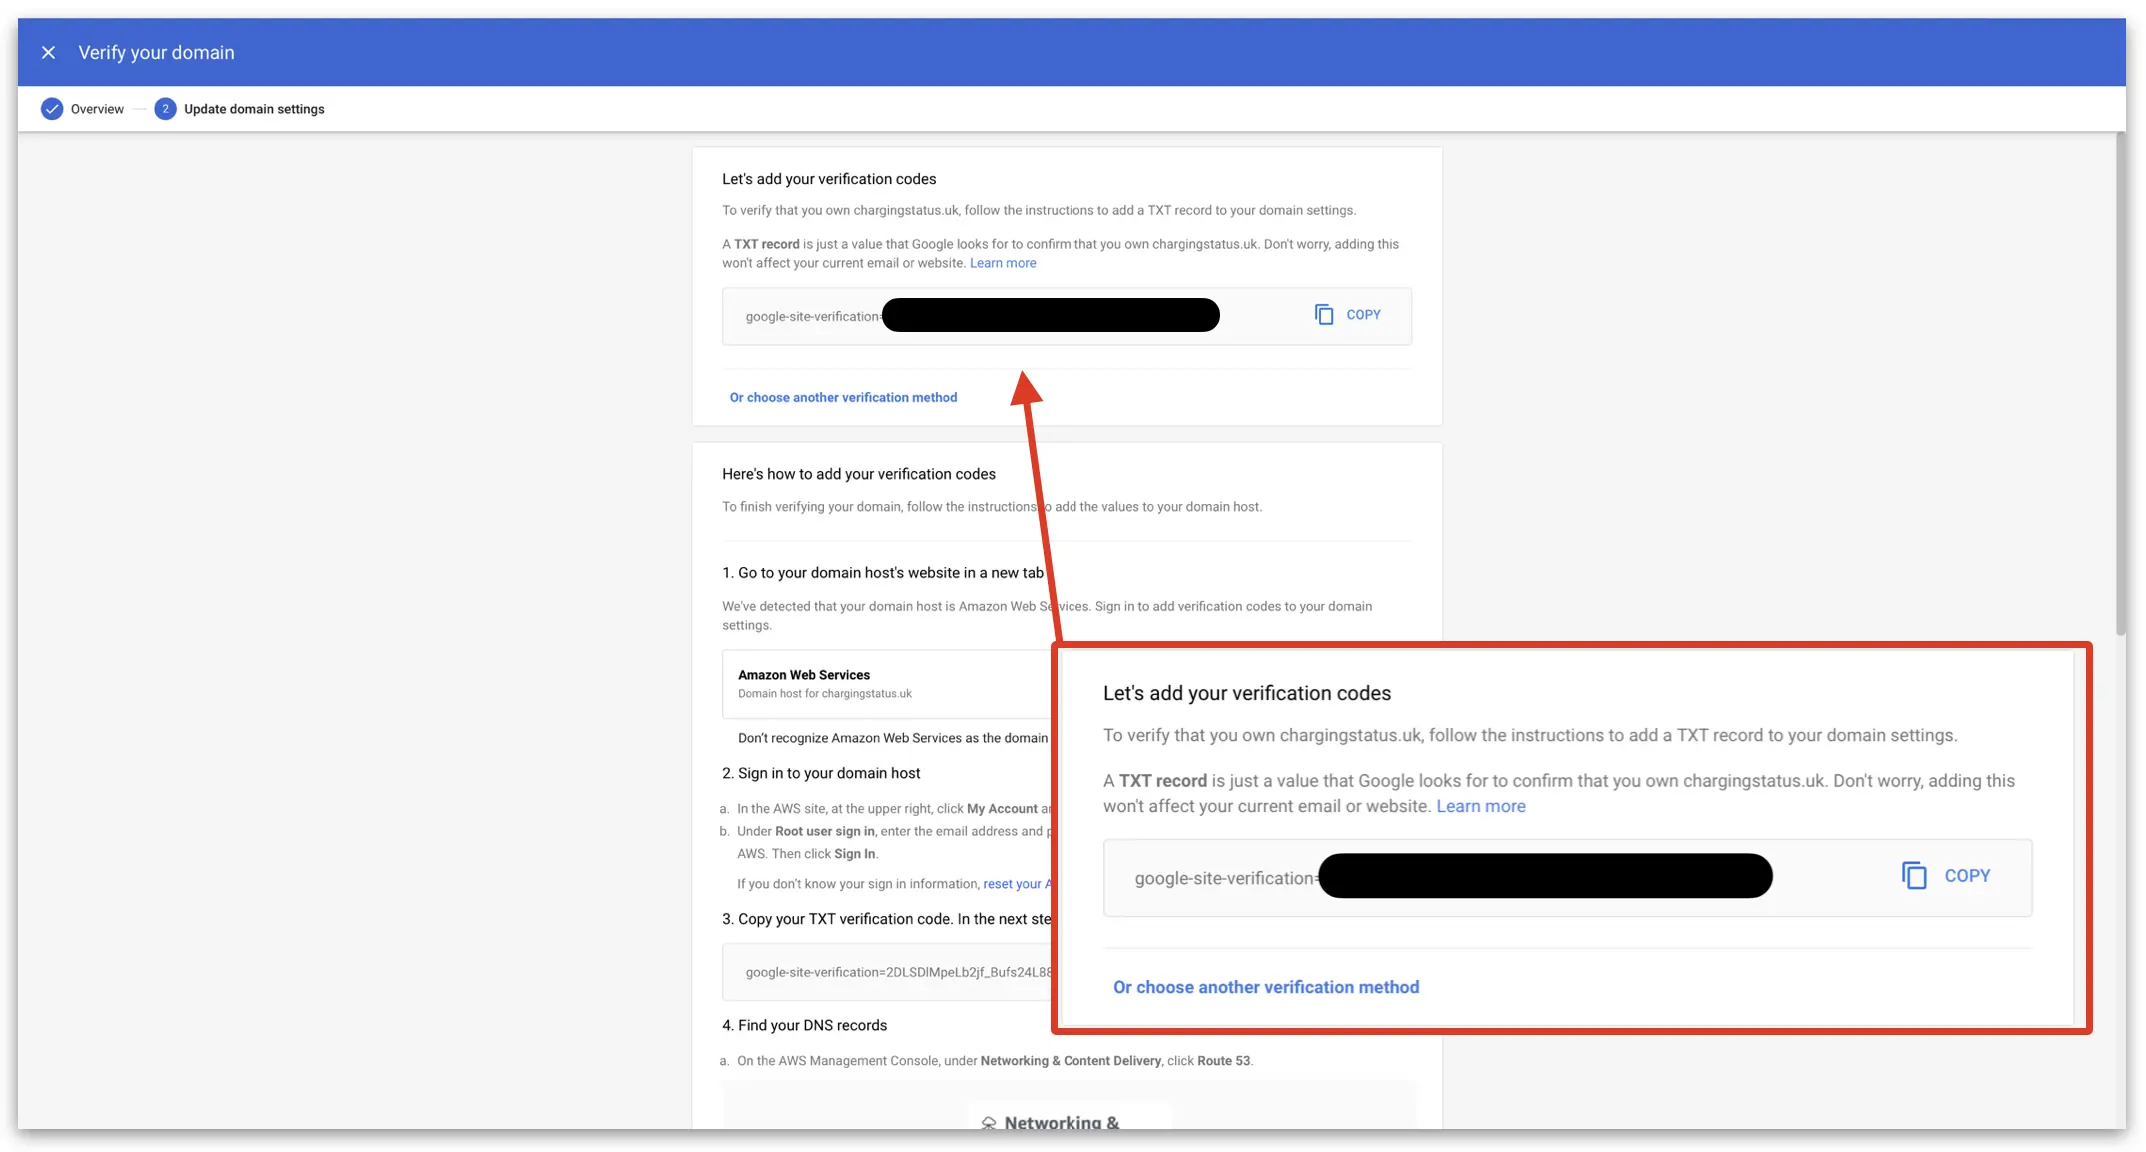
Google shows you the TXT record to copy. Next, we can enter this into Route 53 (or your own domain provider).
Creating the TX Records
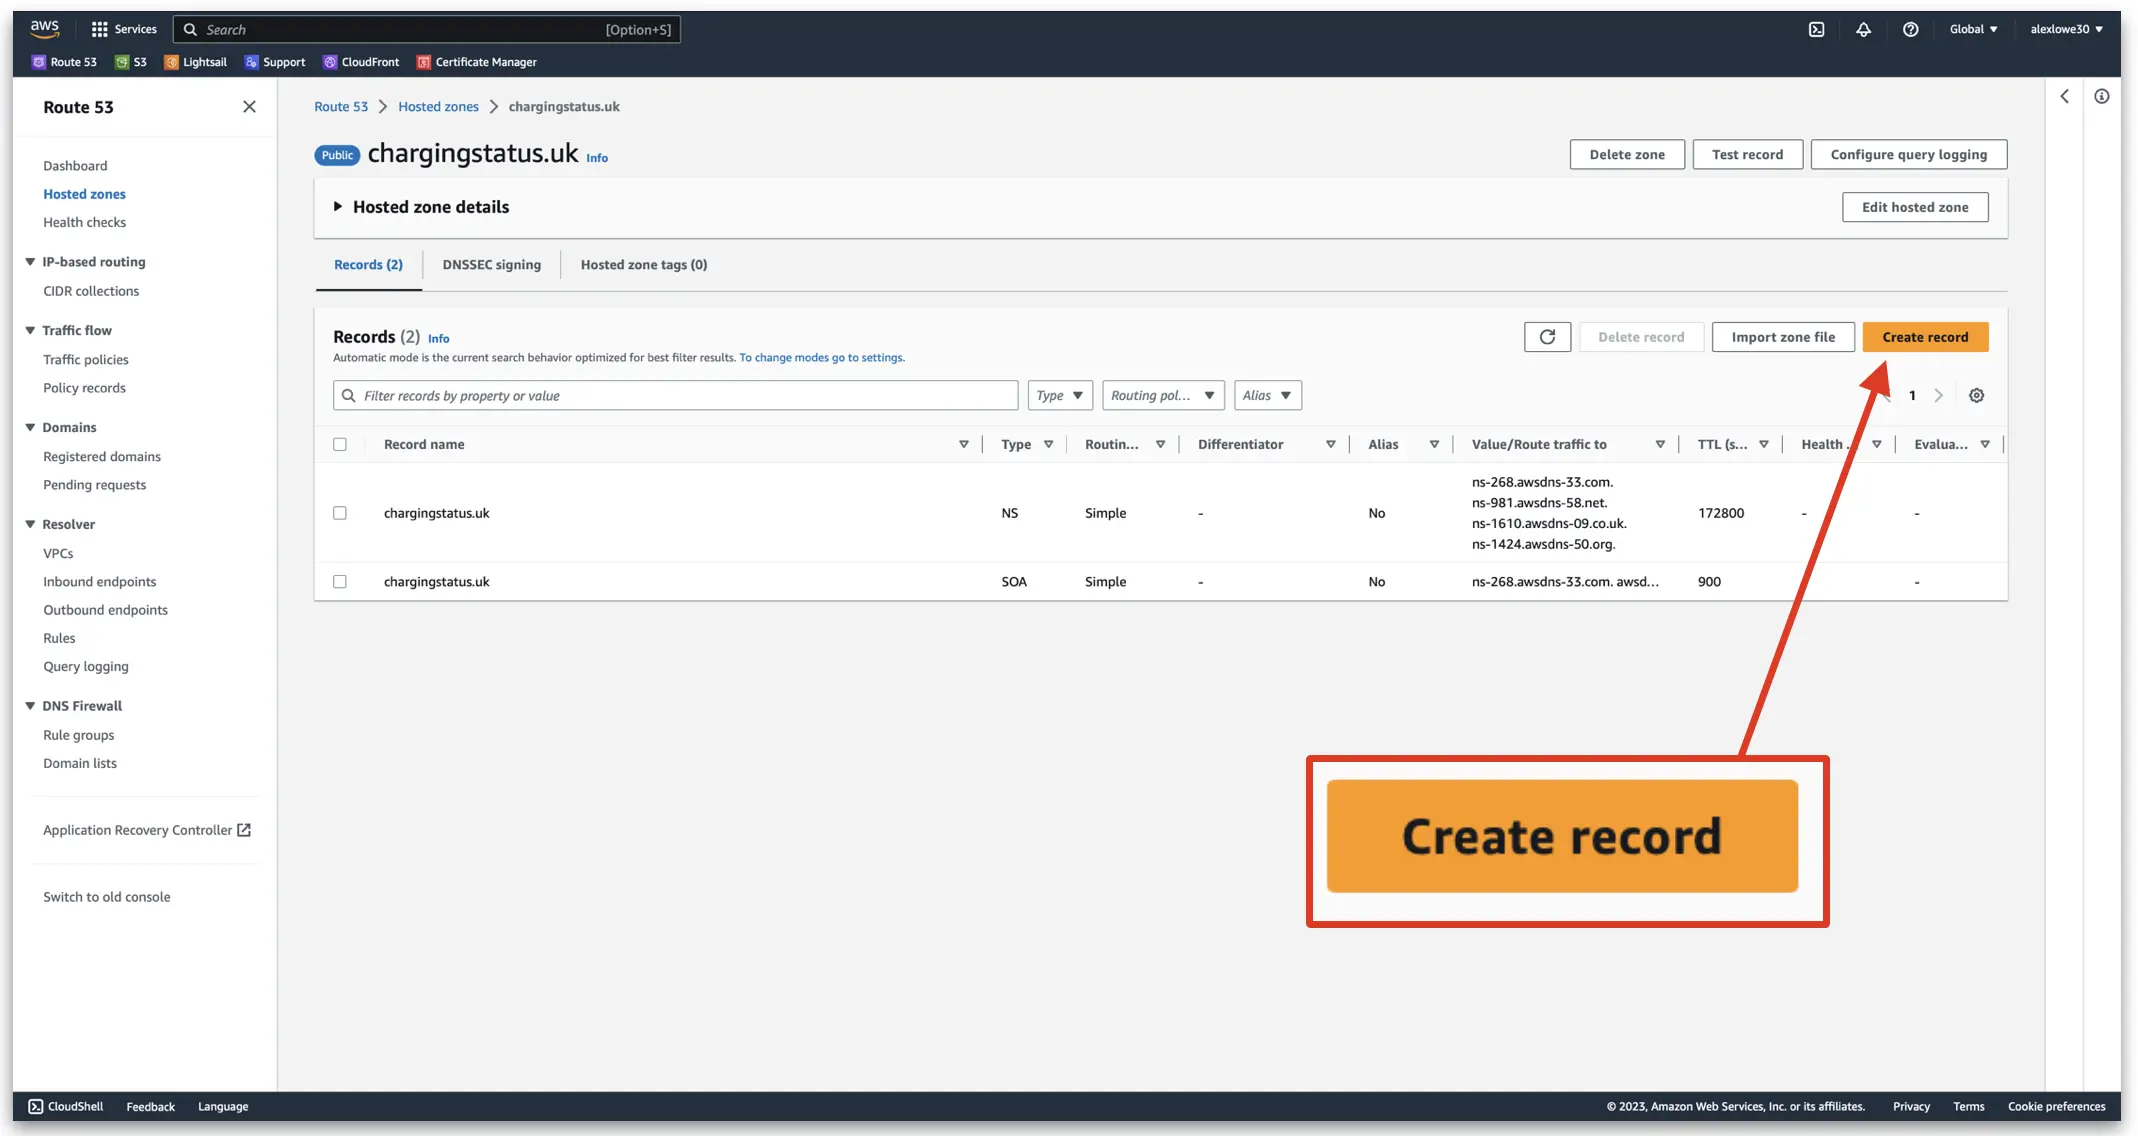
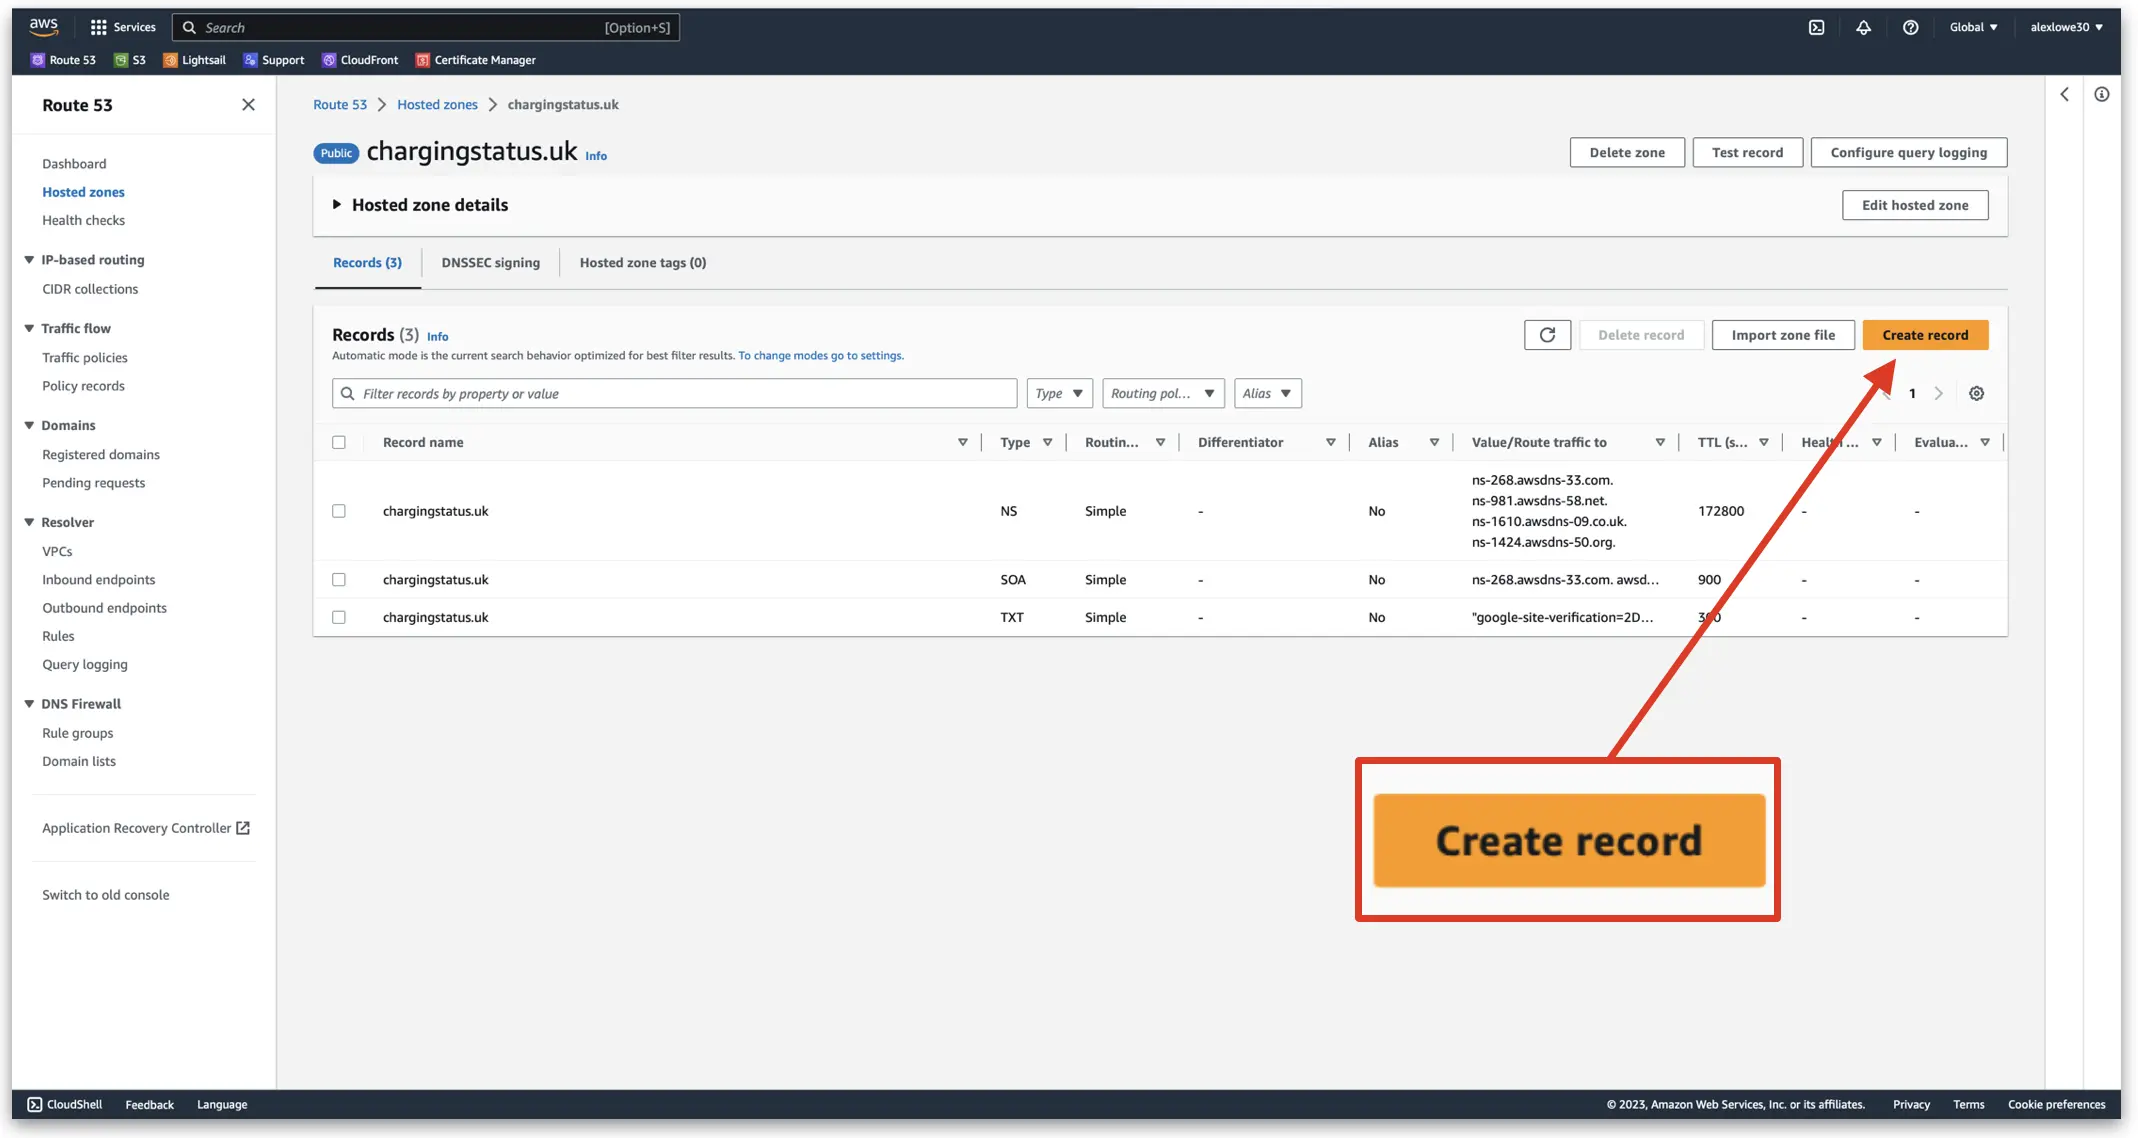
Next, we’re going to log into Route 53 and create a new TX record for this domain. First navigate to the hosted zone for your domain and click on ‘Create record’
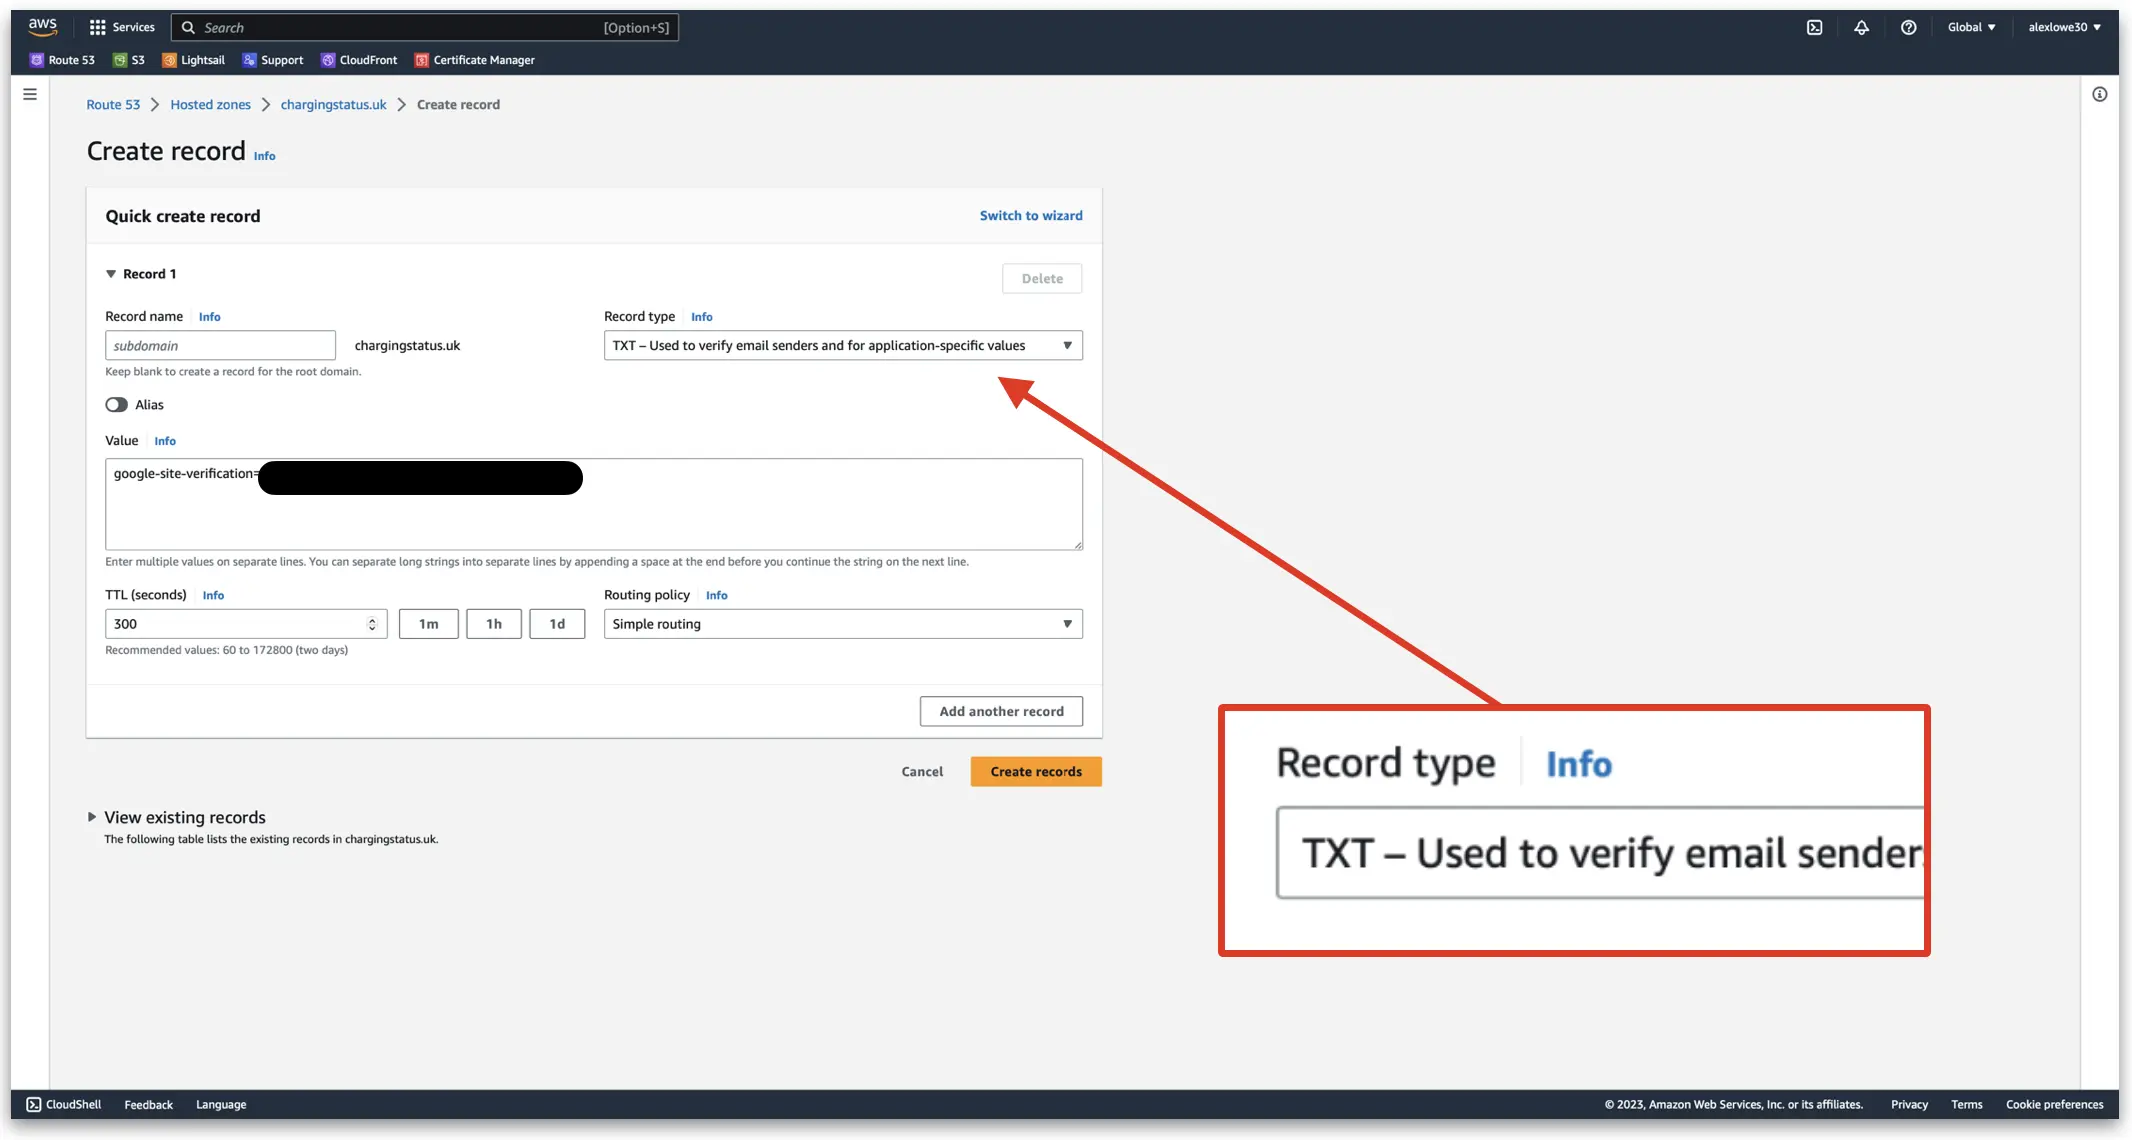
Change the record type to TXT and enter in the google-site-verification=xxxxxxxxxxxx code from earlier. Once done, click on ‘Create records’
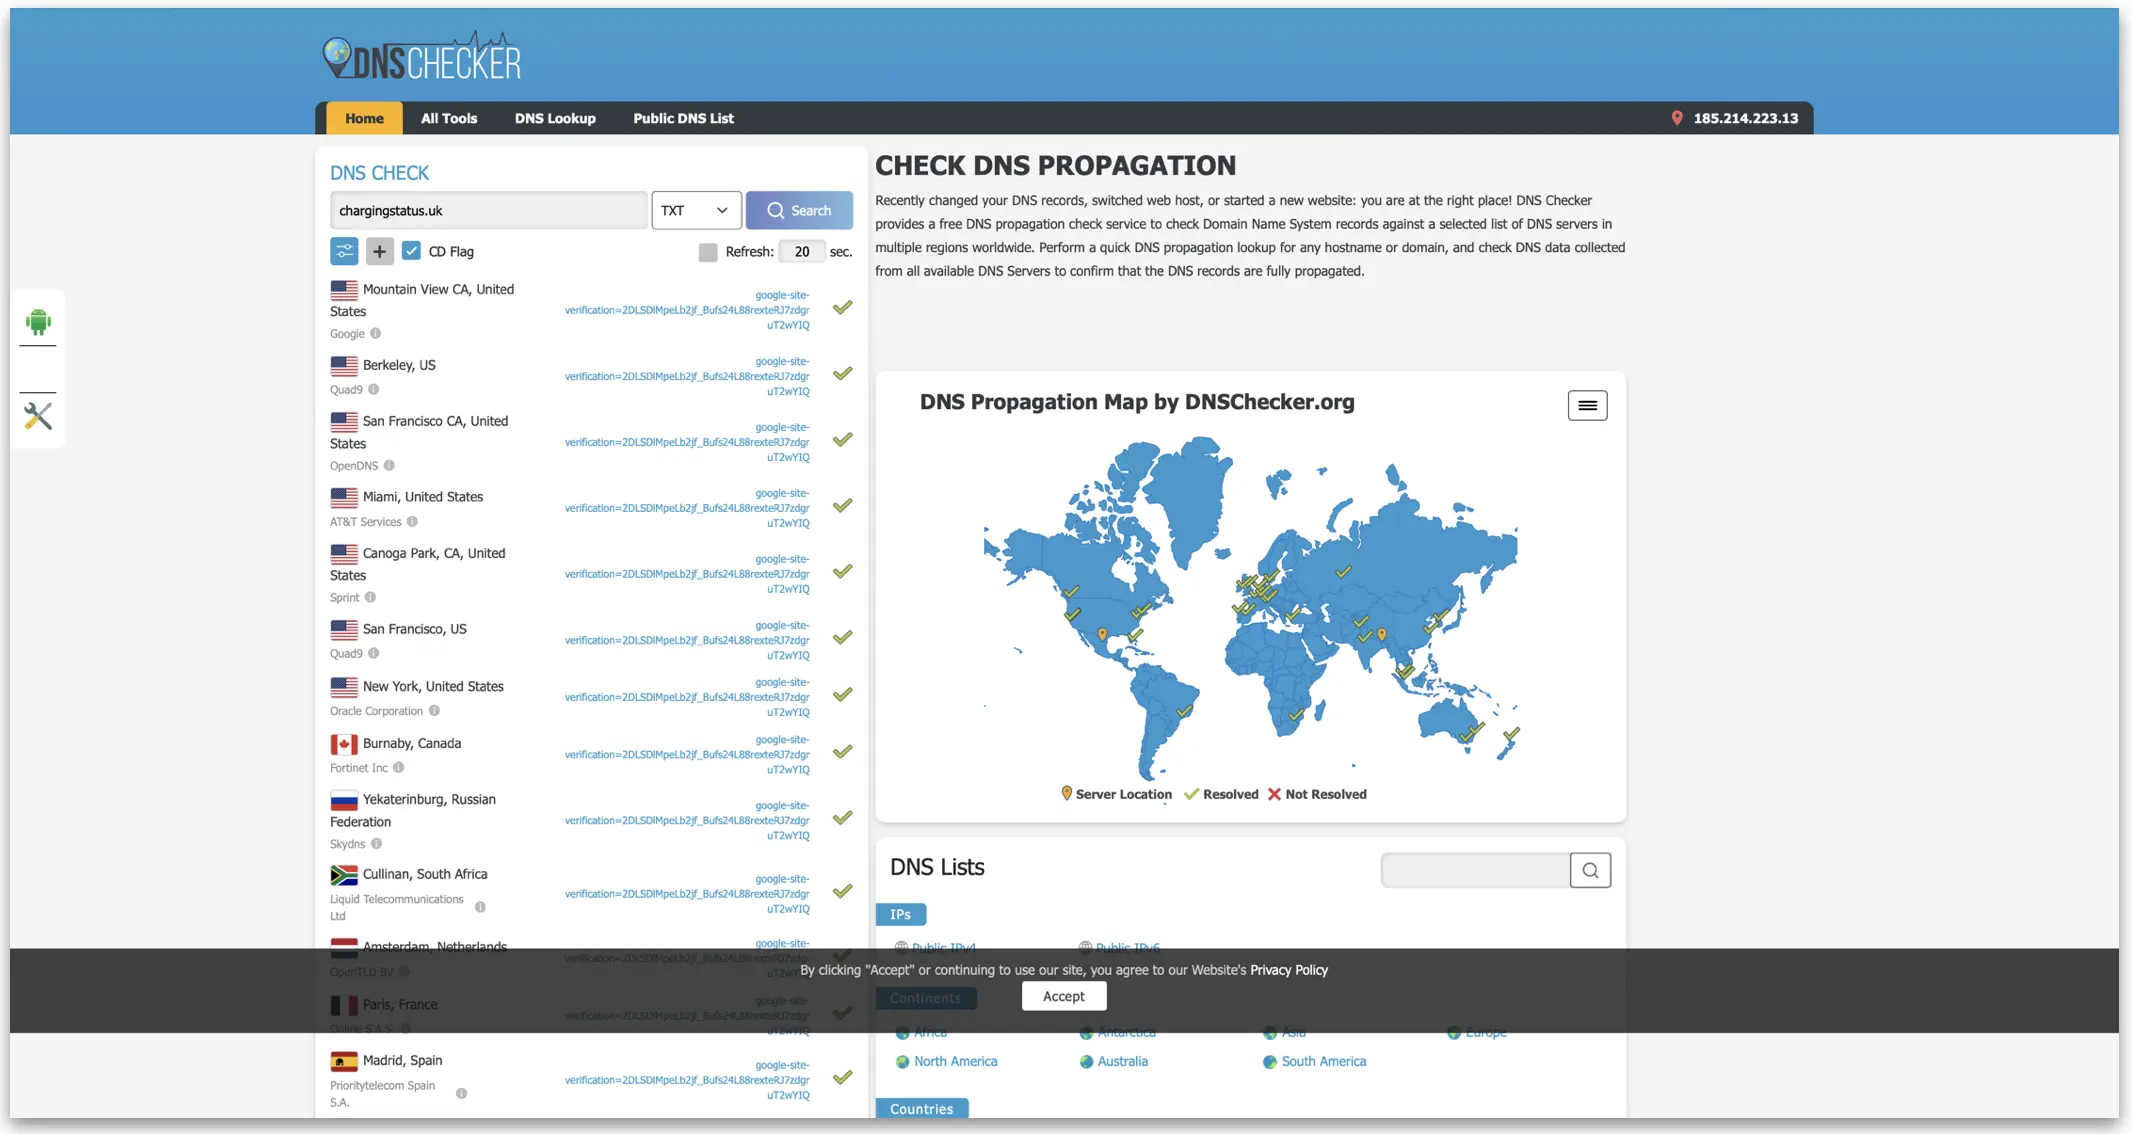
Once done, allow 10-15 minutes for it to proprgate. You can use something like dnschecker.org to verify it has propagated
Further configuration within Google Workspace
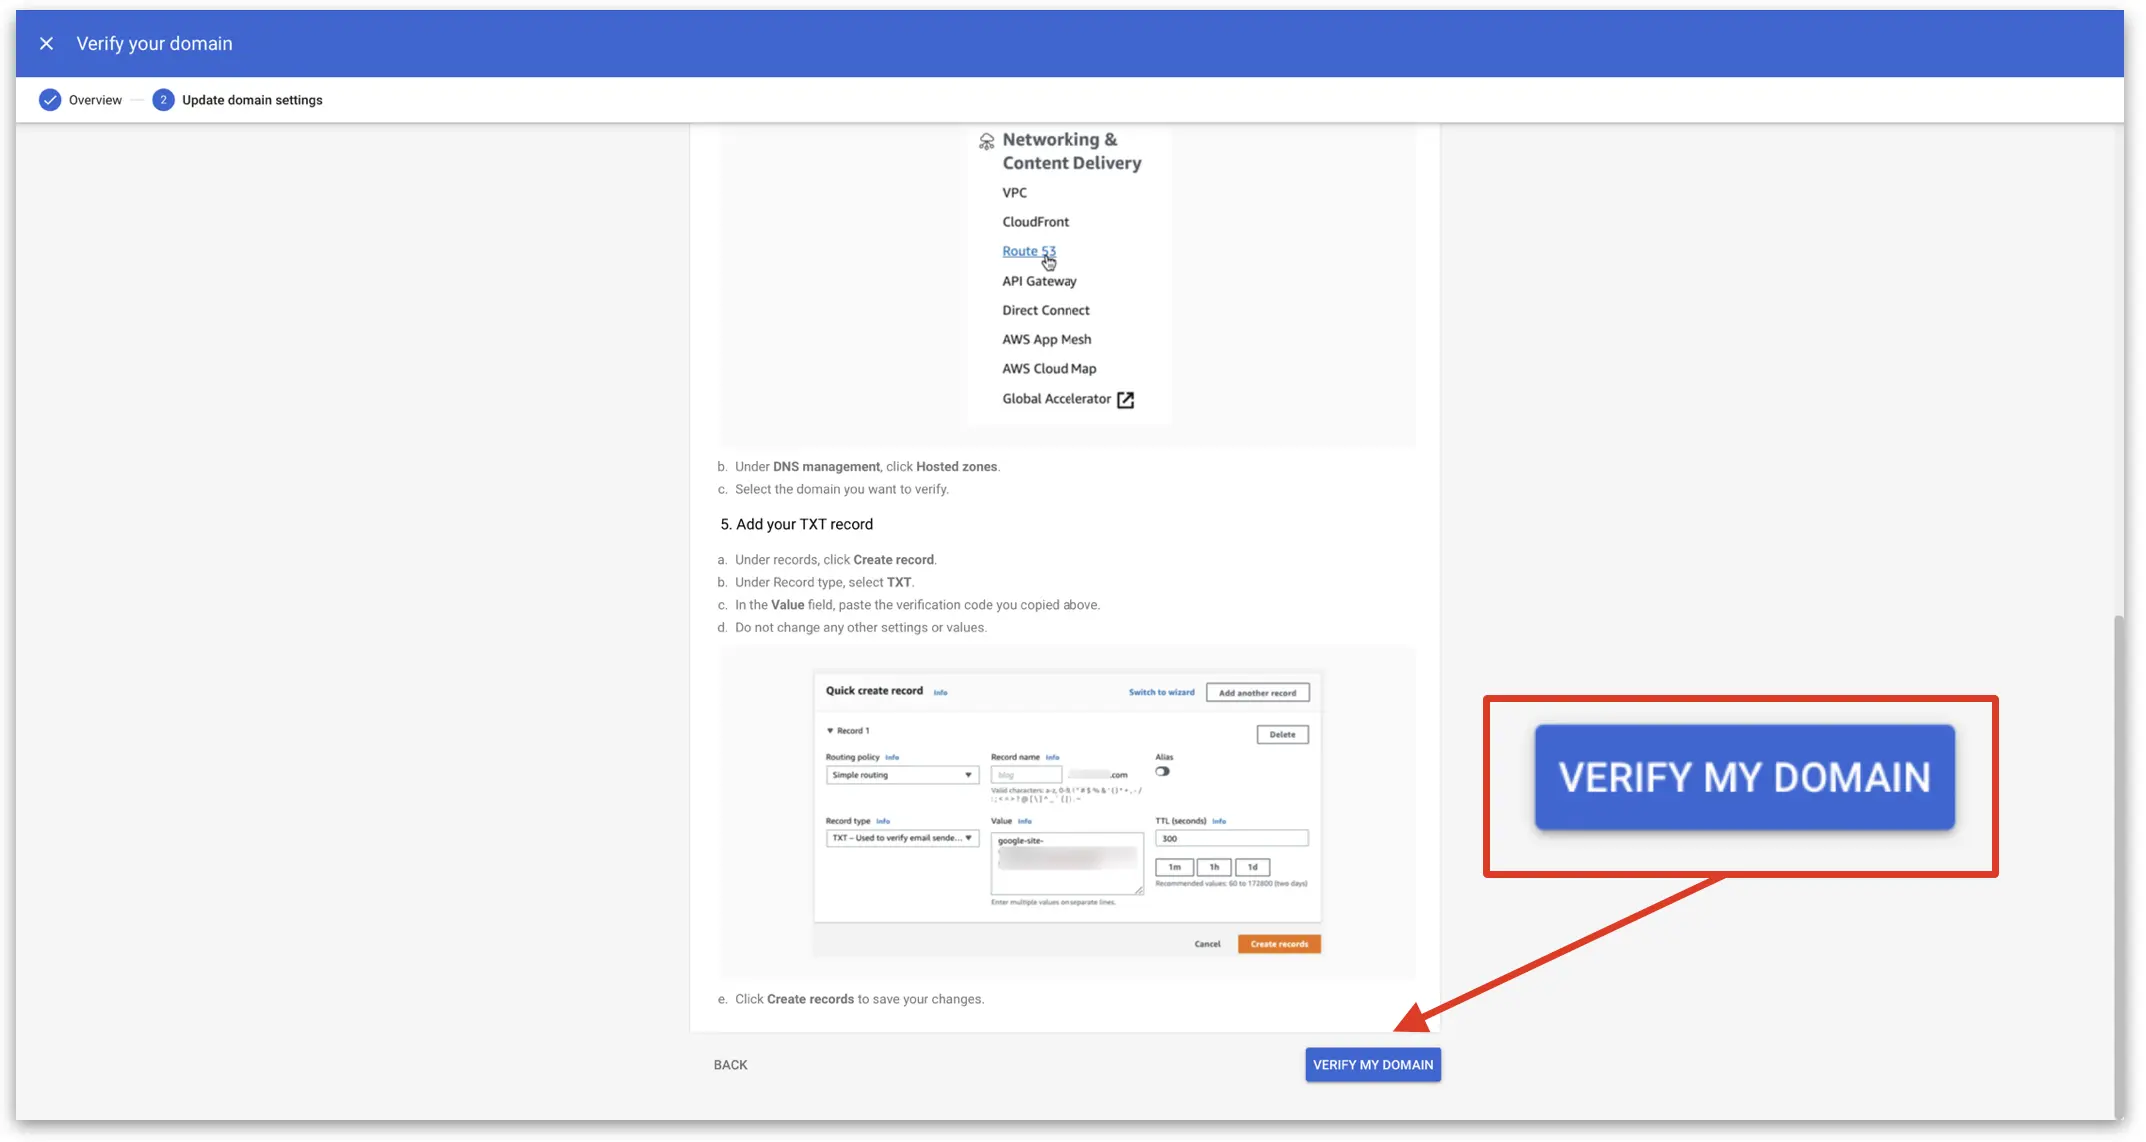
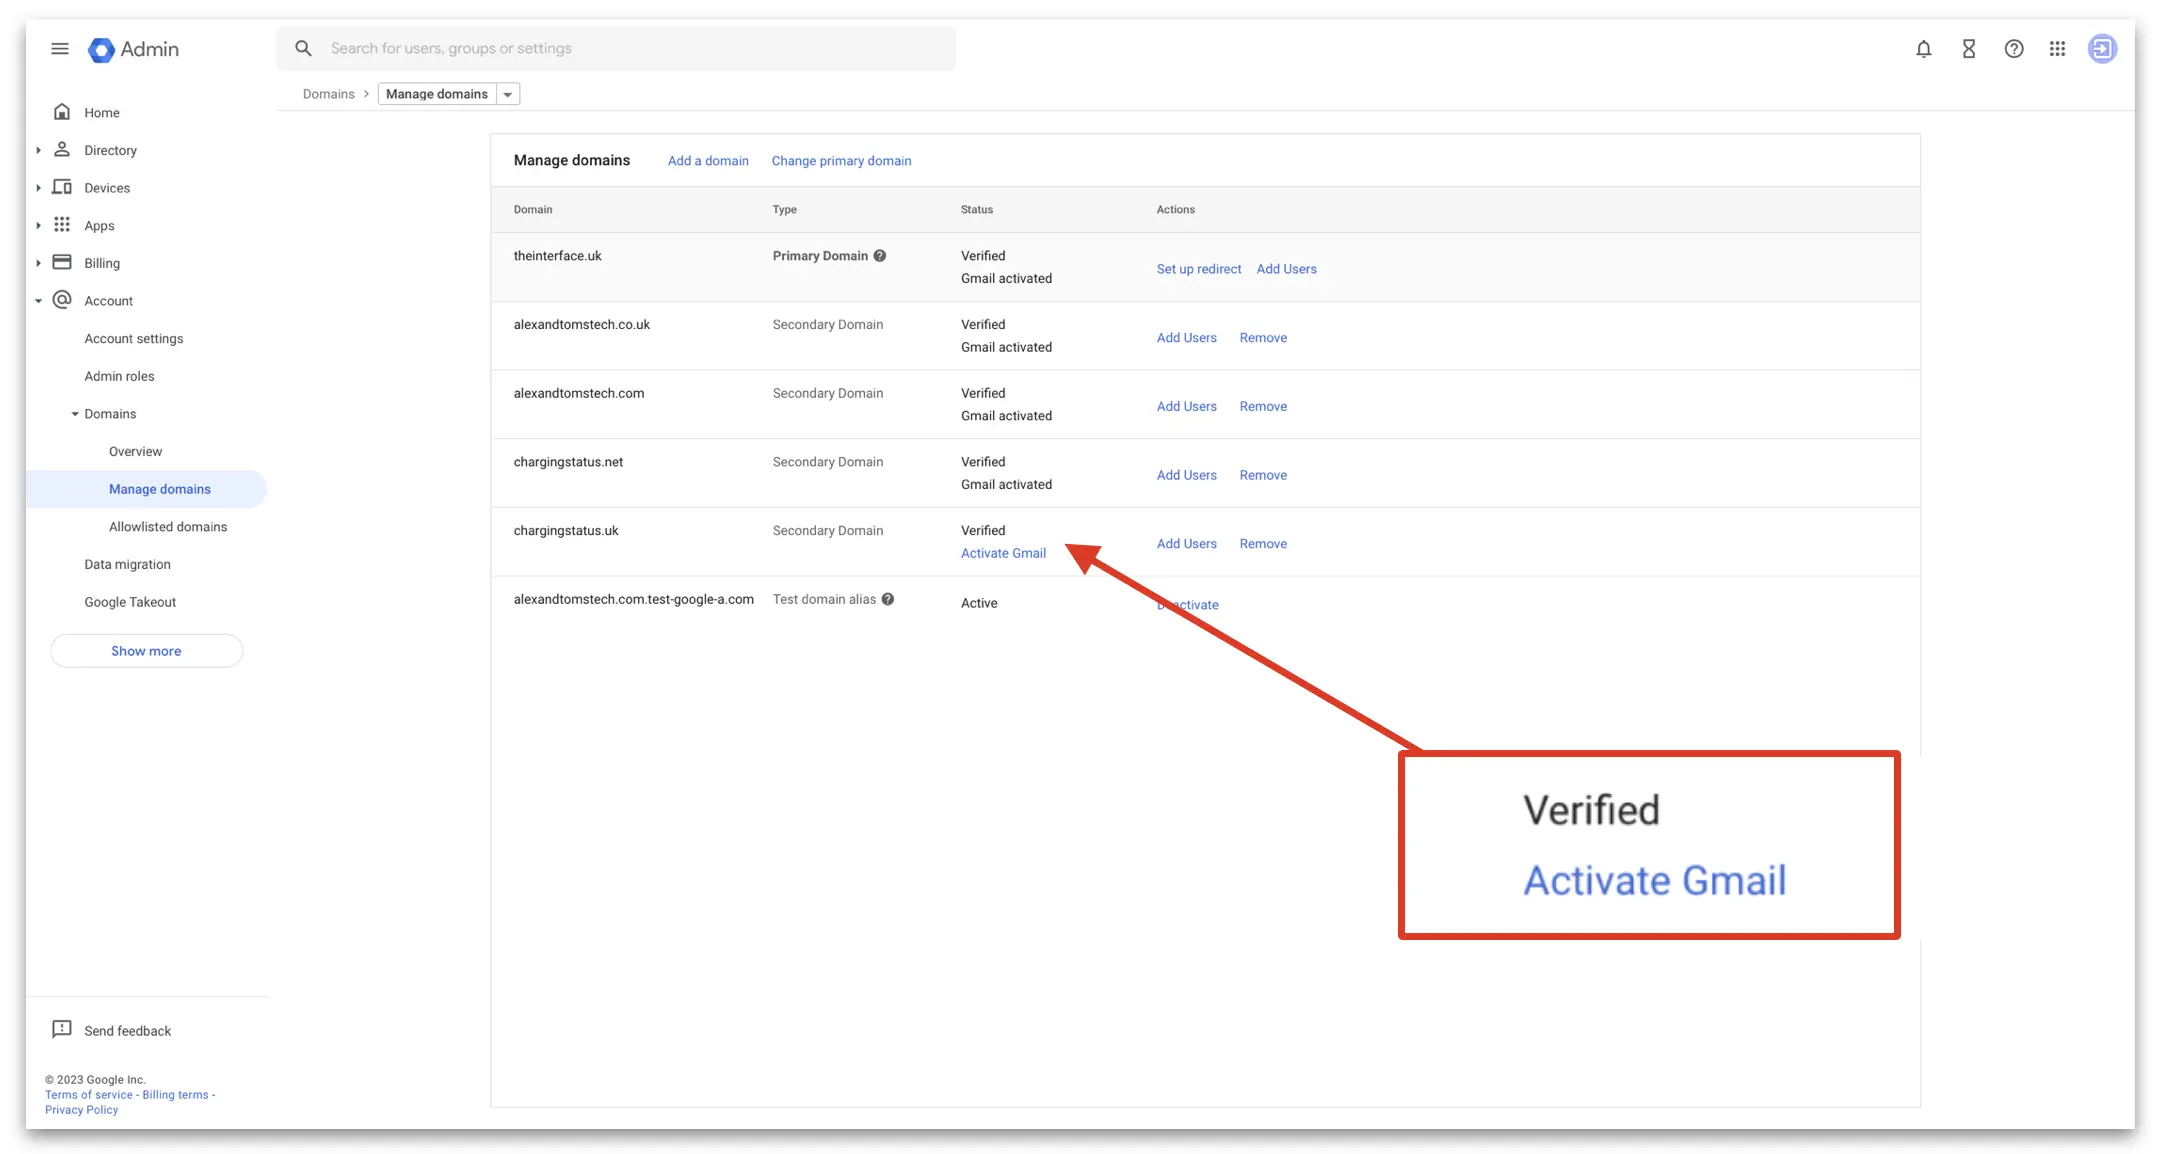
Now that is completed, we need to go back to the Google Workspace page from earlier and allow Google to verify that we own the domain. Click on ‘Verify my domain’ and after a few seconds you’ll be redirected to Google Workspace with a list of your domains.
Next, click on ‘Activate Gmail’ for the new domain
MX Records Configuration
Next step is to add some MX records to our domain provider. The process is pretty similar to adding a new TX record.
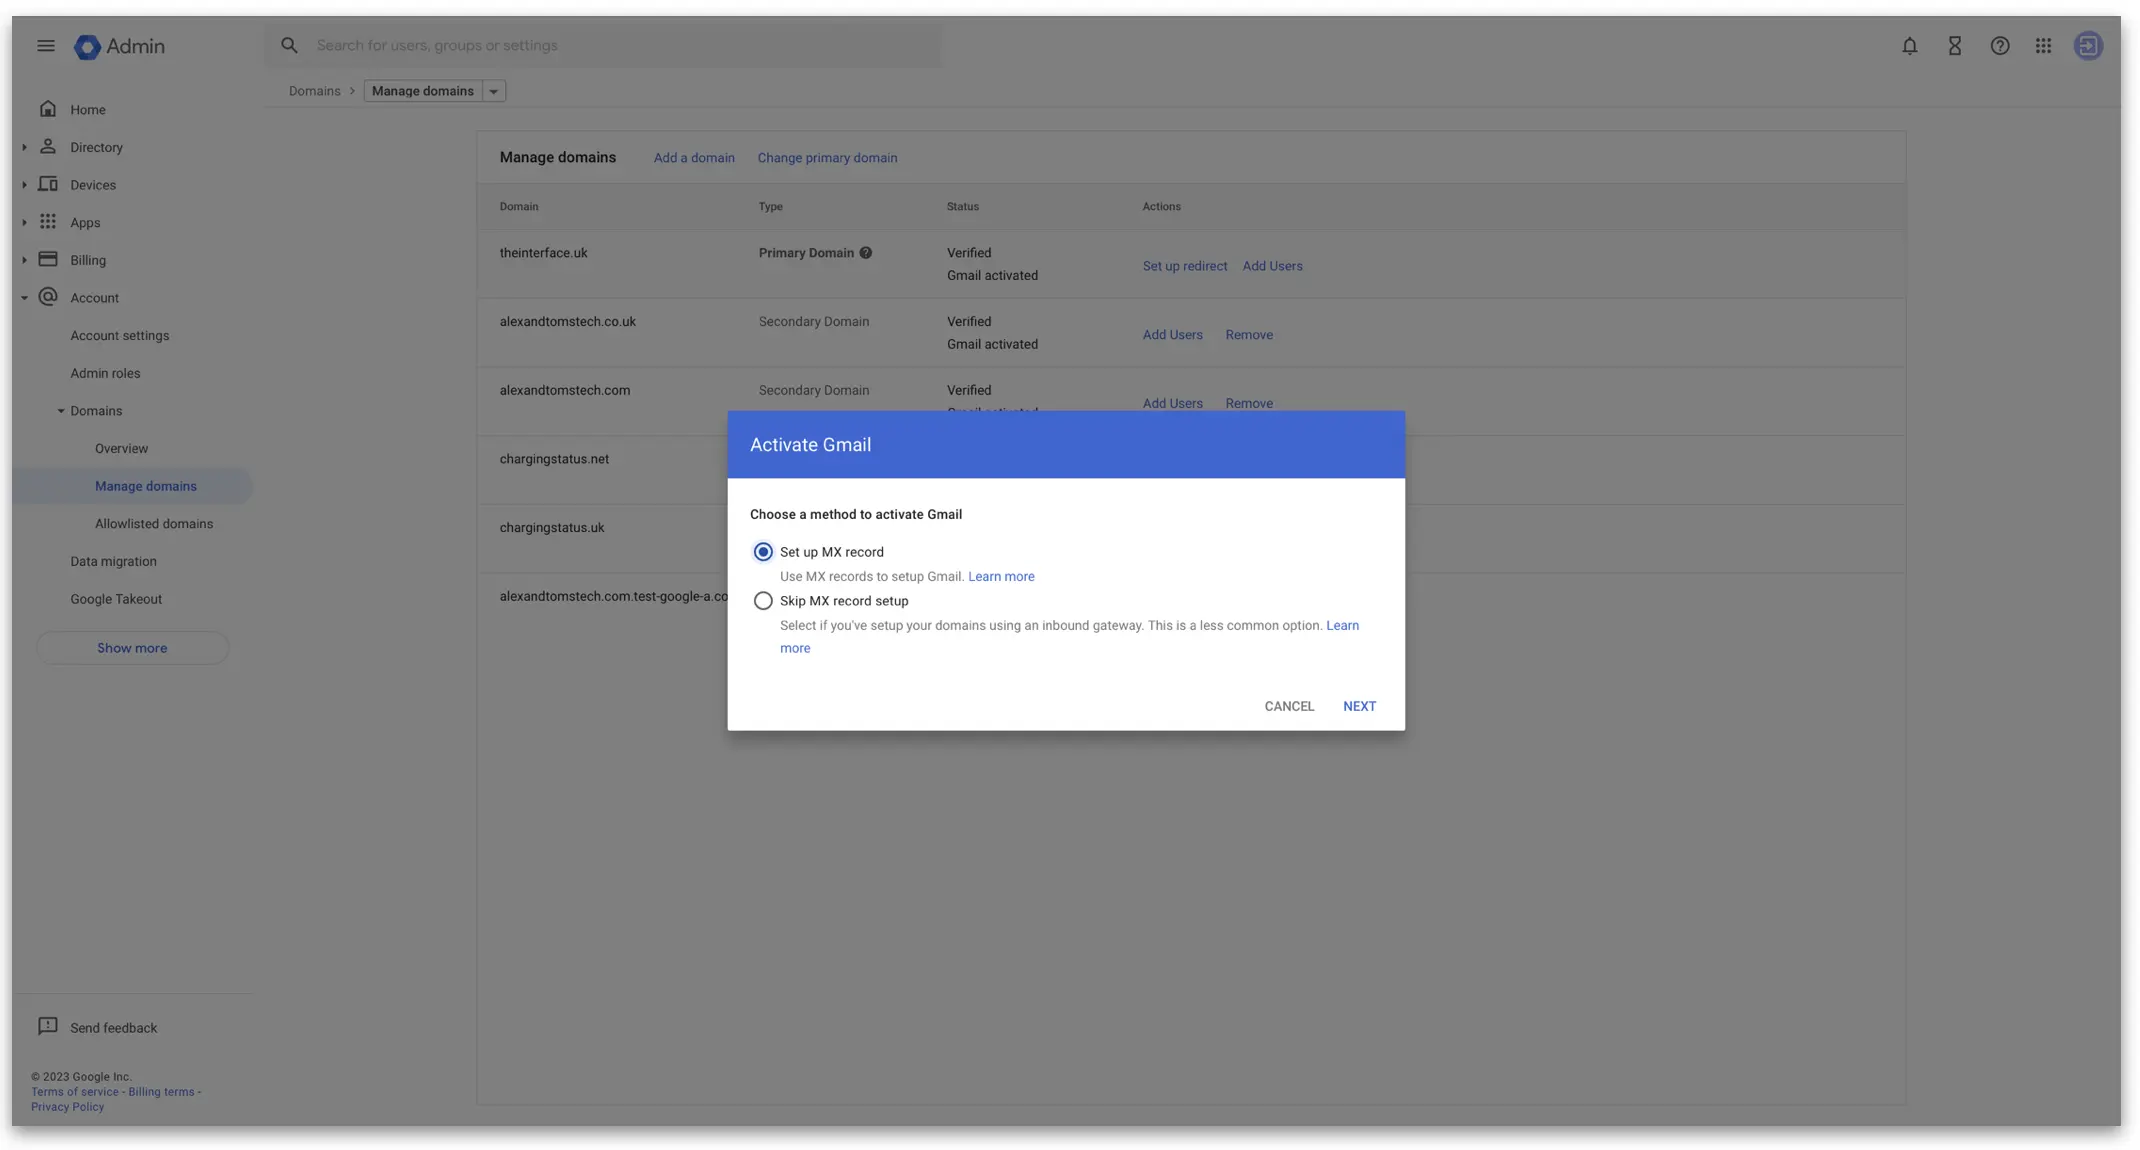
Click on ‘Set up MX record’ then click ‘Next’
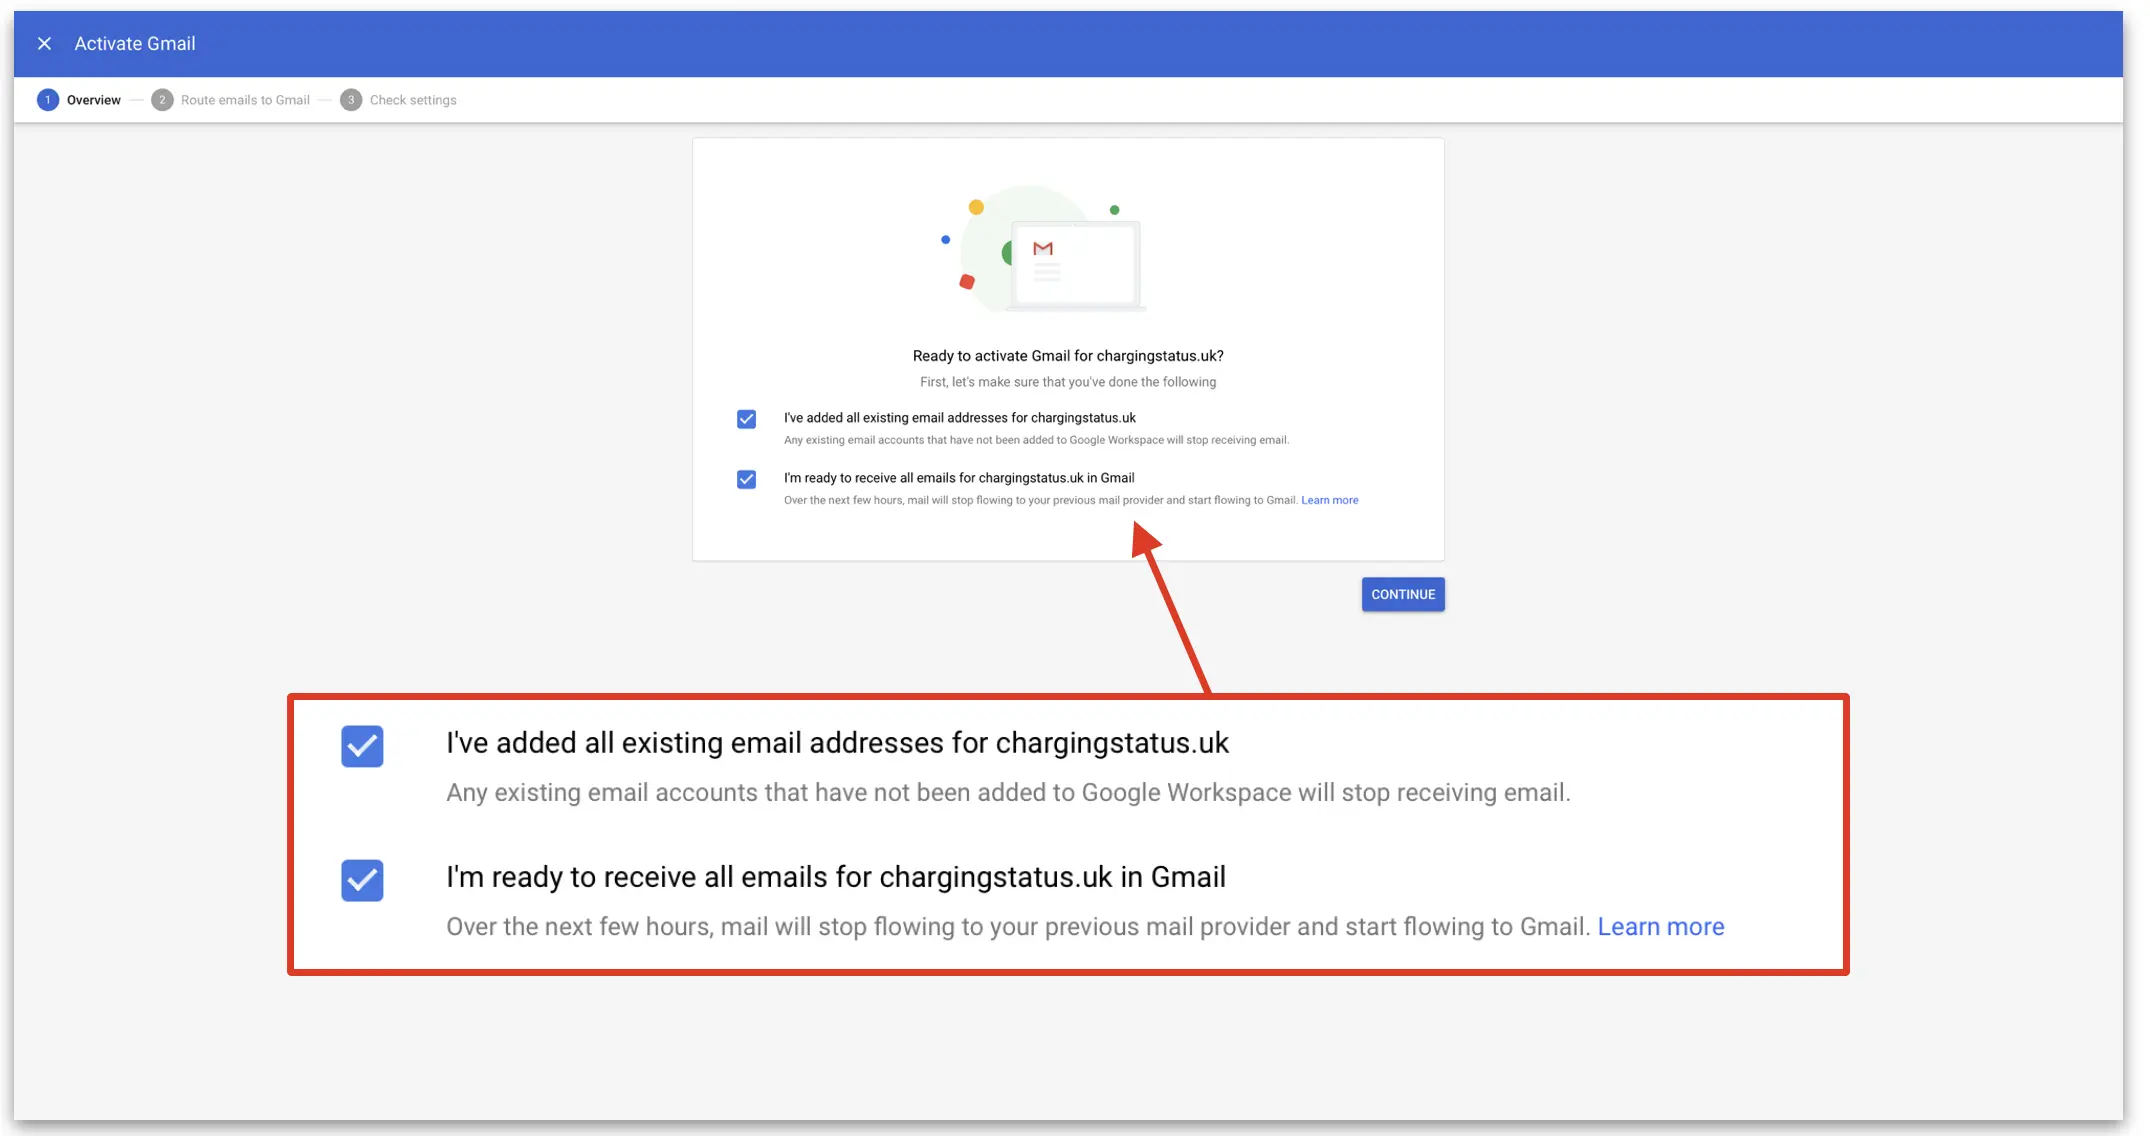
On the next screen select both options and then click ‘Continue’
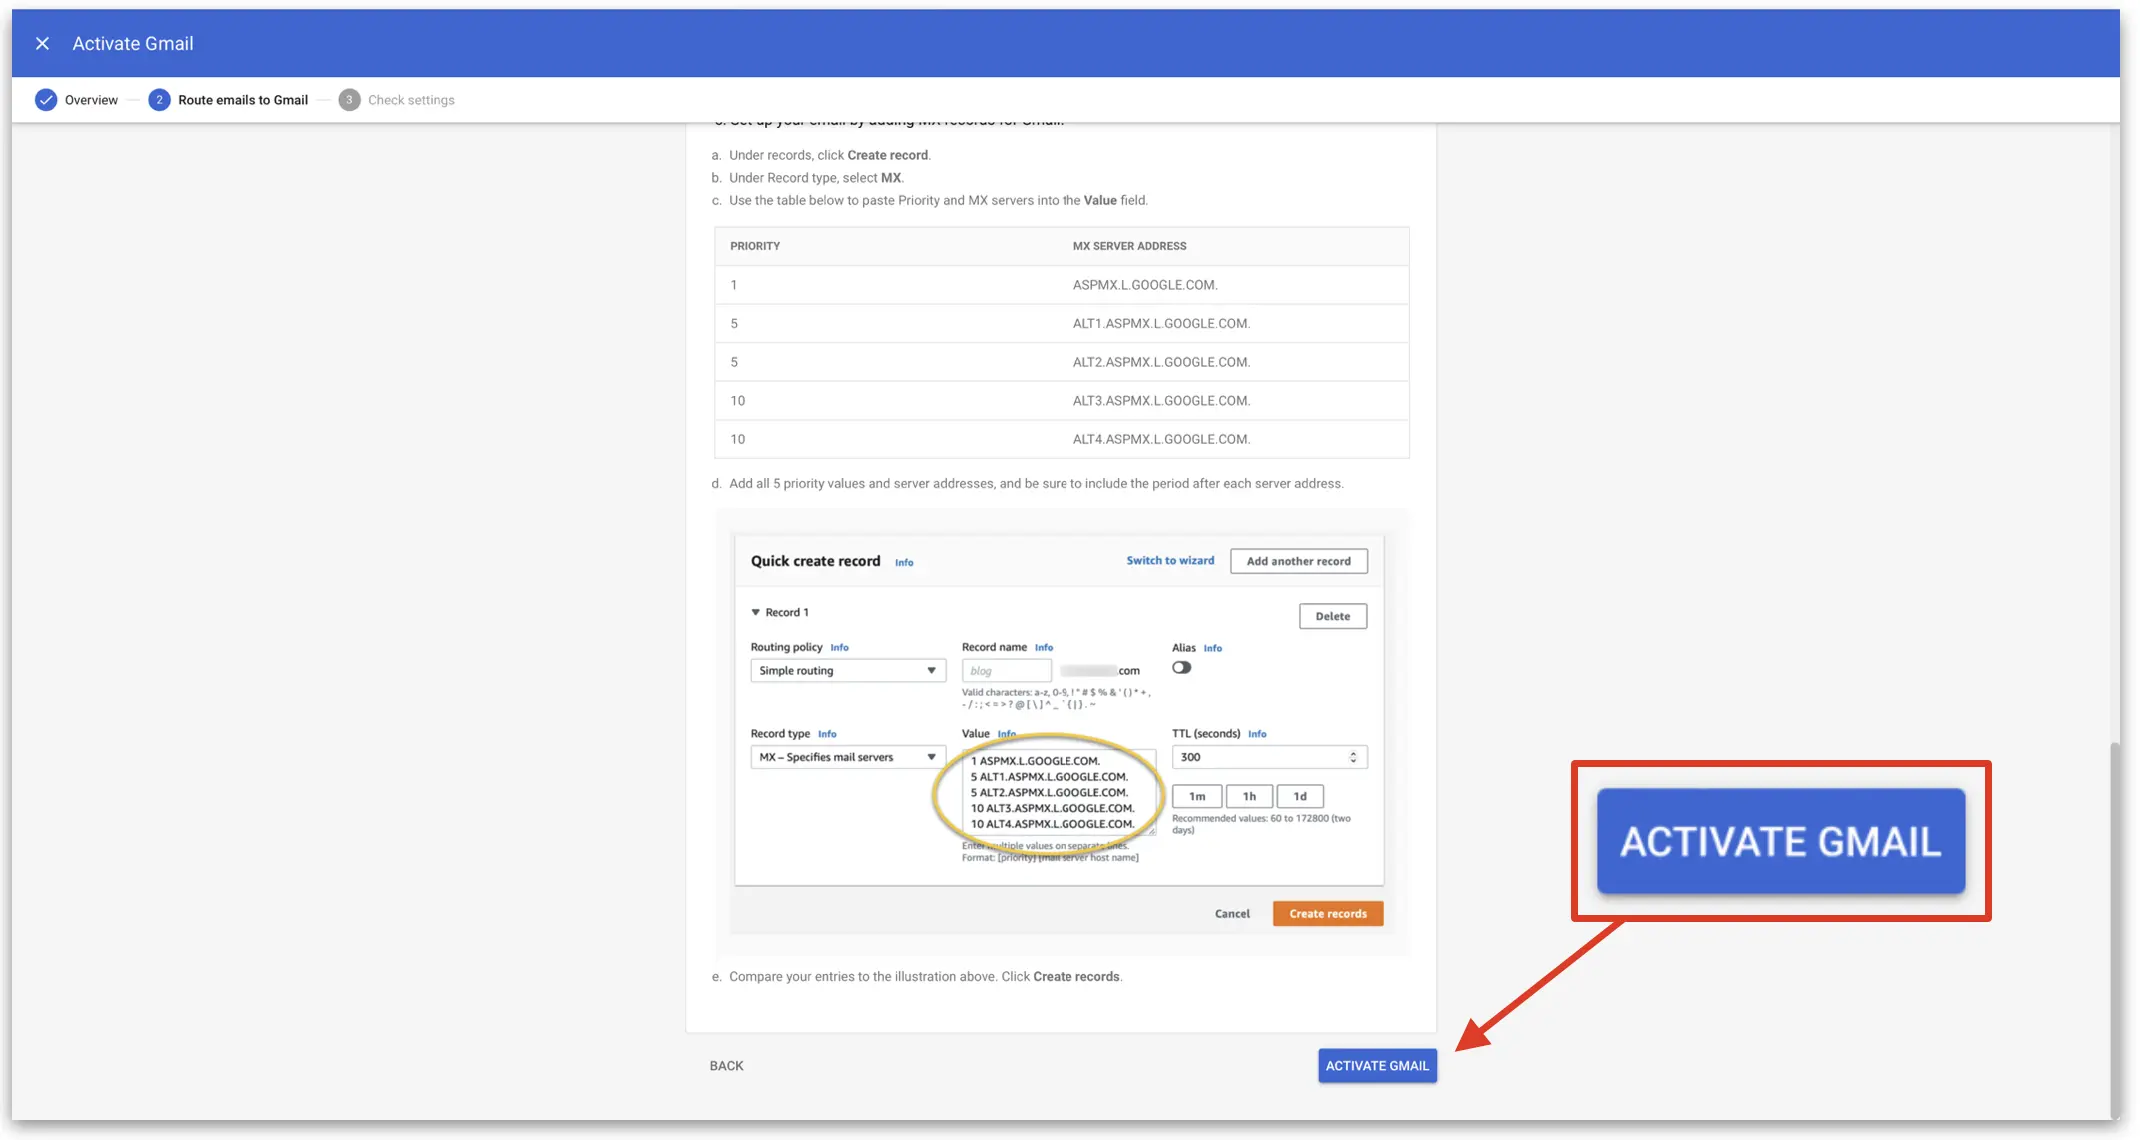
Next, Google will provide the appropriate MX records to enter into Route 53 (or your preferred domain provider)
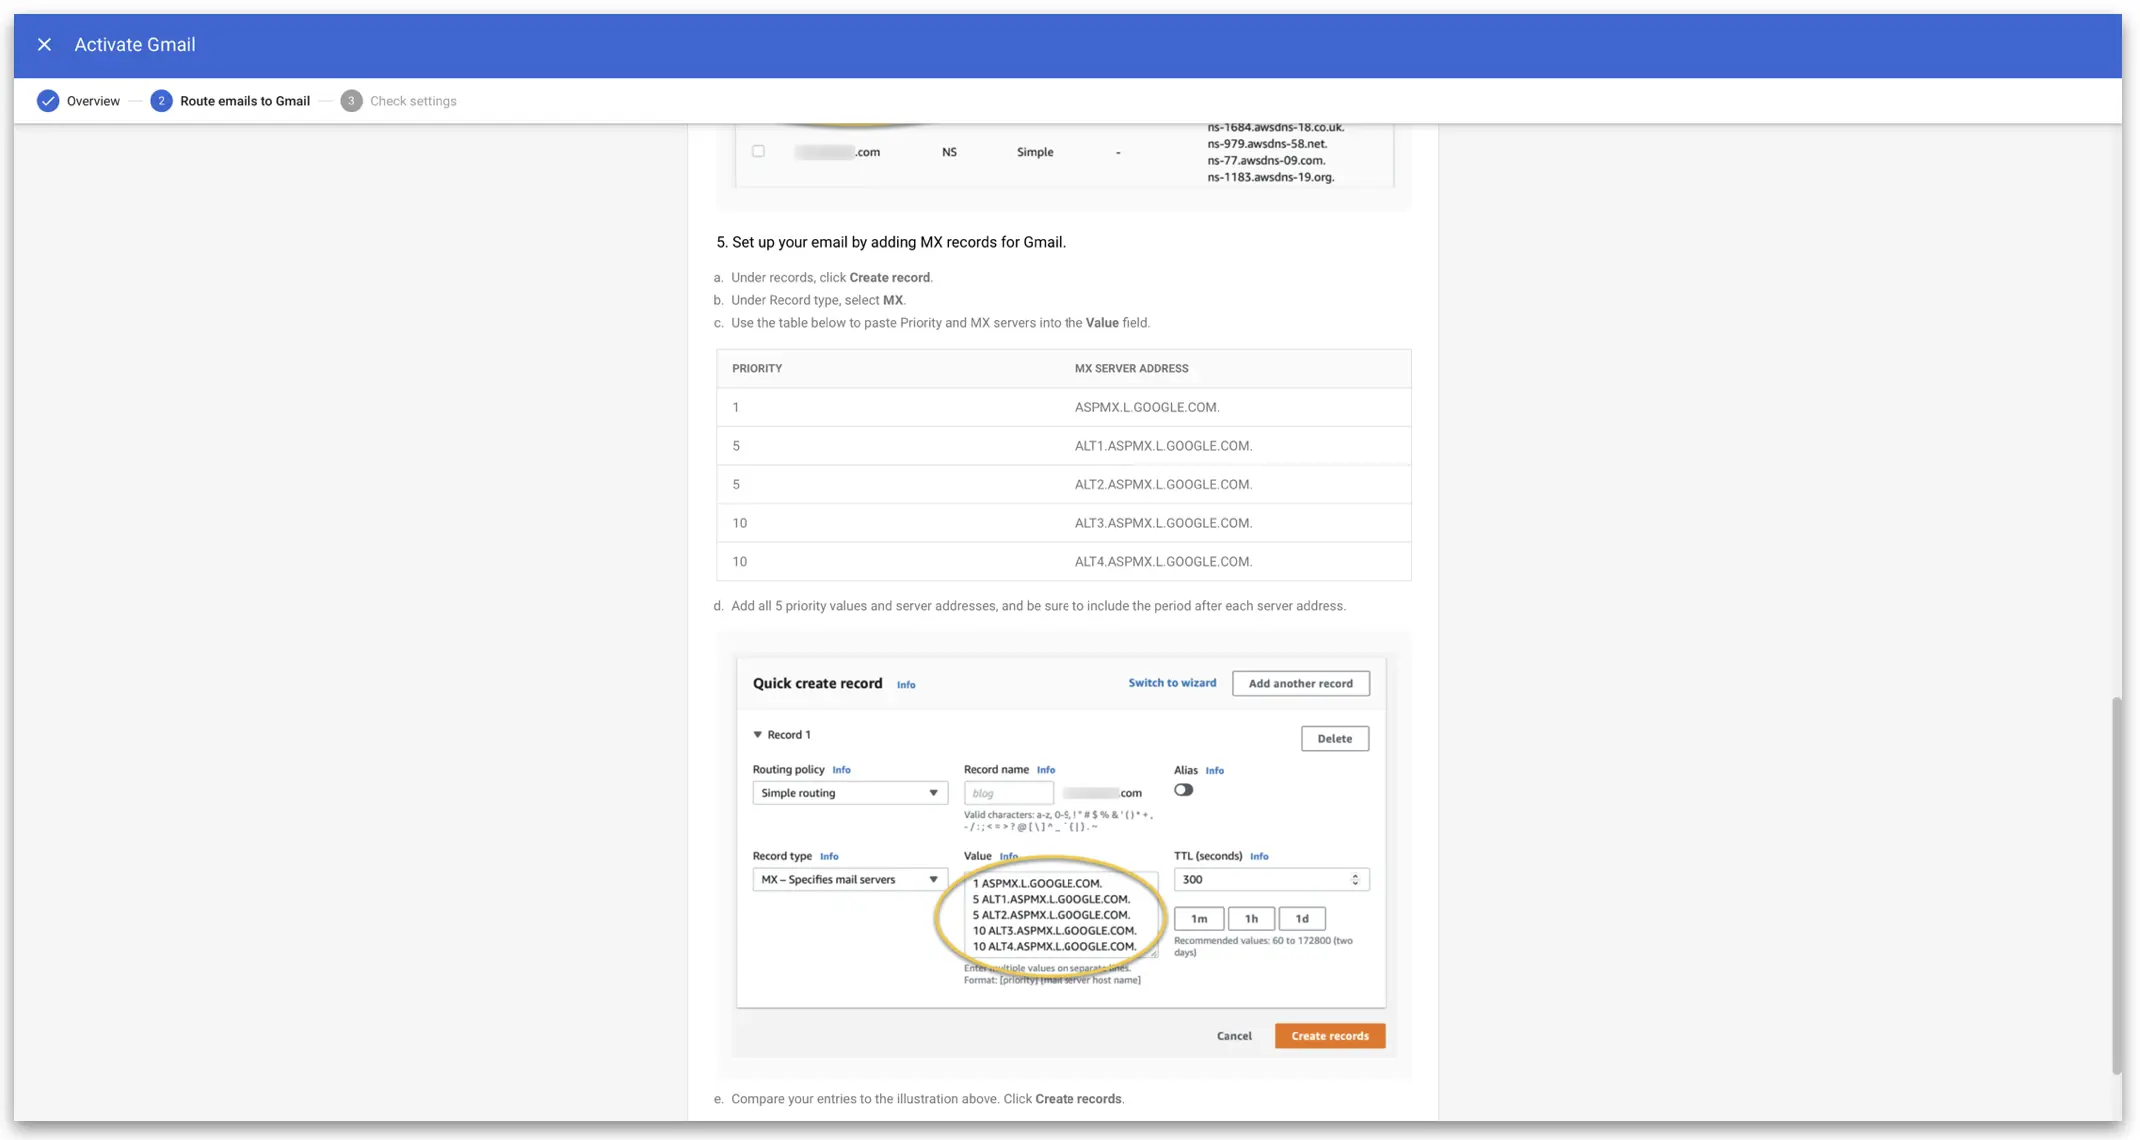
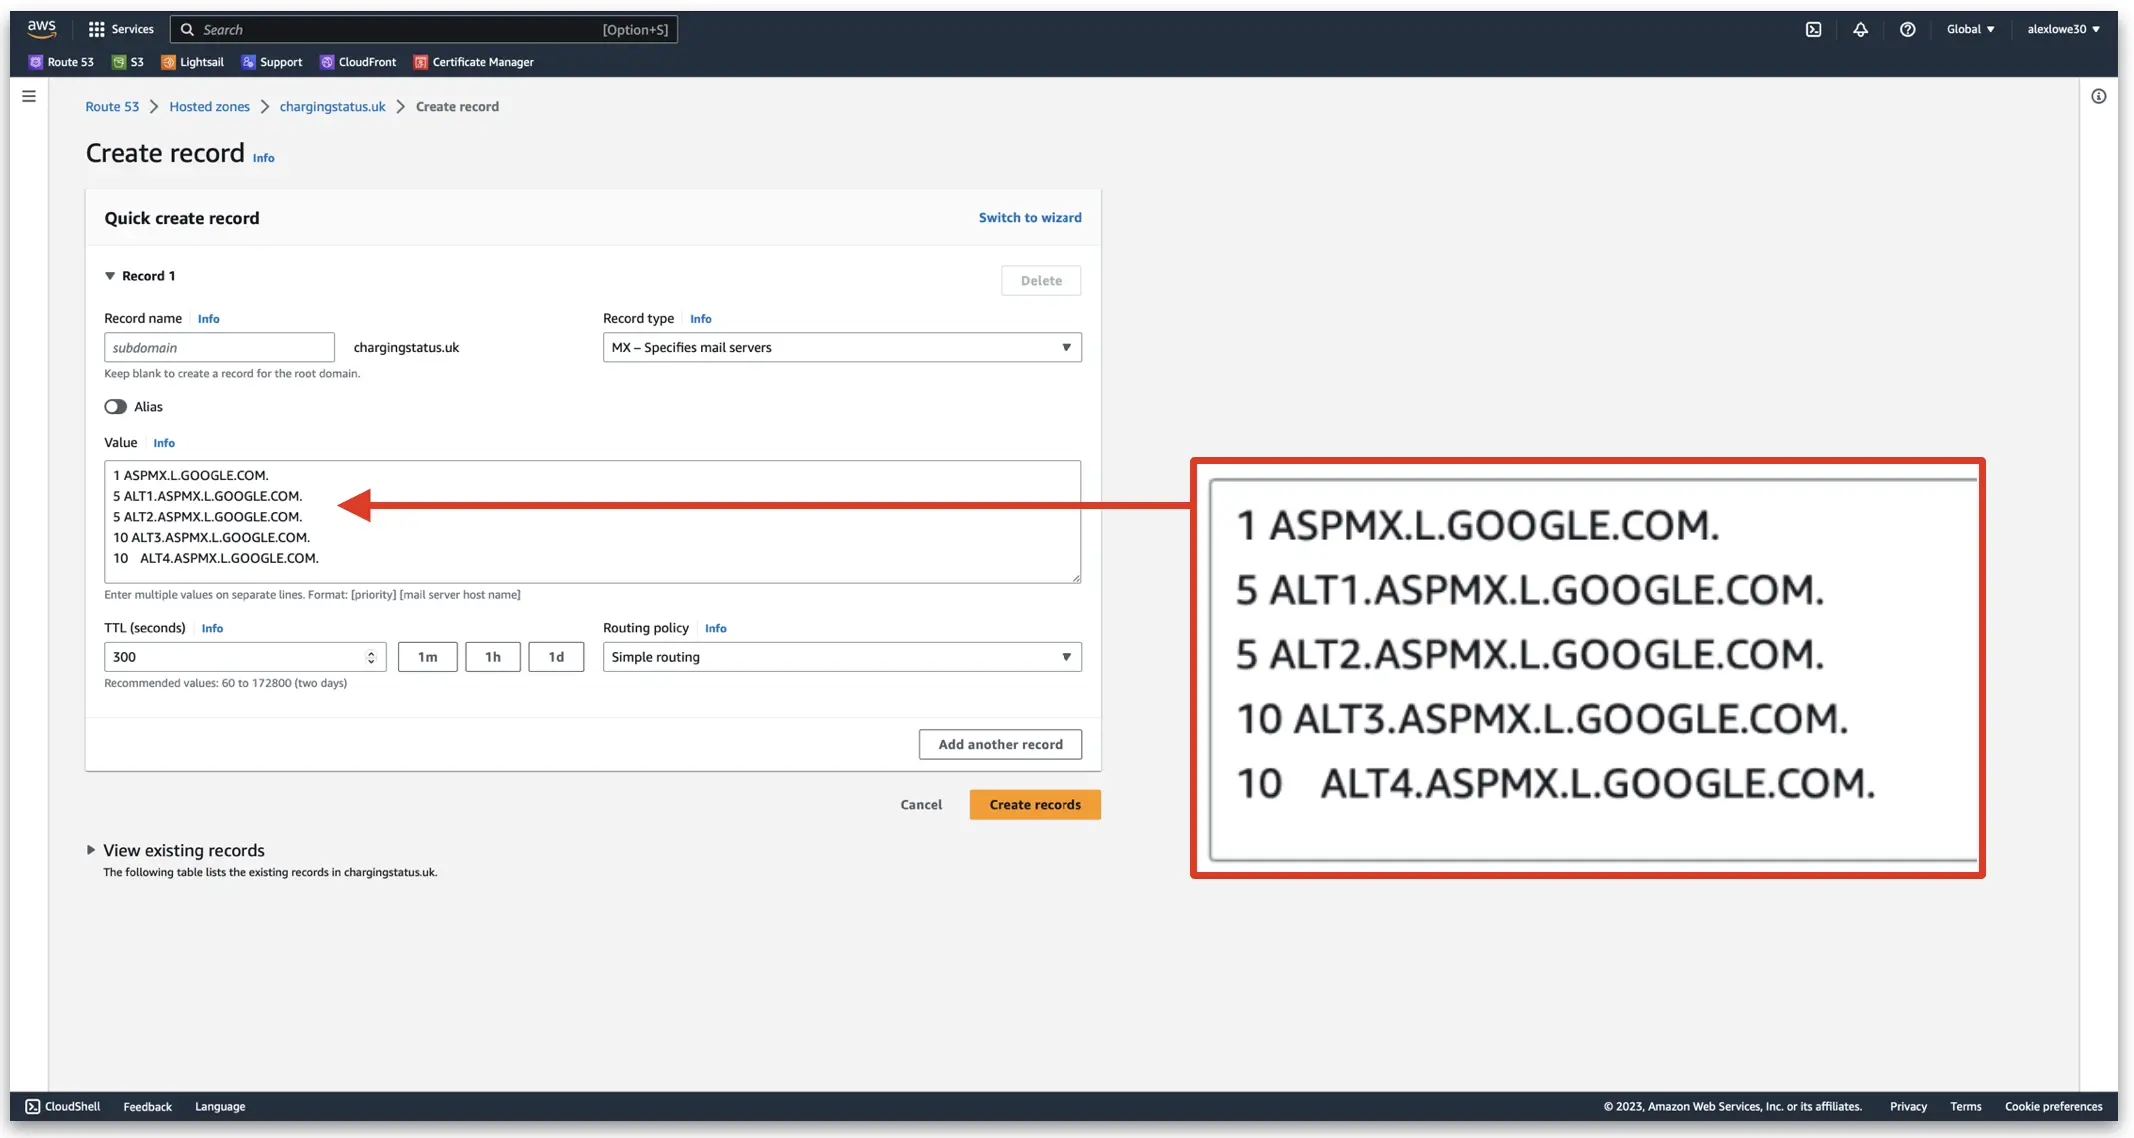
Next, we need to log back into Route 53 and add these new MX records. First navigate to the hosted zone for your domain and click on ‘Create record’
Enter in the NS records supplied by Google. At least for Route 53, it requires a space in-between the number and the record. For example 1[SPACE]ASPMX.L.GOOGLE.COM. including the full stop. Repeat for each record, as per the image below.
Next, head back to the page from Google and wait 10 mins. The click on ‘Activate Gmail’
After 30 seconds or so the screen will show verification page and then boot you back to the Google admin page
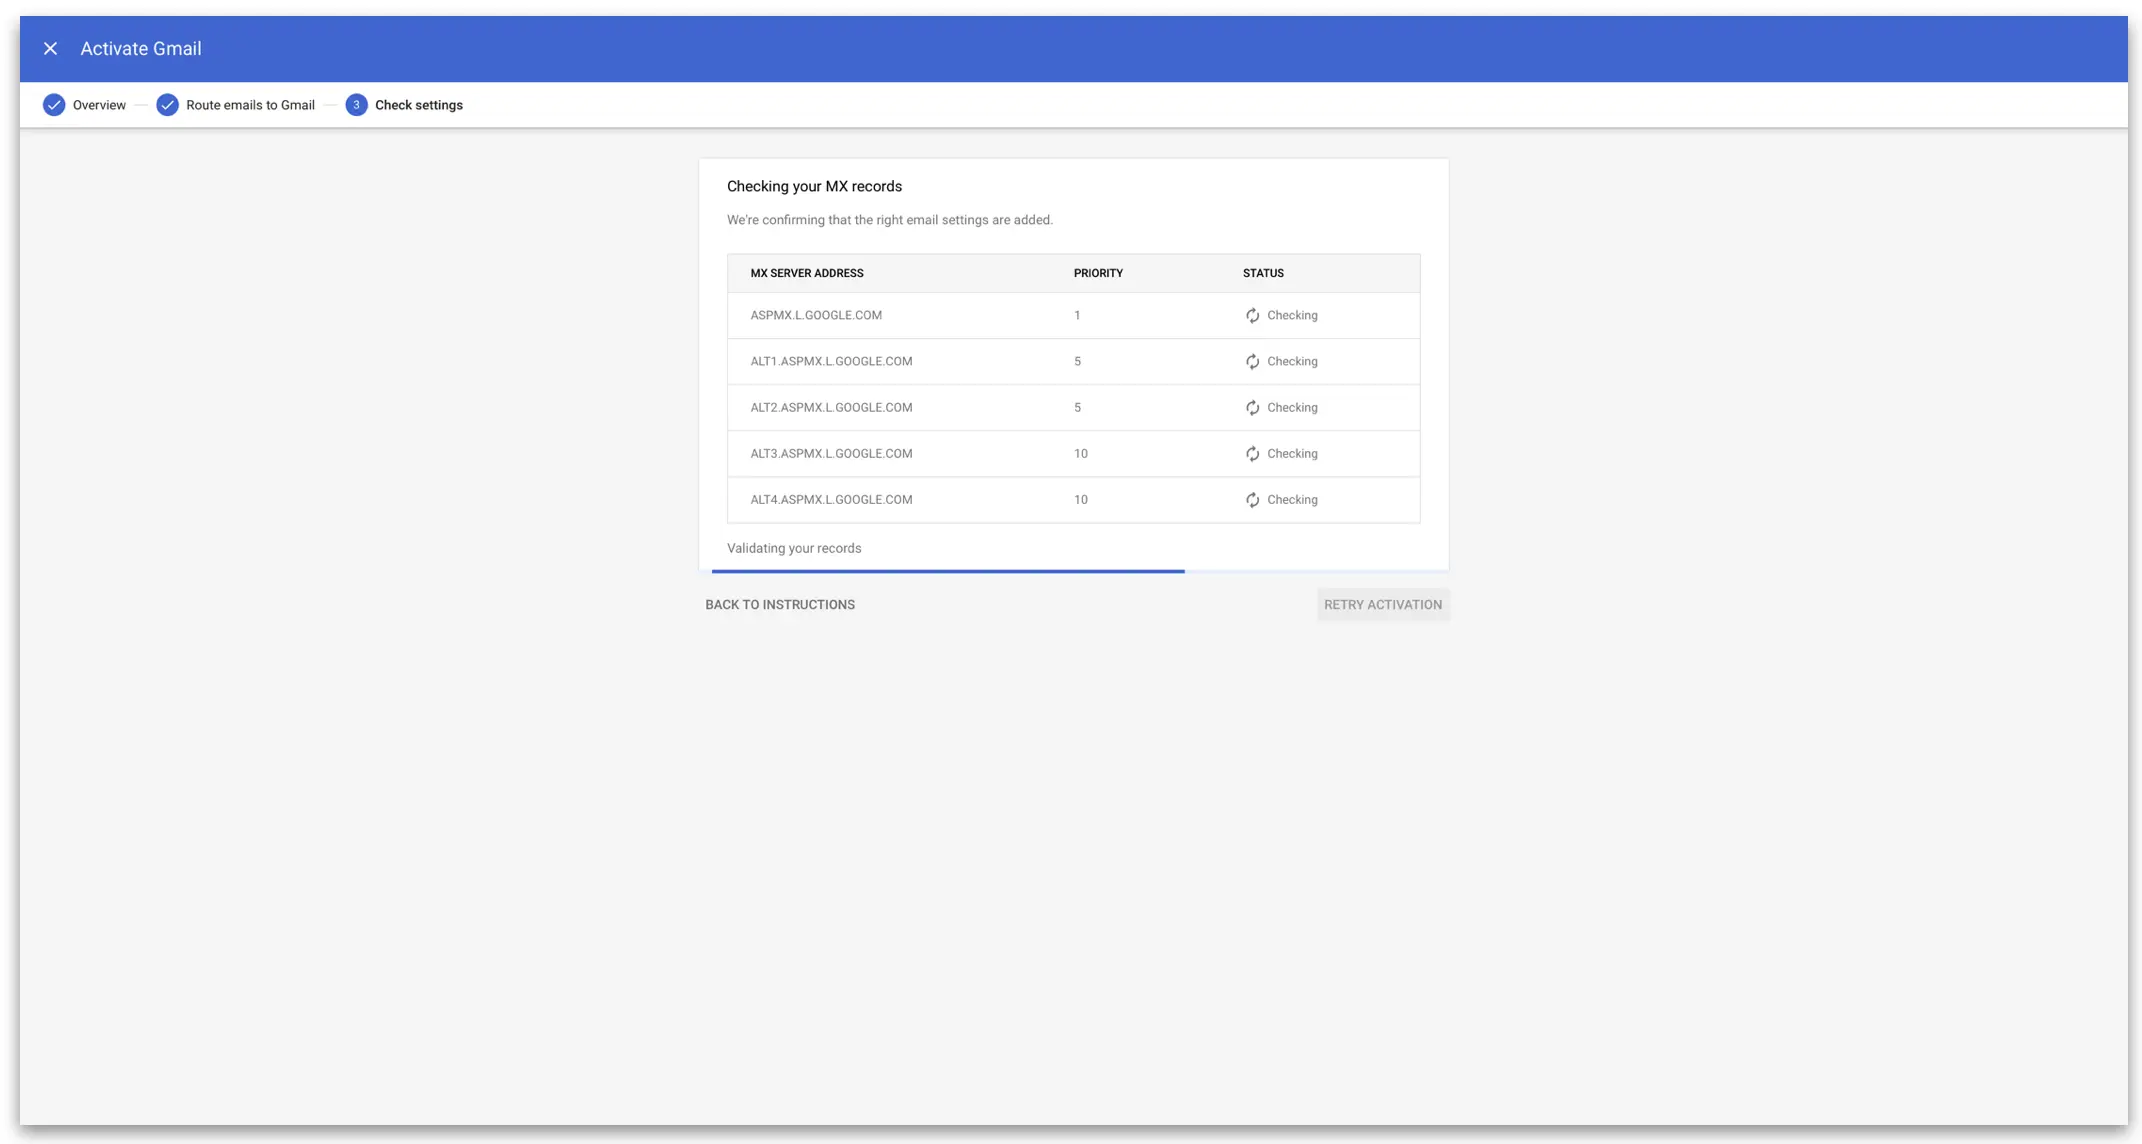
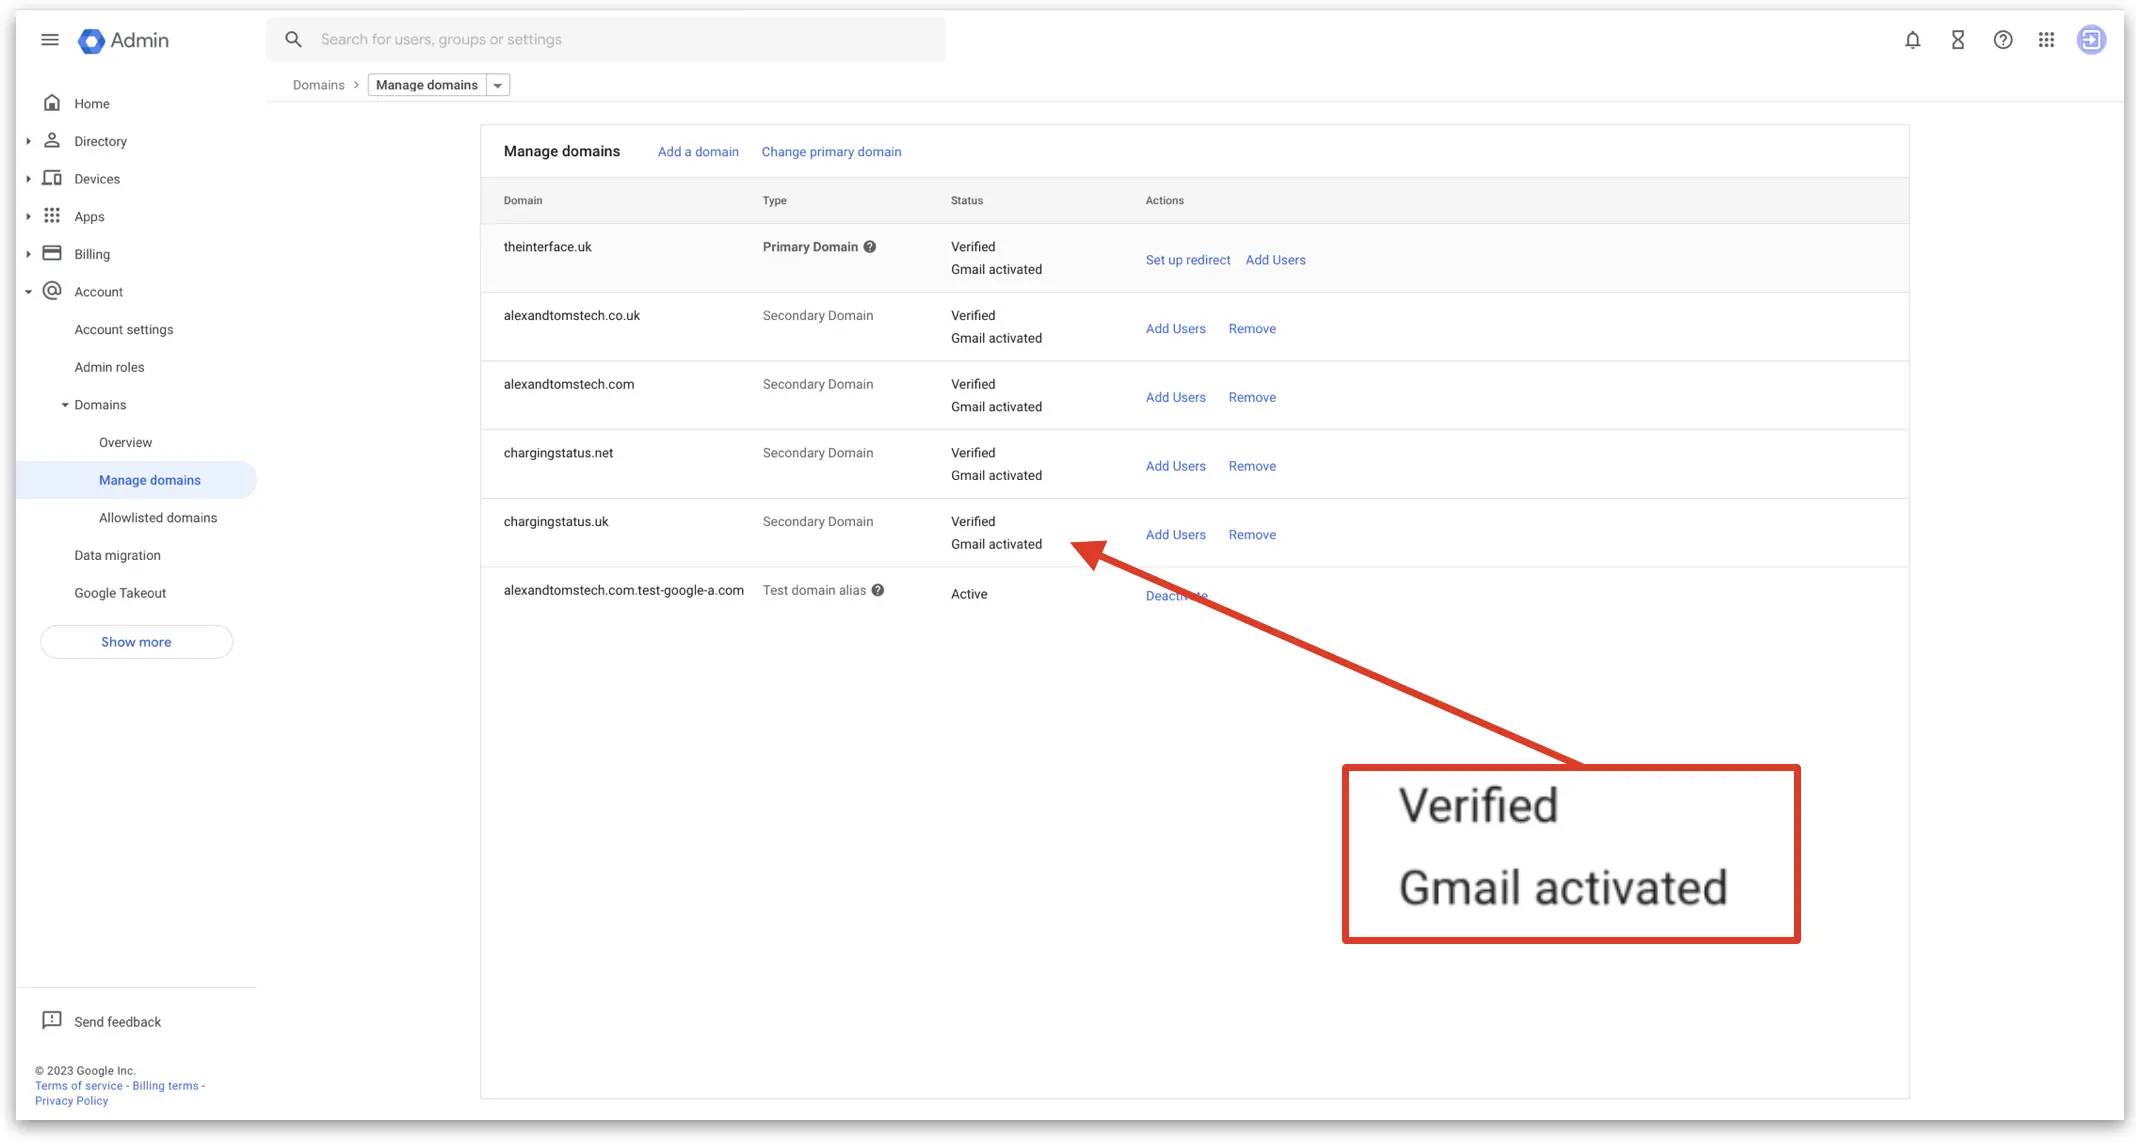
Once done, you can check it is now verified by going back to the list of domains and it’ll now show as Gmail activated
Making a new email address
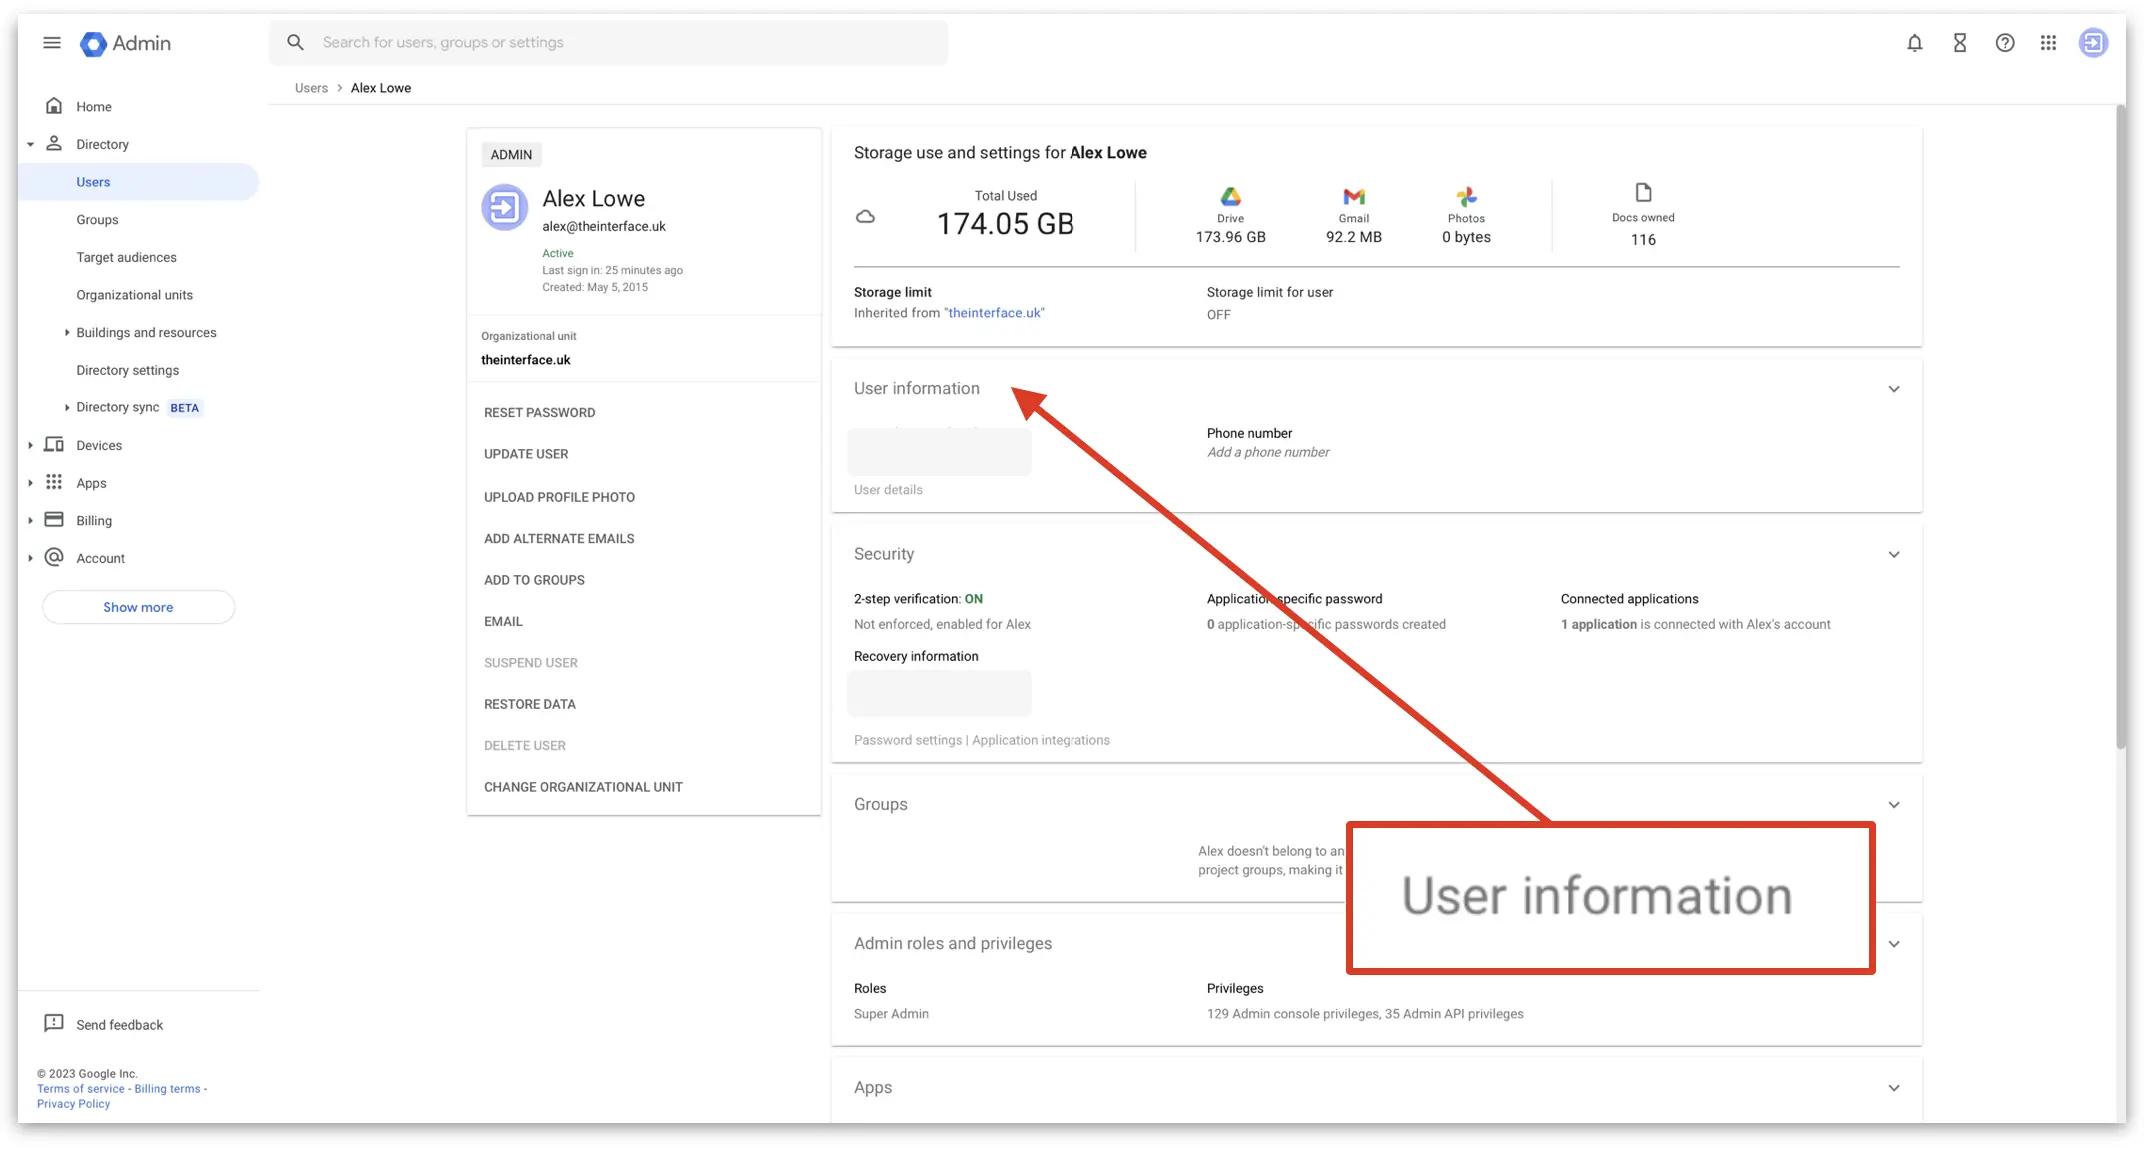
Next, we can make a new email address as an alias for us to use. To do this go back to ‘Users’, then ‘User information’
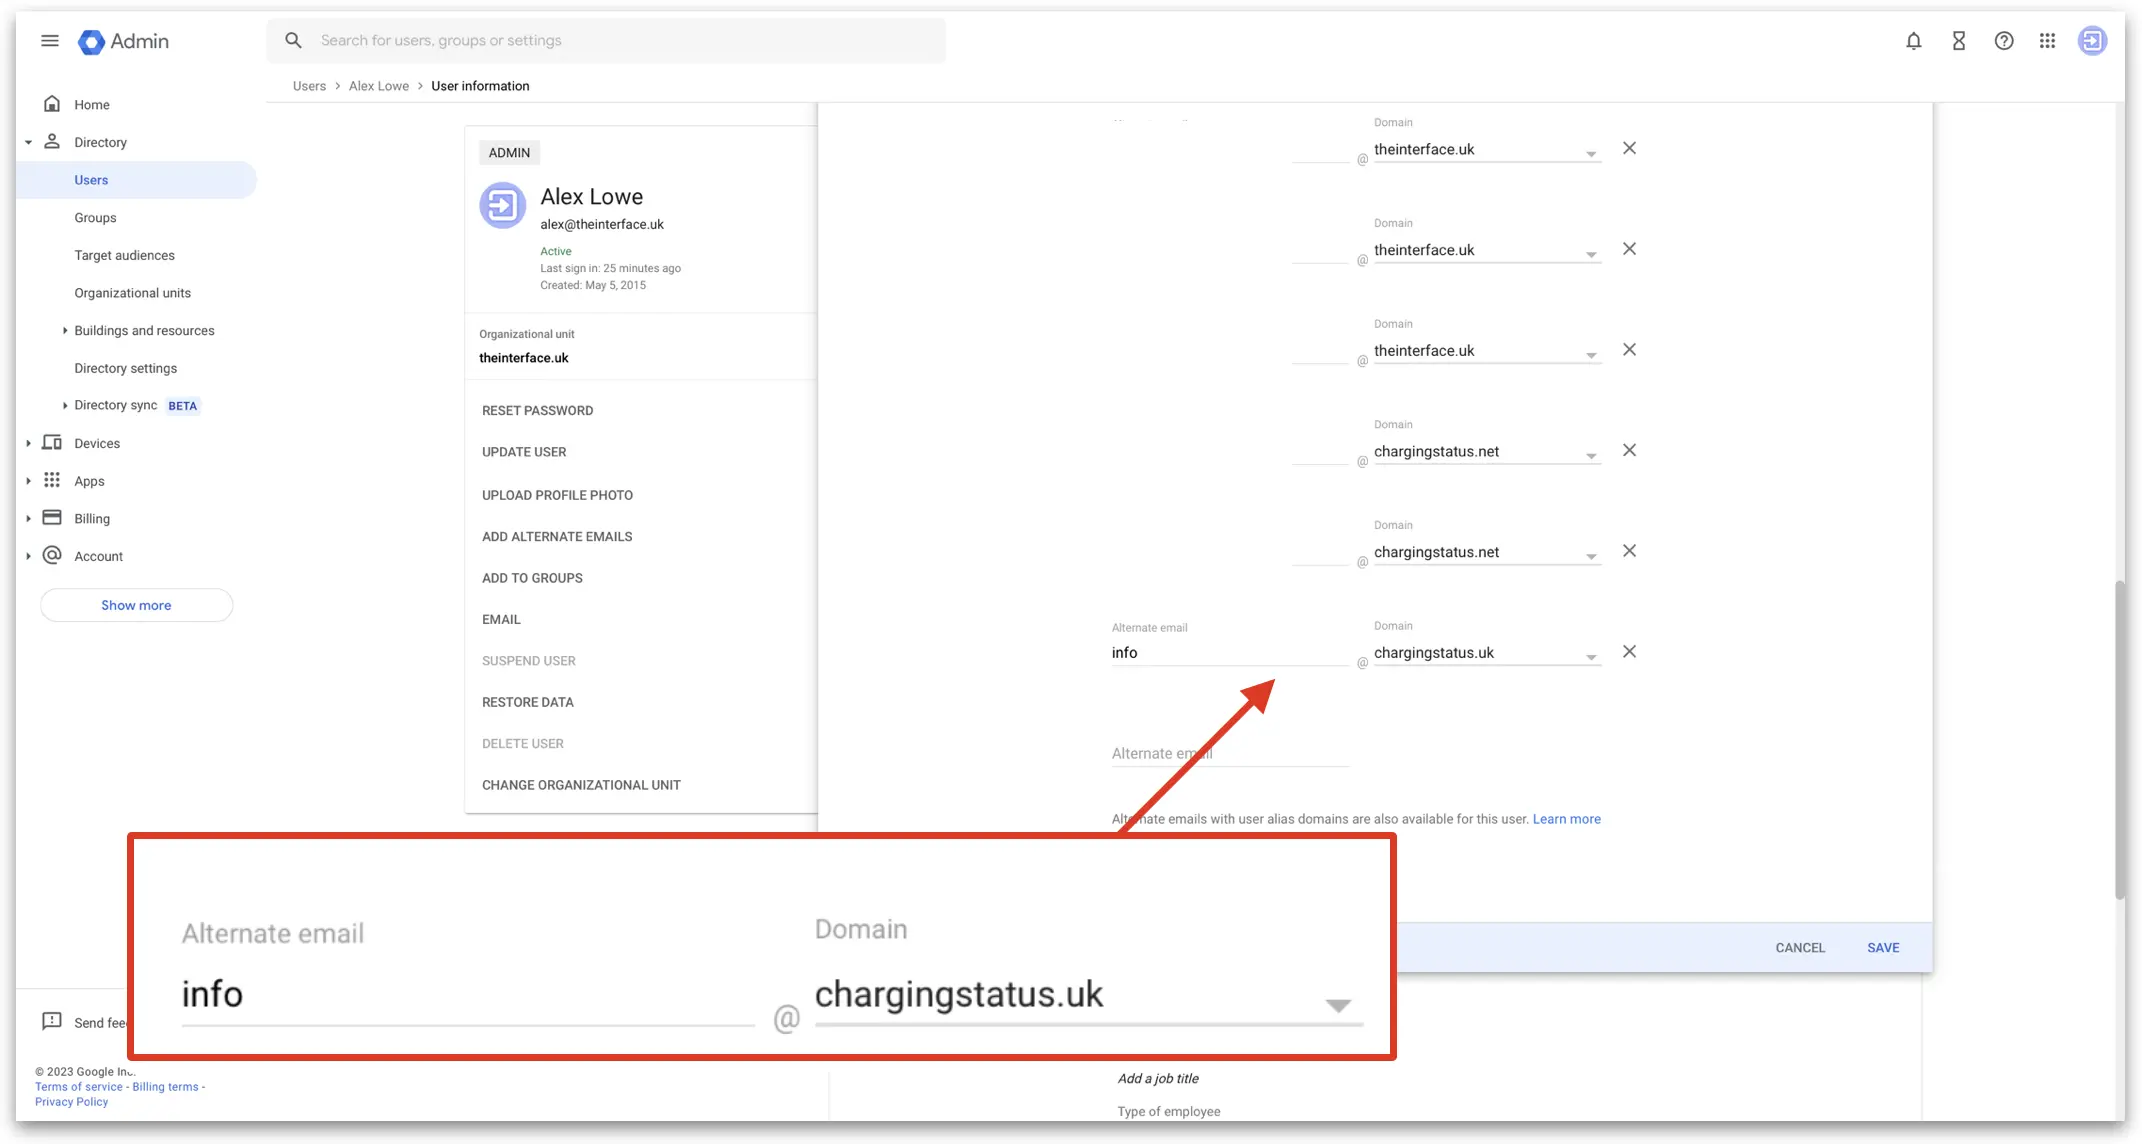
Now, we can add a new email to act as an alias and enter it in a choose a domain for it
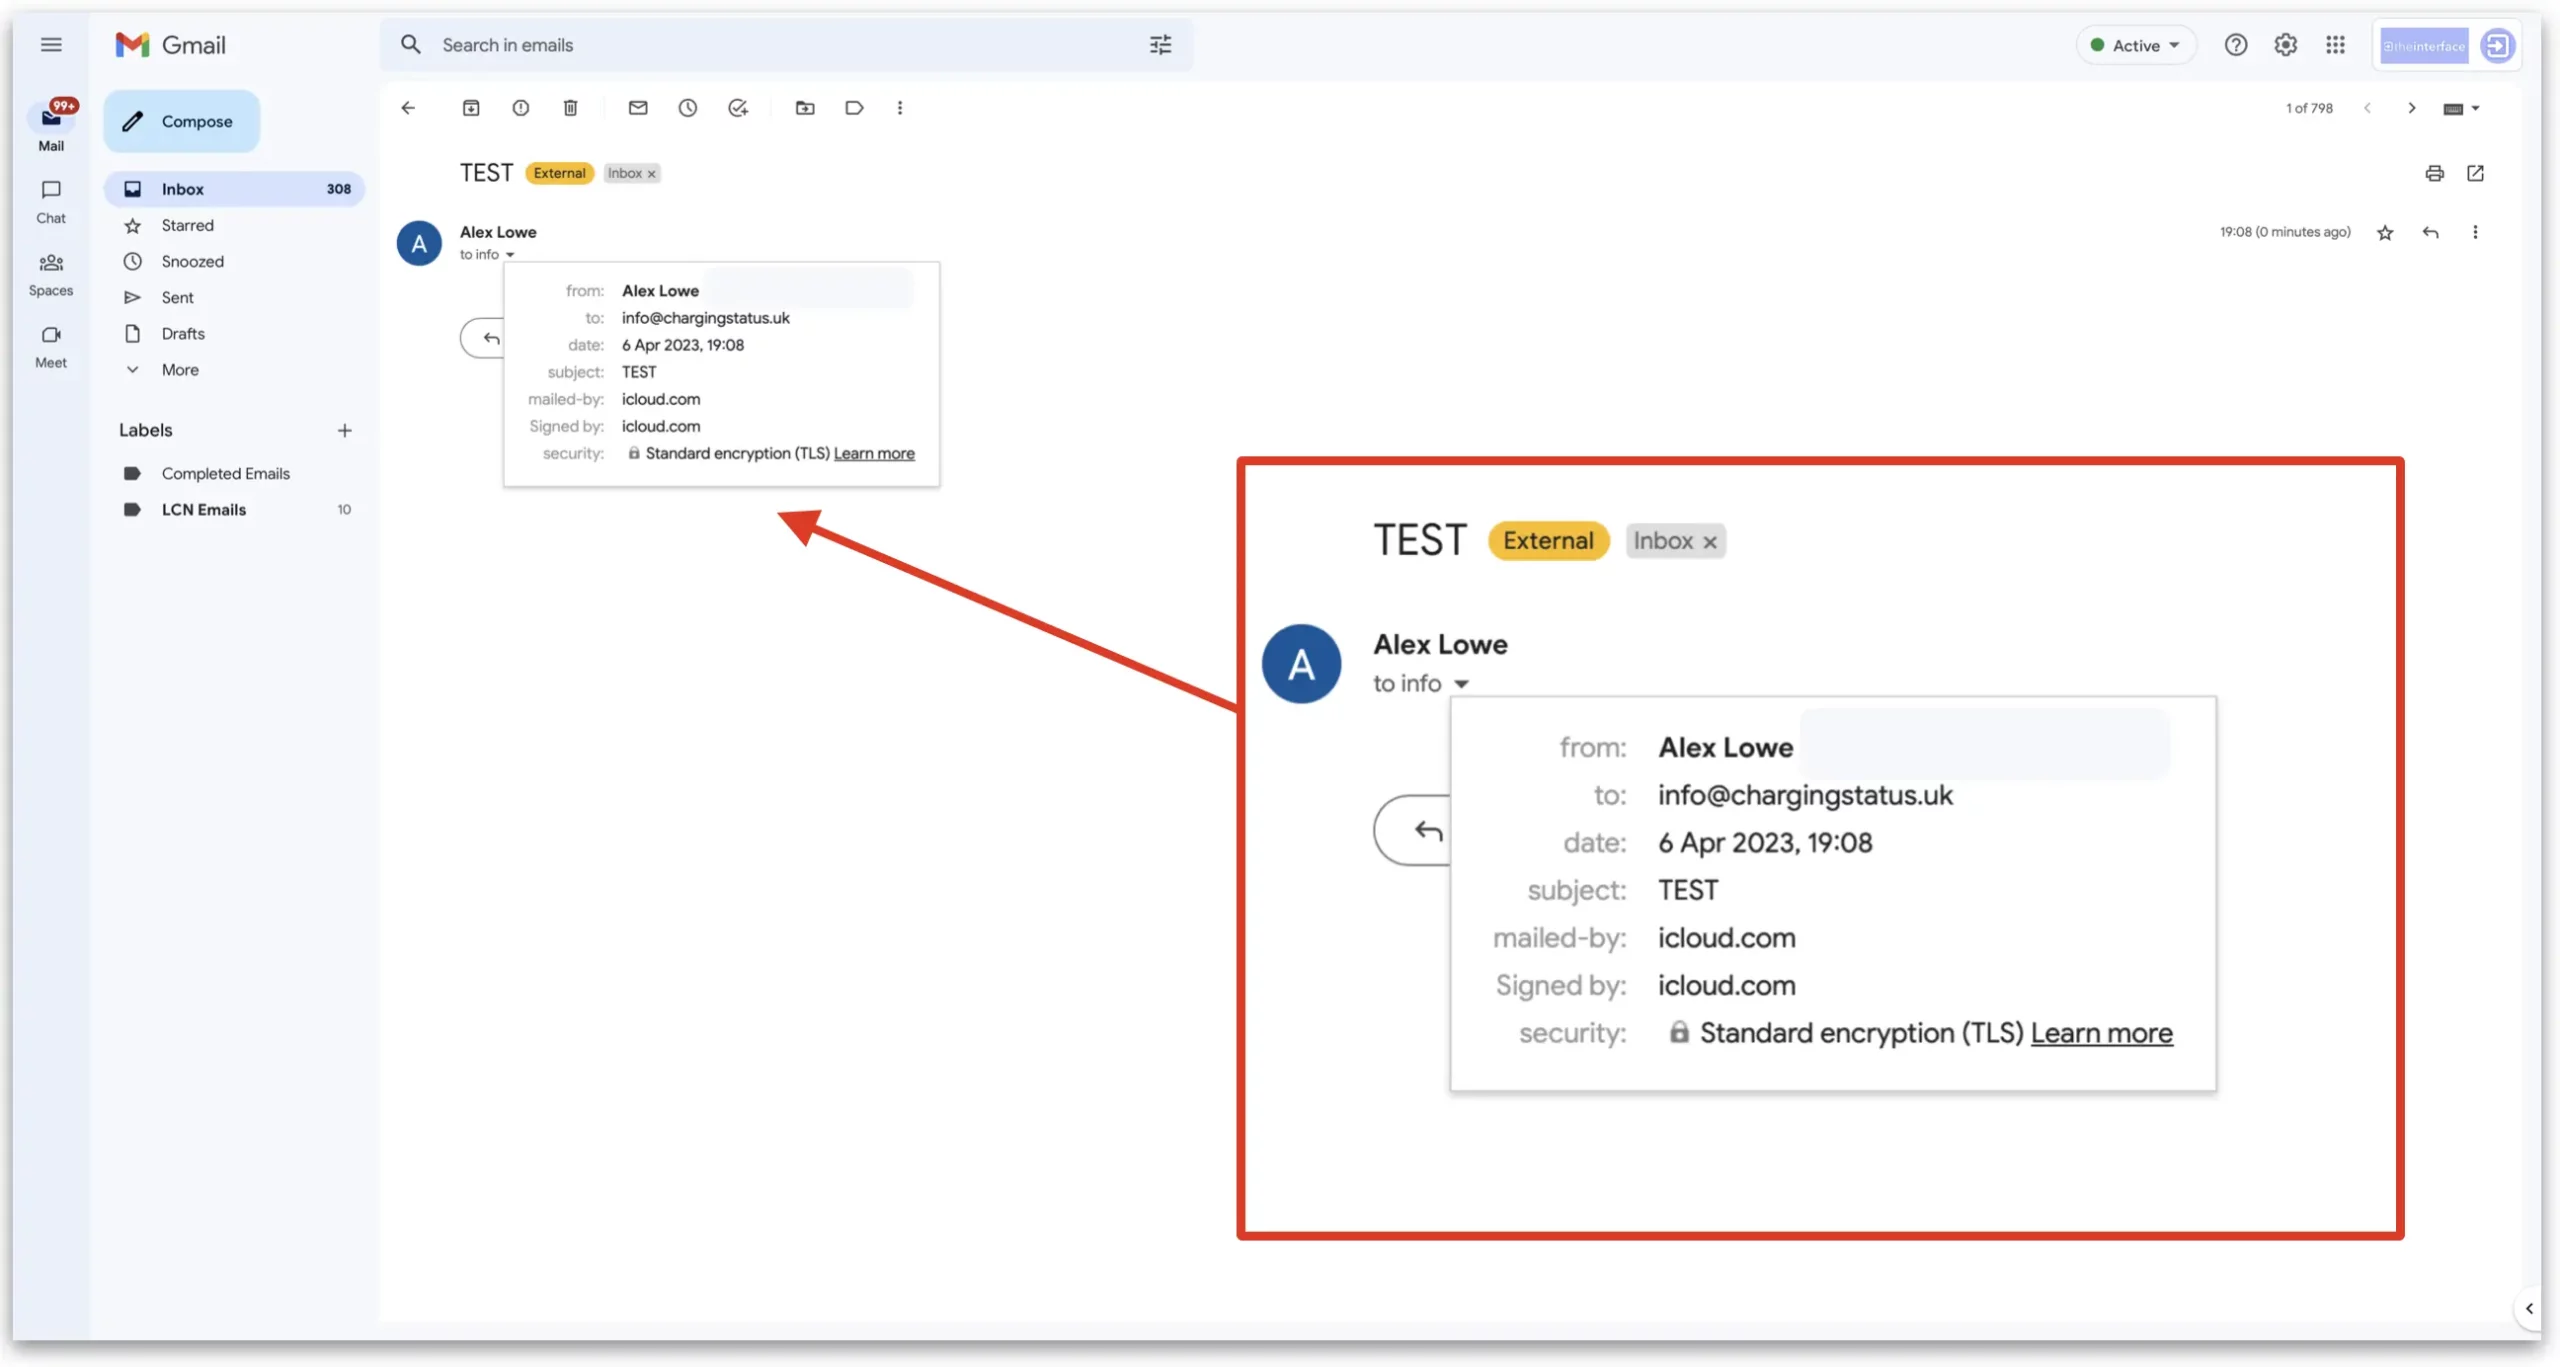
Testing and verification
There are two tests we can do, we can send an email to our new address and make sure it goes
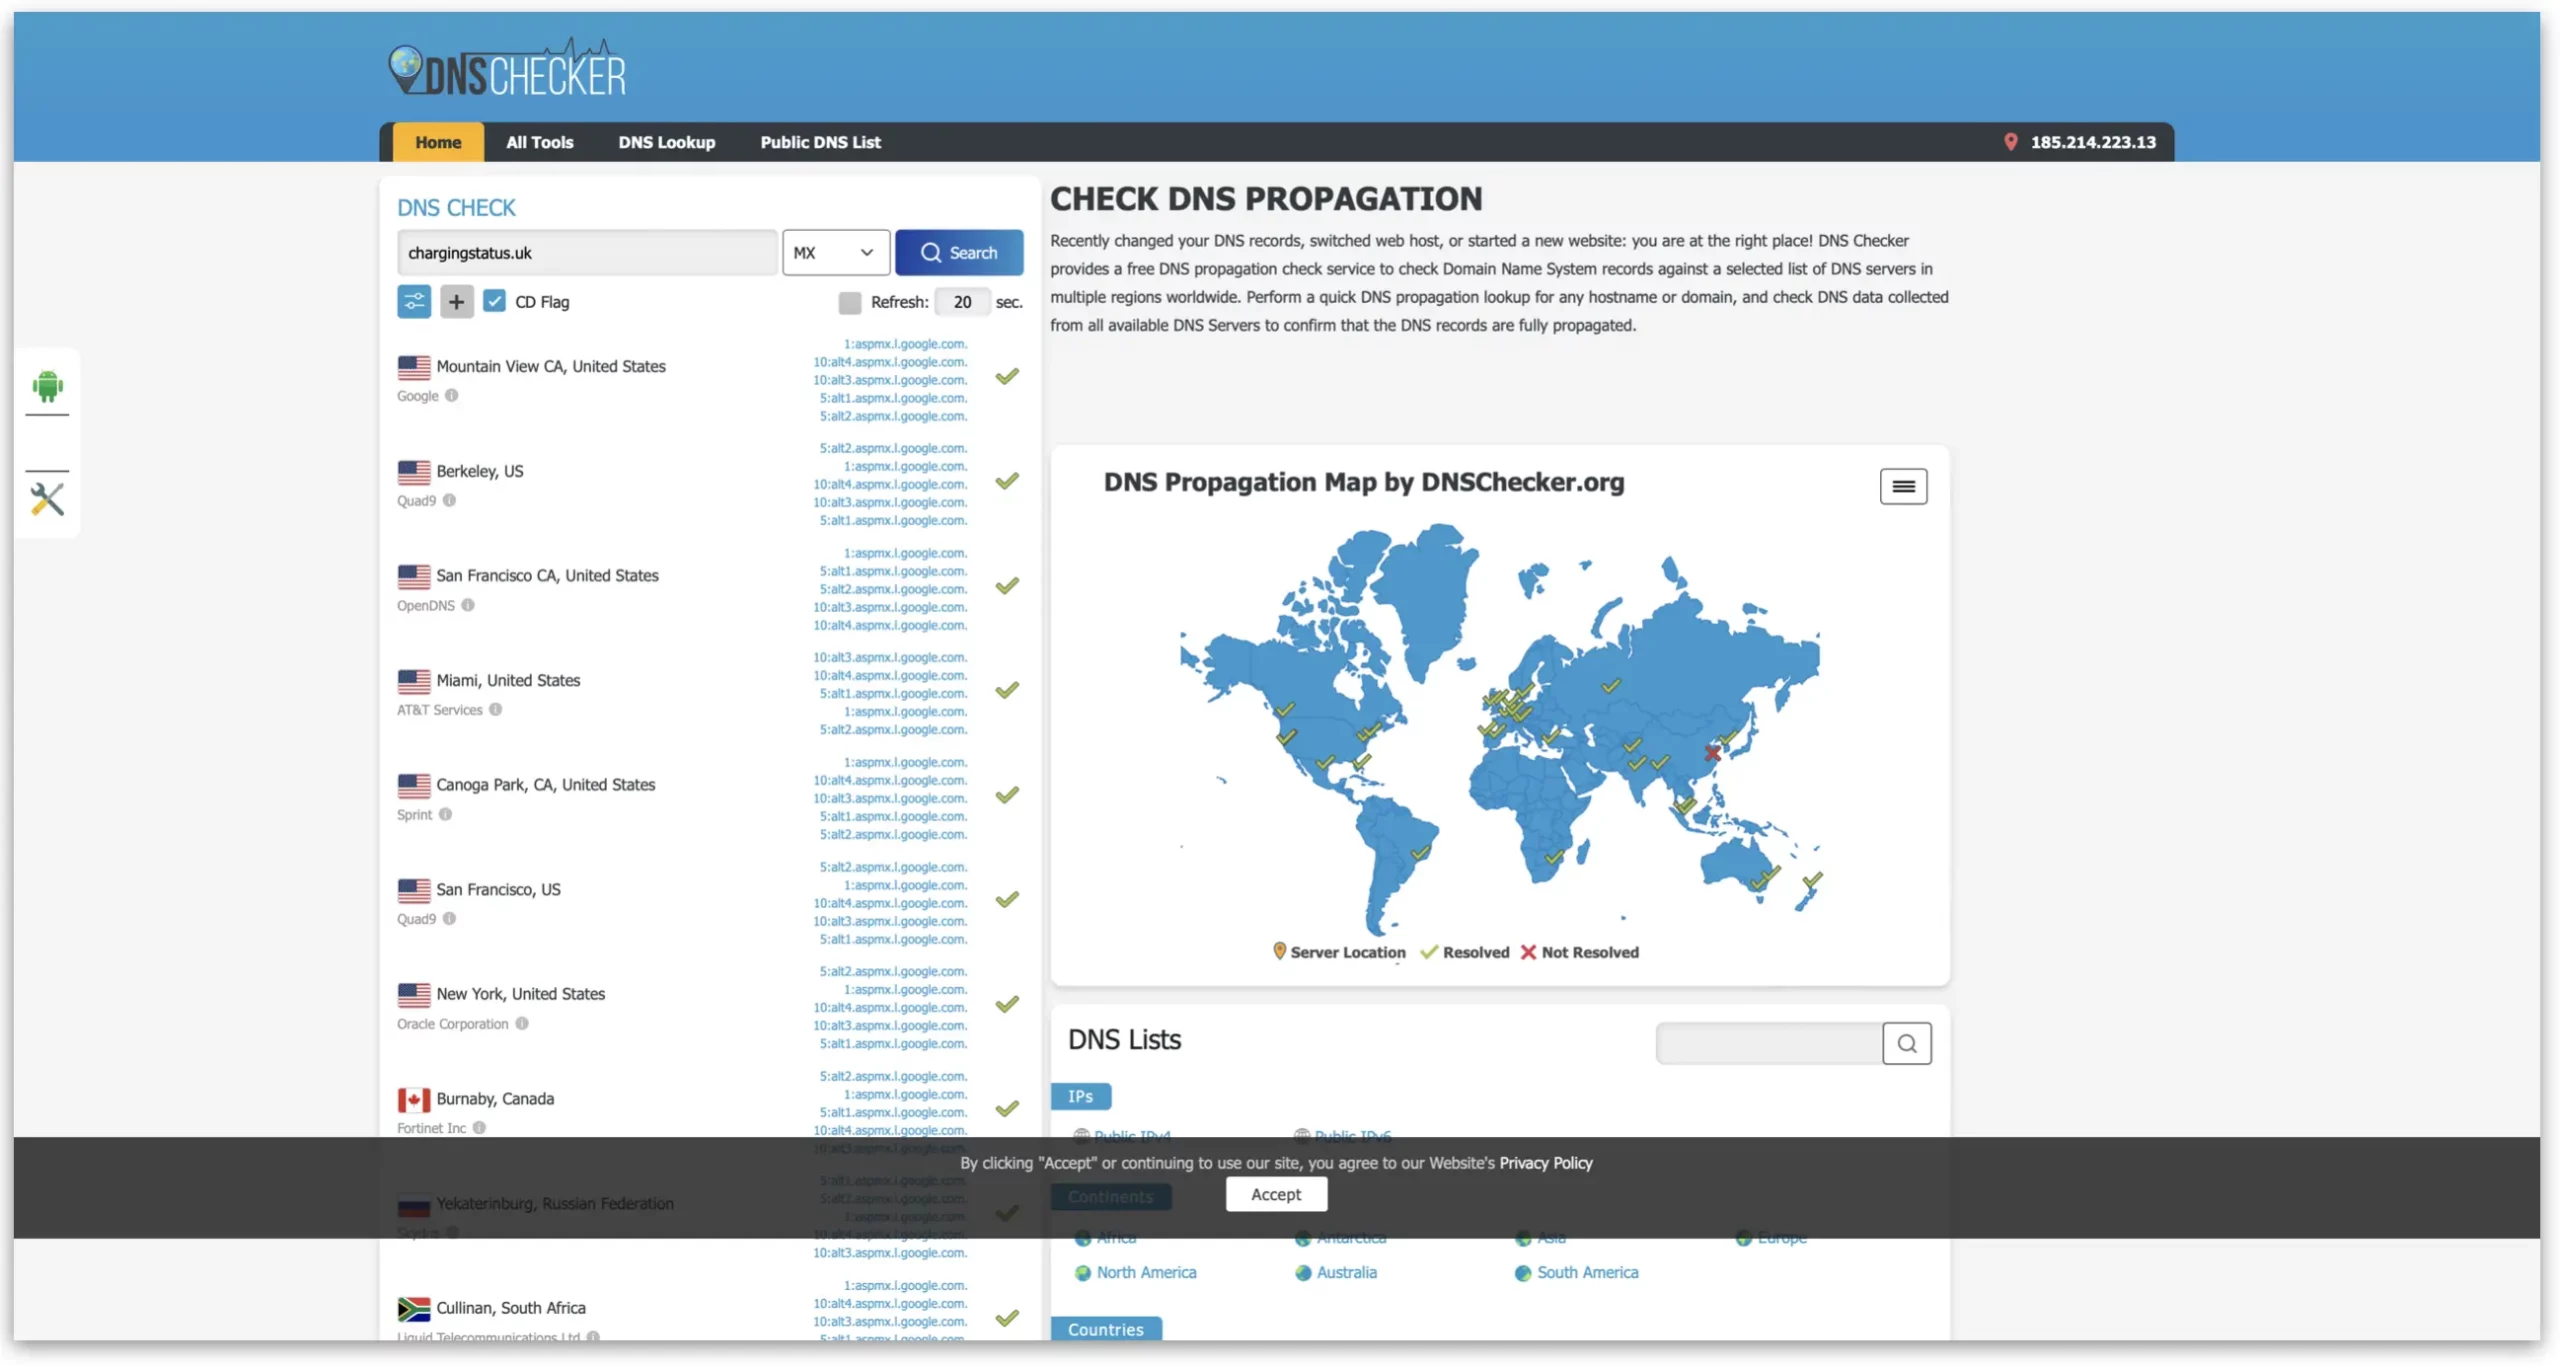
We can also use dnschecker.org to make sure the MX and TX records are in place.
If you are stuck in any process, drop a comment down below and I’ll do my best to help you out with your configuration.